


57
Assemble the moving head
3-3-3
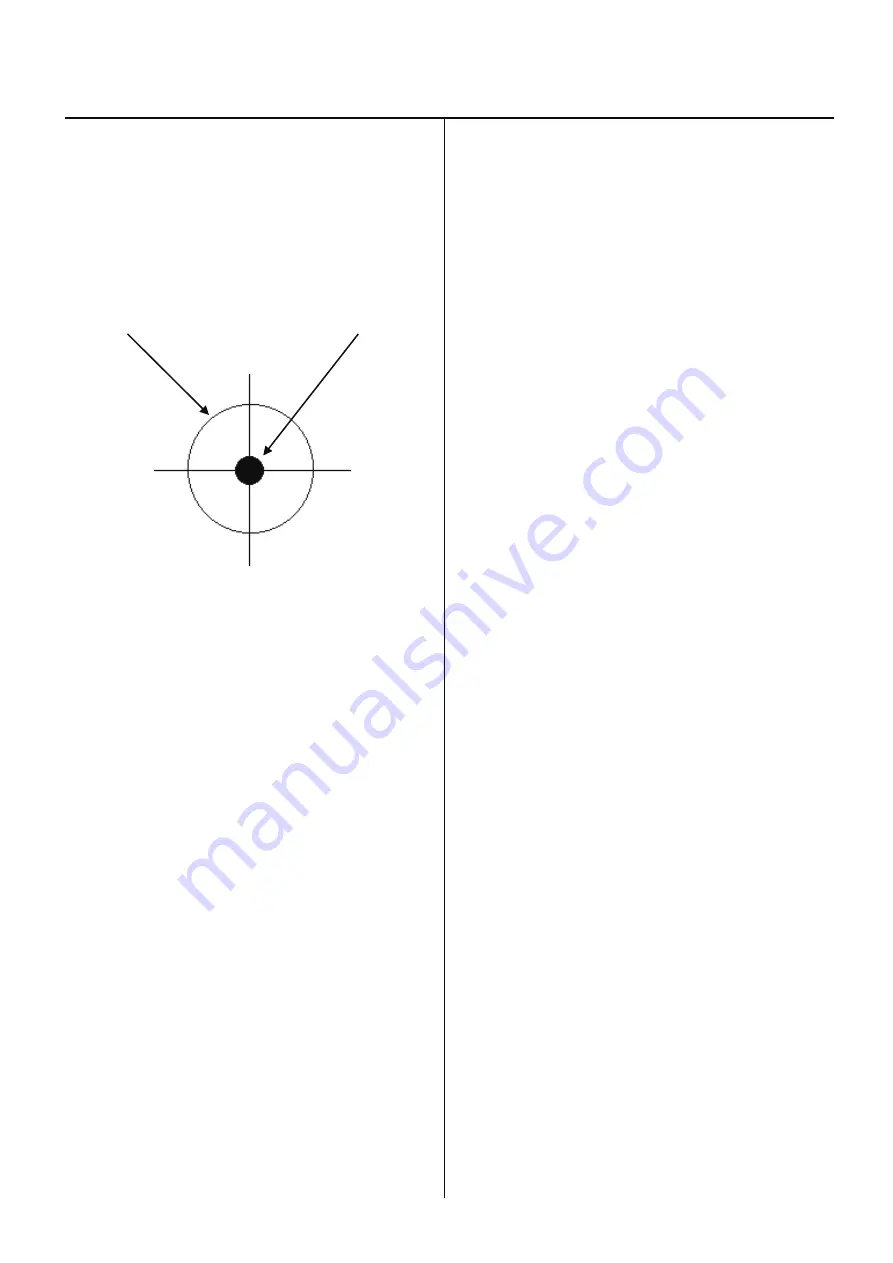
10. Check center (right and left)(back and forth) of needle and
needle hole of needle plate.(Needle No.1 ,4 and 7.)
<Caution>
Should be check needle No.1 ,4 and 7.
Needle hole of needle plate Needle
11. If not center (back and forth), please check the gap
between LM guide and Moving head.
If you find gap, please adjust again with procedure 4-10.
If there is no gap, please refer to [3-3-4 Adjustment of
needle position (back and forth)] and re-adjust
the position.
12. If not center (right and left), please loosen fixing screws
and adjust again with procedure 4-10.
When all needles are displaced to same direction, please
refer to [3-4-1 Fixing of needle bar change unit] and
re-adjust the position.
13. If “OK”. Please check [needle position].
Refer to [3-3-5 Check of needle position].
If “NG” this process, adjust again procedure 11-12.
Summary of Contents for HCH-701-30
Page 1: ...Maintenance Manual for Embroidery Machine HCH 701 30 Version 2 4 HappyJapan Inc ...
Page 132: ...128 Electrical connection diagram 5 ...
Page 133: ...129 Electrical connection diagrams 5 ...
Page 134: ...130 List of electrical connection diagrams 5 ...
Page 137: ...130c HCD81222 LCD CE MX 基板組 ...
Page 138: ...130d HCD8116 TP switch board ass y 3 82 7 32 7 387487 2487 ...


