5
8
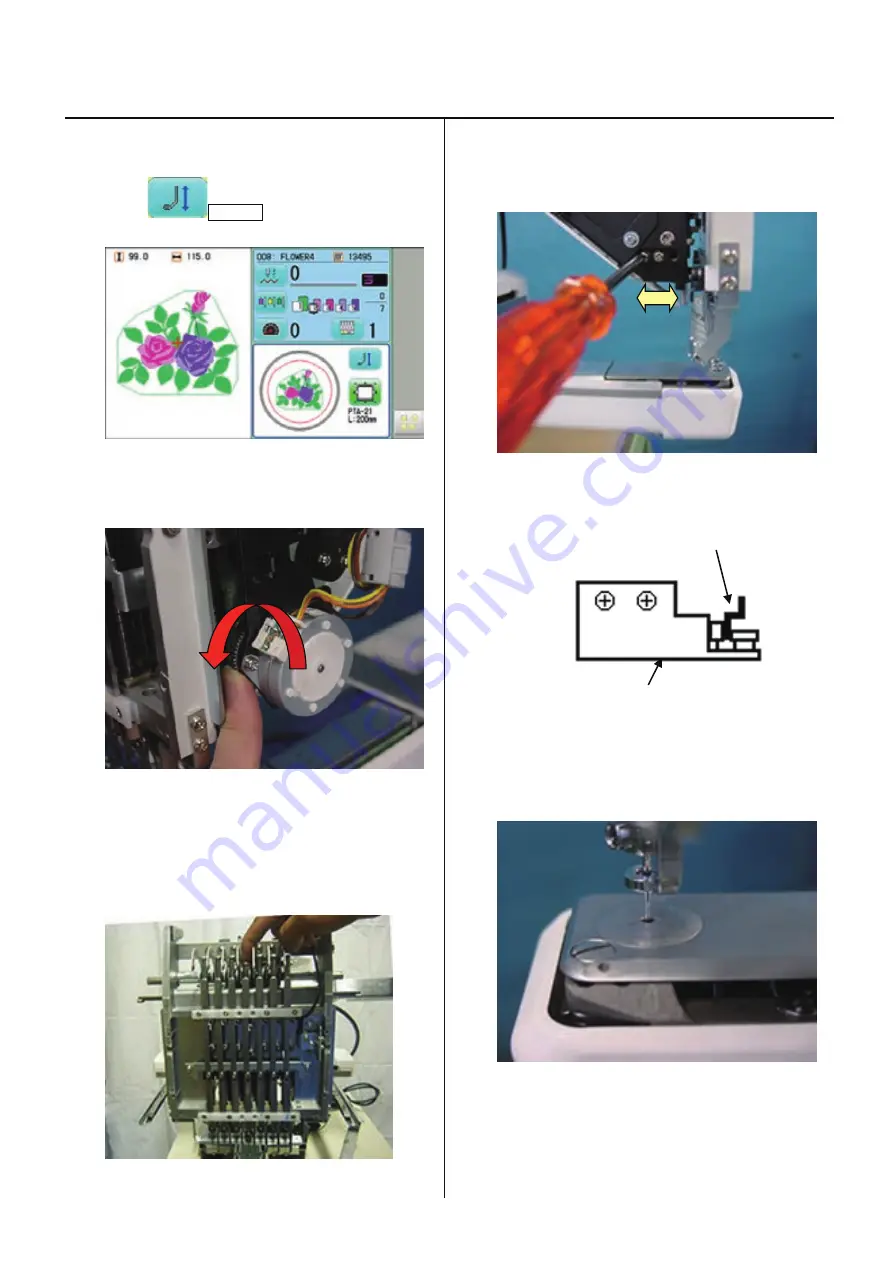
Adjustment of needle position (back and forth)
3-3-4
1. Bring pressure foot down. (Either way mentioned below)
(1)press
P_FOOT key on control box.
(2)Turn gear with finger.
2. Bring needle bar down by finger.
Also you can move down the needle bar by maintenance
mode through menu of control box.
3. Turn upper shaft and set needle near to the lowest needle
position [L] to adjust positioning plate ass’y.
* Insert Lower rail to between the two bearing deeply.
(This is for setting of Moving head completely.)
lower rail
positioning plate ass’y
Viewing from side, set to center of needle hole.
#Check and adjust with 1st, 4th and 7th needle.
4. After adjustment, please be sure to check and adjust
clearance between needle and shuttle hook.
Please refer to [3-5-1 Adjustment of rotary hook timing].
Summary of Contents for HCH-701-30
Page 1: ...Maintenance Manual for Embroidery Machine HCH 701 30 Version 2 4 HappyJapan Inc ...
Page 132: ...128 Electrical connection diagram 5 ...
Page 133: ...129 Electrical connection diagrams 5 ...
Page 134: ...130 List of electrical connection diagrams 5 ...
Page 137: ...130c HCD81222 LCD CE MX 基板組 ...
Page 138: ...130d HCD8116 TP switch board ass y 3 82 7 32 7 387487 2487 ...