5
9
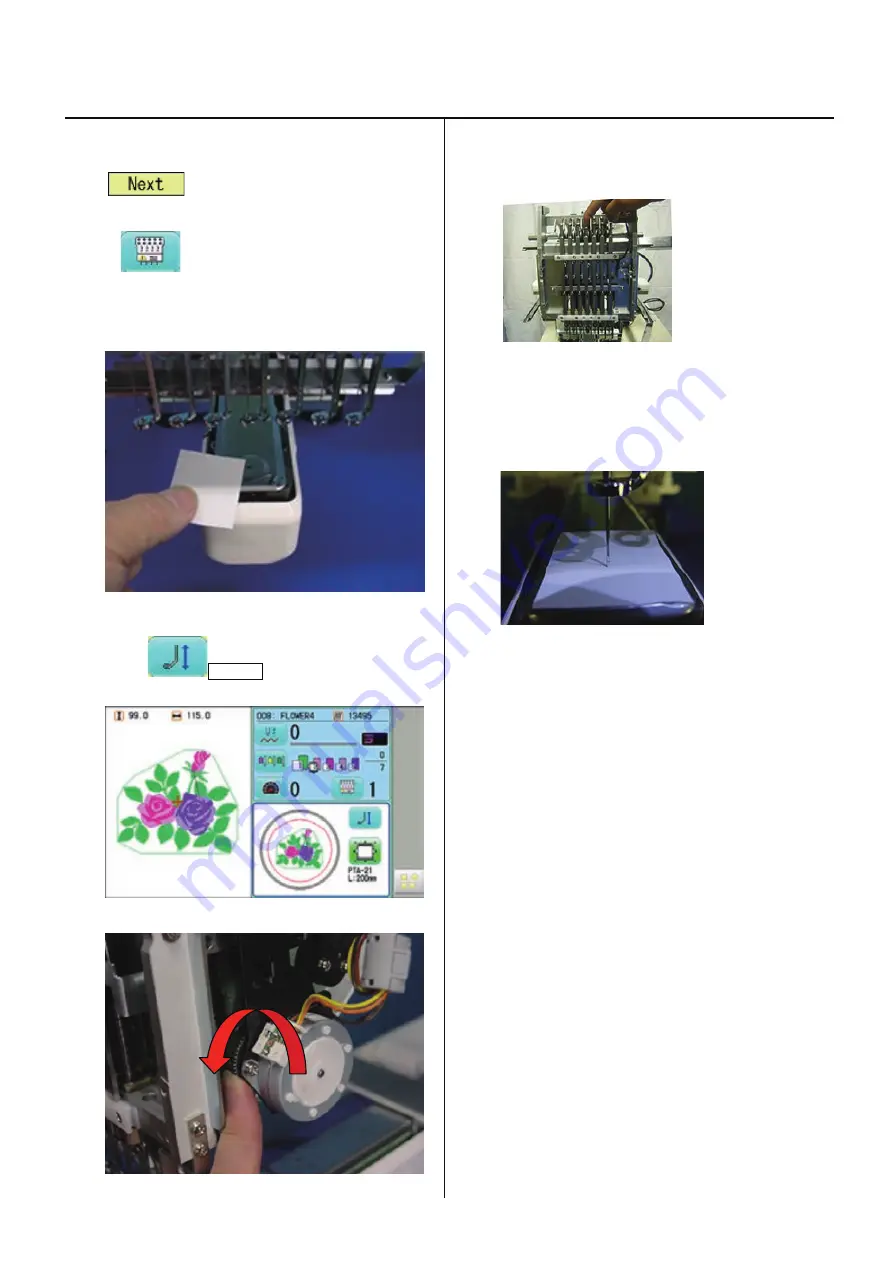
Check of needle position
3-3-5
1.
A main switch is turned on.
The
is pressed and it changes into an
operation state.
2. Press
and make it the 4th needles.
3. Stick a seal on needle hole of a needle plate.
4. Bring pressure foot down. (Either way mentioned below)
(1)press
P_FOOT key on control box.
(2)Turn gear with finger.
5. Bring needle bar down by finger.
Also you can move down the needle bar by maintenance
mode through menu of control box.
6. Turn an upper axis up to [302 degrees - 303 "], and it is the
needle mark to a seal. A hole is made.
<Note>
Needle point will become large if the angle of a dial
disc is made into 304 degrees or more.
An exact needle position check becomes impossible.
7. Reverse-rotate an upper axis, raise a needle bar, and
unite with C [275 degrees].
(It returns to 303 degrees-> 220", and unites with 275
degrees after that.)
<Note>
If a top axis is right-rotated, a needle will enter
deeply, and needle hole is greatly.
It becomes. Therefore, an exact needle position check
becomes impossible.
8. 1st needle and the 7th needles are to 302 degrees - 303
degrees about an upper axis by the above-mentioned
procedure. It turns, a needle is lowered and a needle
position is checked.
It will be O.K. if the needle point goes into the seal hole
made by the 4th needles at this time.
* If “NG”. Please adjust again, follow to [3-3-3 Asemble
the moving head] of procedure 6-10.
*
303°→ Diameter of φ0.2mm
、
310°→Diameter of φ0.5mm
The order which the screw which is fixing the move head
fastens -- from an inner side. If it does not carry out
correctly outside, a needle position will shift -- it is –
9. Un-stick a seal on needle plate to finish.
Summary of Contents for HCH-701-30
Page 1: ...Maintenance Manual for Embroidery Machine HCH 701 30 Version 2 4 HappyJapan Inc ...
Page 132: ...128 Electrical connection diagram 5 ...
Page 133: ...129 Electrical connection diagrams 5 ...
Page 134: ...130 List of electrical connection diagrams 5 ...
Page 137: ...130c HCD81222 LCD CE MX 基板組 ...
Page 138: ...130d HCD8116 TP switch board ass y 3 82 7 32 7 387487 2487 ...


