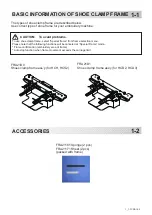
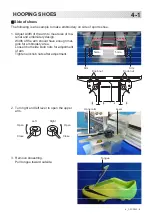
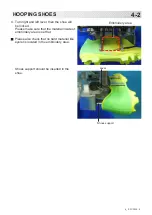
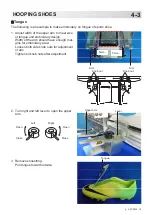
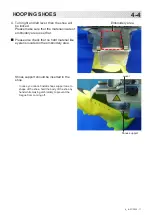
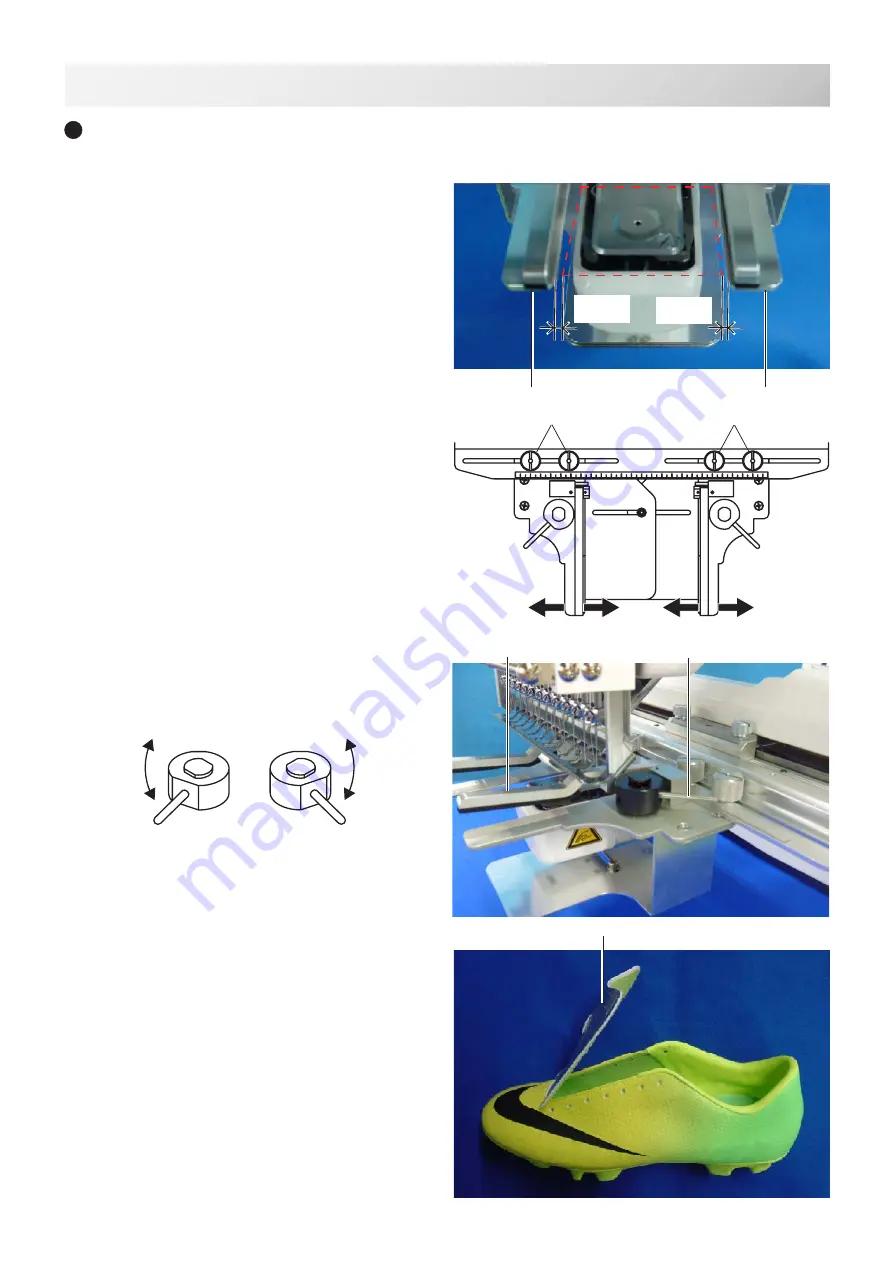
background image

-FC          -10

4-3

HOOPING SHOES

Tongue

The following is an example to make embroidery on tongue of sports shoe.
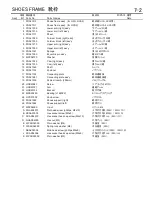
Lever

Tongue

 Upper arm

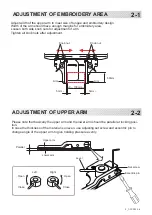
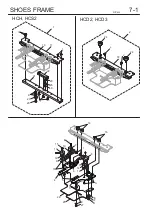
1.  Adjust width of the upper arm to meet size 

of tongue and embroidery design. 

Width of the arm should have enough mar

-

gins for embroidery area. 

Loosen both side knob nuts for adjustment 

of arm. 

Tighten all knob nuts after adjustment.

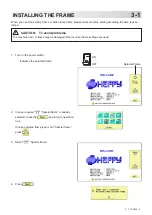
2.  Turn right and left lever to open the upper 

arm.

3.  Remove shoestring.


Pull tongue toward outside.

Knob nut

Knob nut

Arm

Arm

4_3       PA13

Open

Close

Open

Close

Right

Left

5mm~

5mm~

Summary of Contents for HCH(Puls)

Page 1: ...this appliance and for operating Use this appliance only for its intended use as described in this manual Use only attachments recommended by the manufacturer as contained in this manual Keep fingers...

Page 2: ...FRAME 1 1 ACCESSORIES 1 2 ADJUSTMENT OF EMBROIDERY AREA 2 1 ADJUSTMENT OF UPPER ARM 2 2 INSTALLING THE FRAME 3 1 HOOPING SHOES Side of shoes 4 1 Tongue 4 3 STARTING TO EMBROIDER 5 1 ETC EXCHANGE SPON...

Page 3: ...frame for your embroidery machine CAUTION To avoid problems To use shoe clamp frame select Special frame from frame selection menu Please note that the following functions will be canceled at Special...

Page 4: ...the upper arm to give holding pressure evenly Lower arm Set screw Eccentric pin Upper arm Parallel 2 2 ADJUSTMENT OF UPPER ARM Adjust width of the upper arm to meet size of tongue and embroidery desig...

Page 5: ...oid problems The machine and or frame may be damaged if the incorrect frame settings are used ON OFF Selected frame 1 Turn on the power switch Indicates the selected frame 2 In case required Special f...

Page 6: ...hen you need to change from Special frame to oth er type of frame please powor machine off and start again Without re starting machine machine will move in correctly 6 Press and move the carriage to t...

Page 7: ...ed Fix knob screws as hitting the bearing against the carriage while pressing the shoe clamp frame to the carriage HCD2 HCD3 HCH HCS2 Carriage Knob screw Fixing base Shoes clamp frame Carriage Knob sc...

Page 8: ...and embroidery design Width of the arm should have enough mar gins for embroidery area Loosen both side knob nuts for adjustment of arm Tighten all knob nuts after adjustment 2 Turn right and left le...

Page 9: ...will be locked Please make sure that the material inside of embroidery area is set flat Please also check that no hard material like eyelet is located in the embroidery area Shoes support should be i...

Page 10: ...t size of tongue and embroidery design Width of the arm should have enough mar gins for embroidery area Loosen both side knob nuts for adjustment of arm Tighten all knob nuts after adjustment 2 Turn r...

Page 11: ...set flat Please also check that no hard material like eyelet is located in the embroidery area Shoes support should be inserted in the shoe In case you cannot install shoes support due to shape of the...

Page 12: ...ing without tracing 3 Press after the trace is completed The embroidering frame has moved to the first stitch point of the pattern 4 Press The embroidery will start 5 After embroidering your design is...

Page 13: ...m 3 Remove the sponge or sheet from the upper arm or the lower arm 4 Attach the sponge to fit with the edge of the upper arm as shown 5 Attach the sheet to fit with the edges of the lower arm as shown...

Page 14: ...HCH HCS2 HCD2 HCD3 SHOES FRAME 7 1 FCPA13 16 16 10 15 13 12 7 10 4 5 26 C 11 B 6 15 14 12 3 A 25 E E D F 27 1 I I 17 19 22 20 23 K 21 K 23 20 I 2 18 24 J 24 J 7 9 8...

Page 15: ...FRA21F30 Cam left ass y 15 FRA21340 Shaft 16 FRA21102 Knob nut 17 FRA21152 Connecting plate 18 FRA21B51 Connecting plate ass y 19 FRA21200 Scale sticker A 250mm A 20 HCB40041 Screw 21 HCB40121 Arm 22...

Page 16: ...OA01E HEAD OFFICE 3 3515 Tachiyagawa Yamagata city 990 2251 Japan Phone 81 23 686 2272 Fax 81 23 686 2243 TOKYO OFFICE 2 9 5 Taito Taito Ku Tokyo 110 0016 Japan Phone 81 3 3834 0711 Fax 81 3 3835 8917...

Reviews: