

-FC -12
5-1
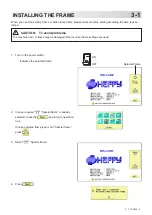
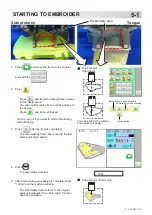
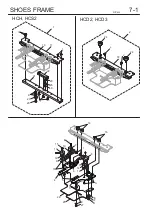
STARTING TO EMBROIDER
: Original point
(Start point)
Embroidery area
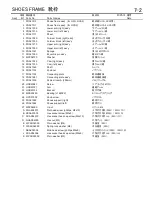
1. Press
and move the frame to the original
point with the
.
2. Press
.
Press
, and the embroidering frame moves
for the design trace.
You can confirm outline trace and the position of
the design.
Press
, and trace is stopped.
Go on to step 4 if you want to start embroidering
without tracing.
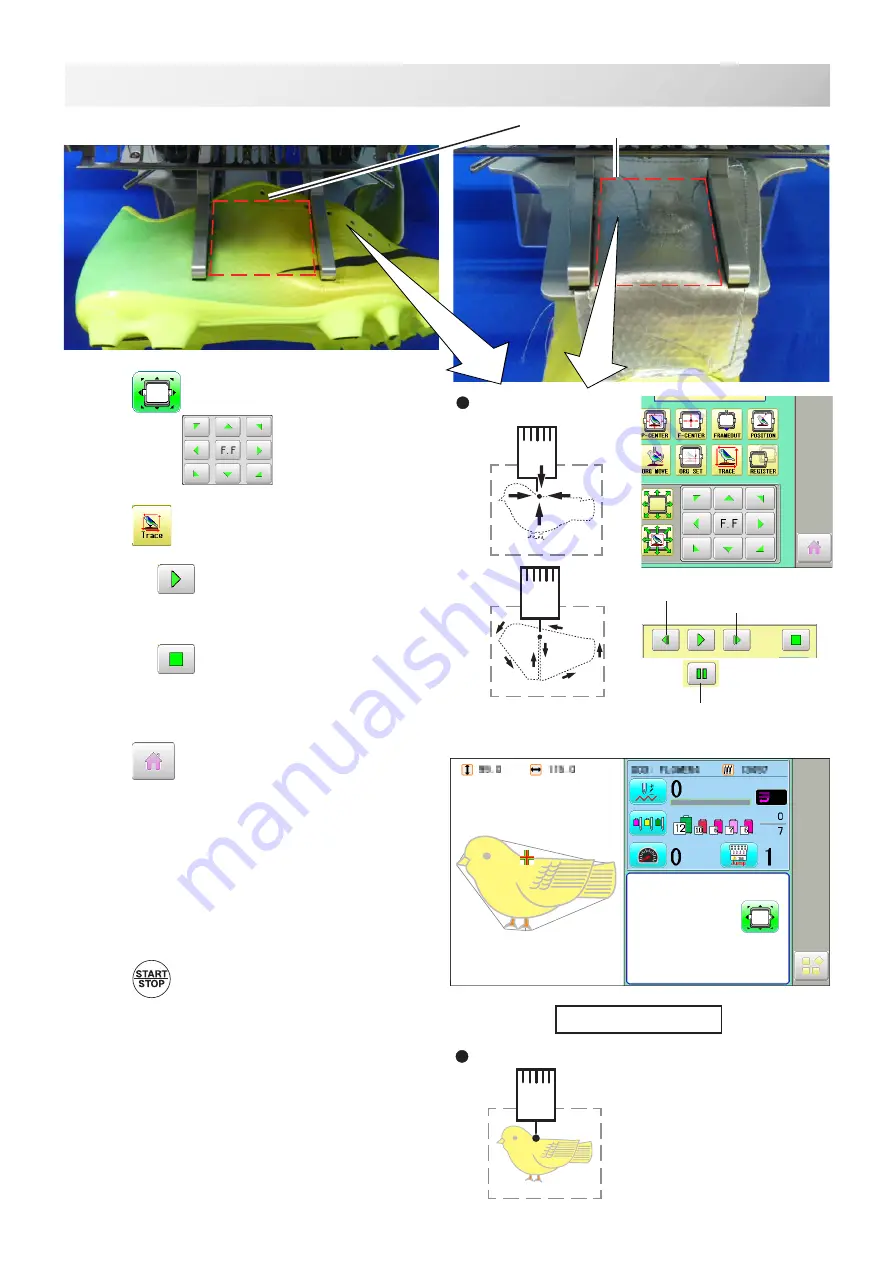
3. Press
after the trace is completed.
The embroidering frame has moved to the first
stitch point of the pattern.
4. Press
.
The embroidery will start.
5. After embroidering your design is complete, show
“>>End” and the machine will stop.
The embroidery frame returns to the original
point automatically if the “Auto origin” function
has been activated.
: Original point (Start point)
Forward only when pressing
Backward only when pressing
You can confirm the outline
and position of design.
>>End
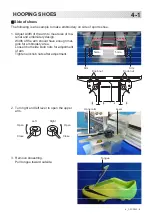
Side of shoes
Tongue
5_1 PA13
Pause button


