7
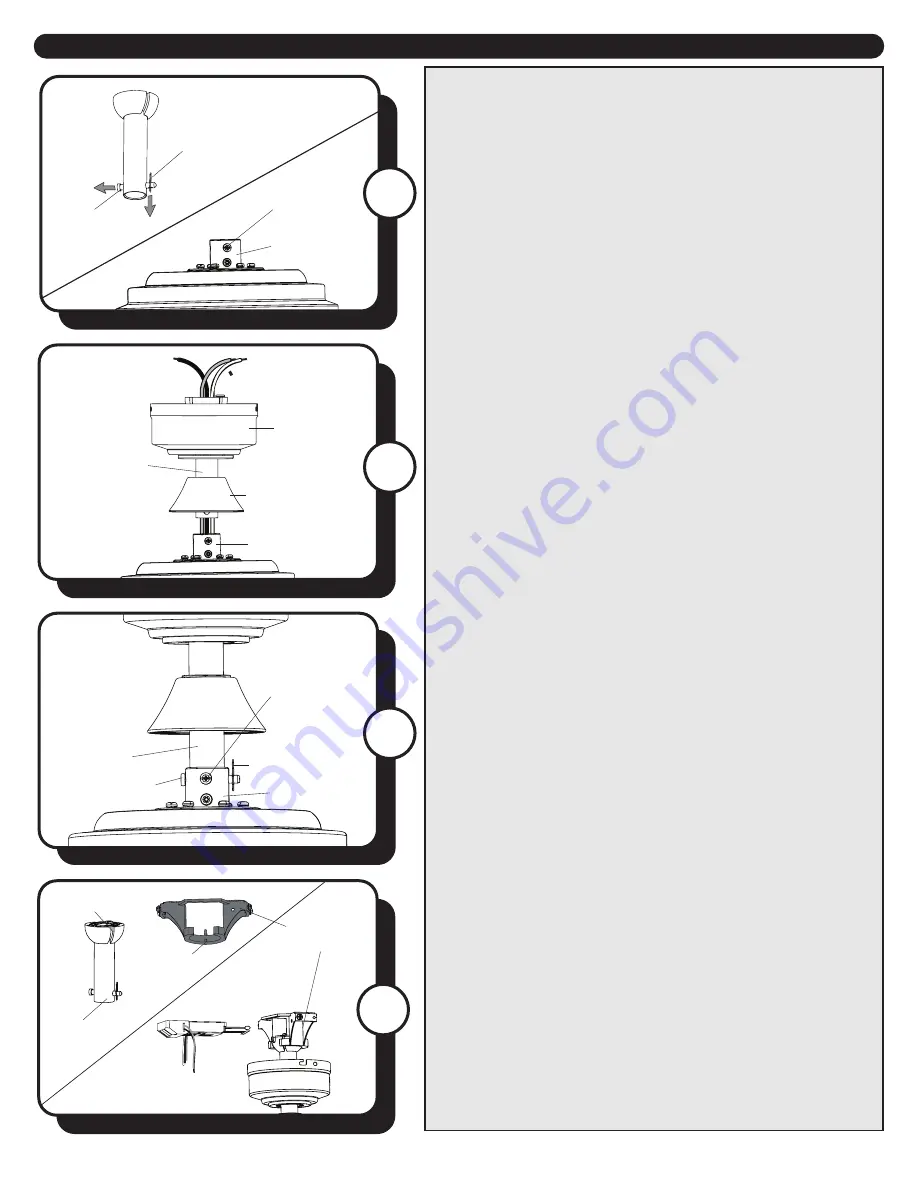
Tab
Slot
Downrod
Receiver
8. Install the ball end of the downrod into the opening of
mounting bracket. Rotate the downrod until the tab in the
mounting bracket is seated in the slot in the downrod ball.
WARNING:
The fan and/or downrod should not rotate in
the mounting bracket, if installed correctly. Failure to align
the slot in the downrod ball with the tab on the mounting
bracket may result in fan falling causing serious injury or
death.
Insert the receiver from remote pack into the mounting
bracket with antenna end first and the flat side facing the
ceiling.
Note:
The receiver will rest on the downrod.
Note:
There is an adhesive sticker on one of the antennas
connected to the receiver. For best results, stick the
antenna to the ceiling.
Downrod Pin
Downrod Clip
Yoke
Downrod
Set Screw
7. Slide the downrod into the yoke of the motor assembly,
align the holes, then re-install the downrod pin and
downrod clip. Secure with the two set screws and slide
the yoke cover down until it rests on top of the motor
assembly.
Note:
With wiring extending out of the downrod,
measure 8 inches of lead wire and cut the excess wire with
wire cutters (not included). Then strip 1/2” of insulation
from the end of each wire.
7
6
ASSEMBLY INSTRUCTIONS
Mounting
Bracket
6. Insert the downrod through the canopy and yoke
cover. Feed the wires from the fan through the downrod.
Canopy
Yoke Cover
Downrod
Yoke
8
Downrod
Clip
Downrod
Pin
Set Screw
Yoke
5. Remove the downrod clip and downrod pin from the
downrod. Then loosen but do not remove the two set
screws in the yoke at the top of the motor assembly.
5


