11
FINAL INSTALLATION
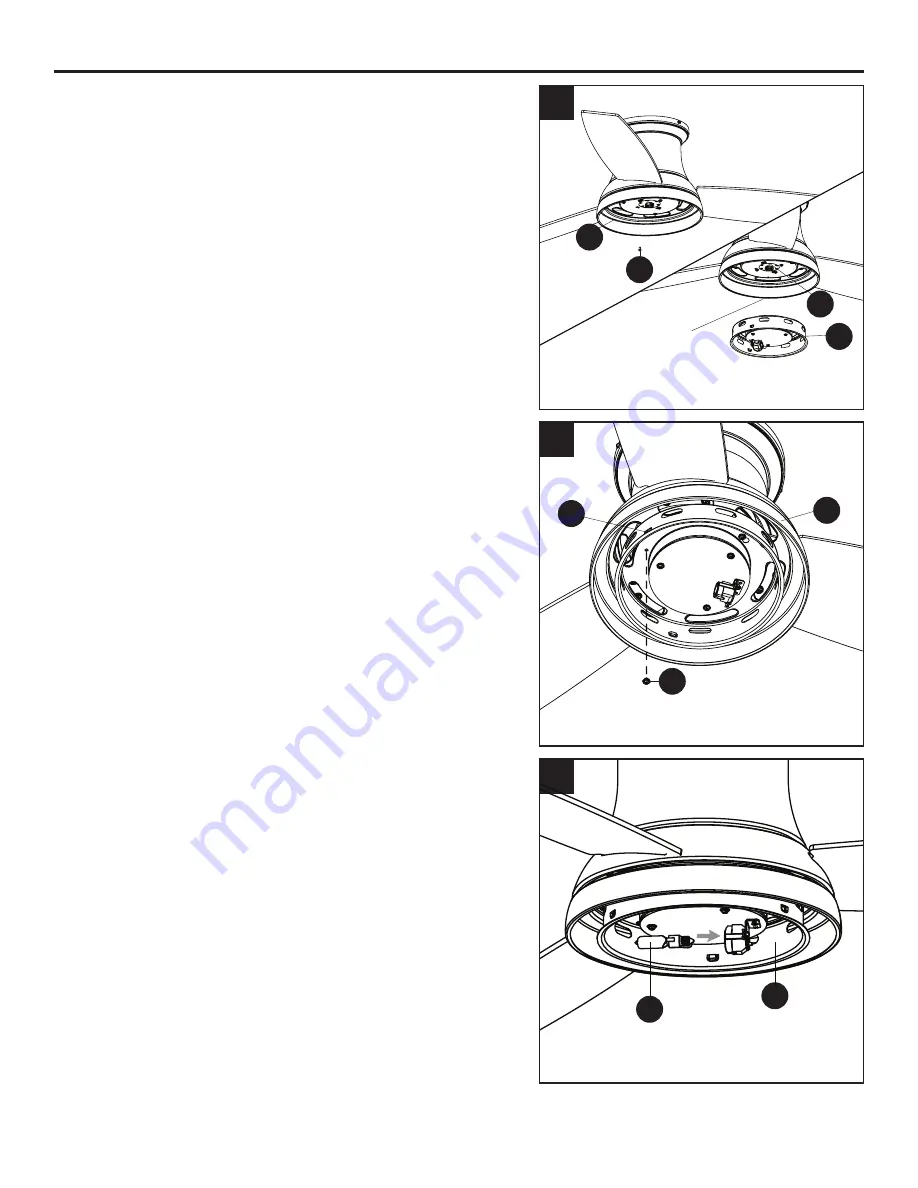
4 .
Note: If you wish to install the fan without the light
kit,
proceed to Step 8 .
To install the fan with the light kit,
remove one of the
switch housing screws (N) from the light pan (F), and
loosen (do not remove) the other two screws .
Connect the 2-pin connector from the center of the fitter
plate (D) to the 2-pin connector from the switch housing
(E) .
5 . Align the switch housing (E) over the loosened switch
housing screws (N) preassembled on the switch
housing (E), then place the keyholes of the switch
housing (E) onto the switch housing screws (N) and
rotate the switch housing (E) clockwise . Secure the
switch housing (E) with the previously removed switch
housing screw (N) . Tighten all three switch housing
screws (N) .
6 .
Important:
Oils from your hands will shorten the life of
a halogen bulb . It is important to use gloves or a piece
of cloth to handle the bulb during installation .
Install the bulb (K) into the socket on the switch housing
(E) .
WARNING:
Make sure you allow the bulb (K) and
switch housing (E) to cool before you replace the bulb .
6
4
E
F
N
5
D
F
E
N
2-pin connector
K
E


