13
FINAL INSTALLATION
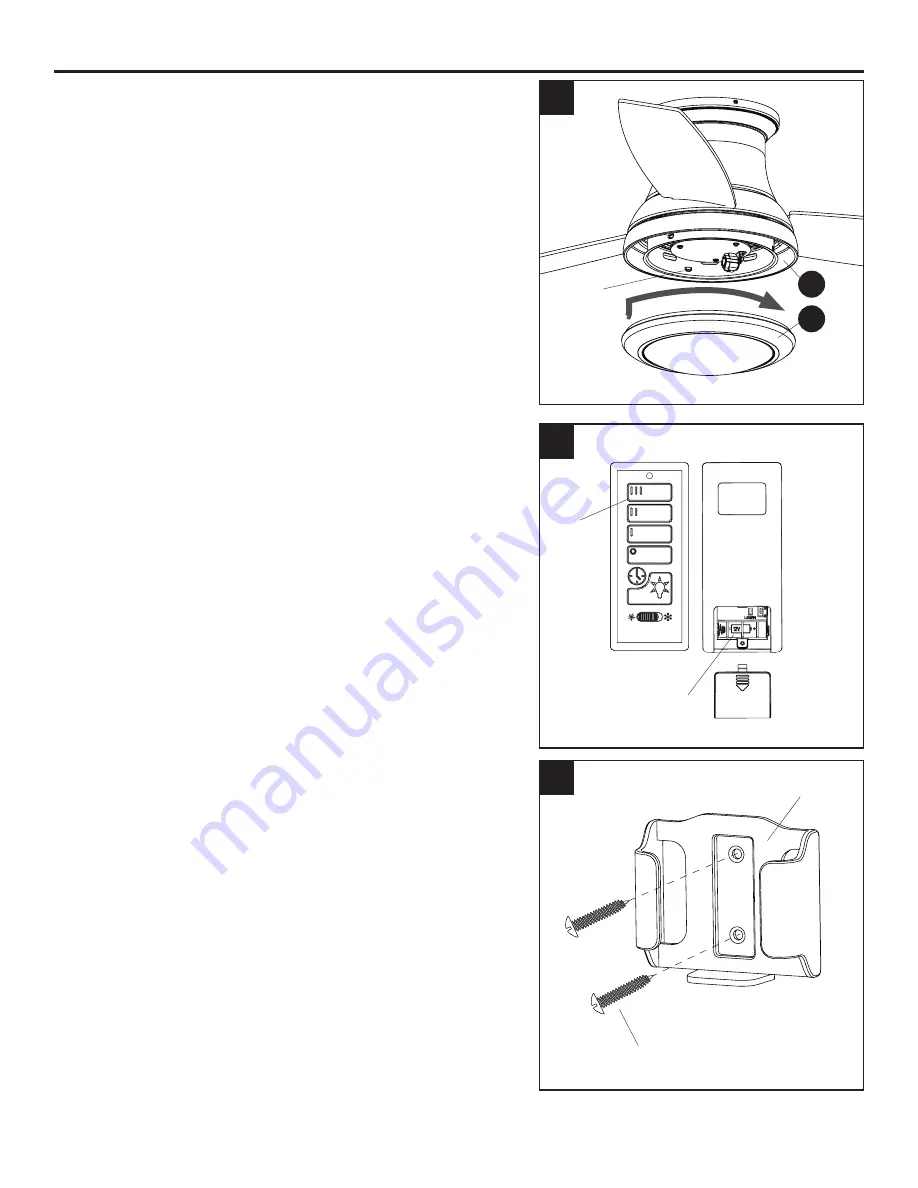
10 . Align the notches in the switch hosing (E) with the
grooves in the locking ring (G) preassembled to bowl
housing (H) . Then, twist the locking ring (G) tightly in
a clockwise direction until it is secure .
Turn on the citcuit breakers and the wall switch to the
fan supply lead lines .
11 . Remove the battery cover from the back of the
remote found in remote pack (Q) . Insert the battery
from remote pack (Q) into the remote; ensure polarity
of battery matches the polarity indicated in the
battery compartment -- positive (+) to positive (+) and
negative (-) to negative (-) . Replace the battery cover
and press the high fan speed button on the remote to
ensure the remote turns on the fan .
Note:
If remote does not turn on fan, see
TROUBLESHOOTING (page 16) .
12 . If desired, the wall bracket in remote pack (Q) can
be installed to a wall using the provided mounting
screws . Store the remote on the wall bracket when
not in use .
10
12
E
G
11
Notch
Front
Back
Battery
Compartment
Battery Cover
High
Fan
Speed
Wall Bracket
Mounting Screw


