background image

6

7

INITIAL INSTALLATION

INITIAL INSTALLATION

DOWNROD STYLE FAN MOUNTING 

1

4

1

3

2

Lowes.com/harborbreeze

Lowes.com/harborbreeze


A

B

B

A

Remove

and save

Loosen but

Rubber

insert

and screw


do not remove

E

Clip

Pin

E

B

C

D

2

Outlet box

A

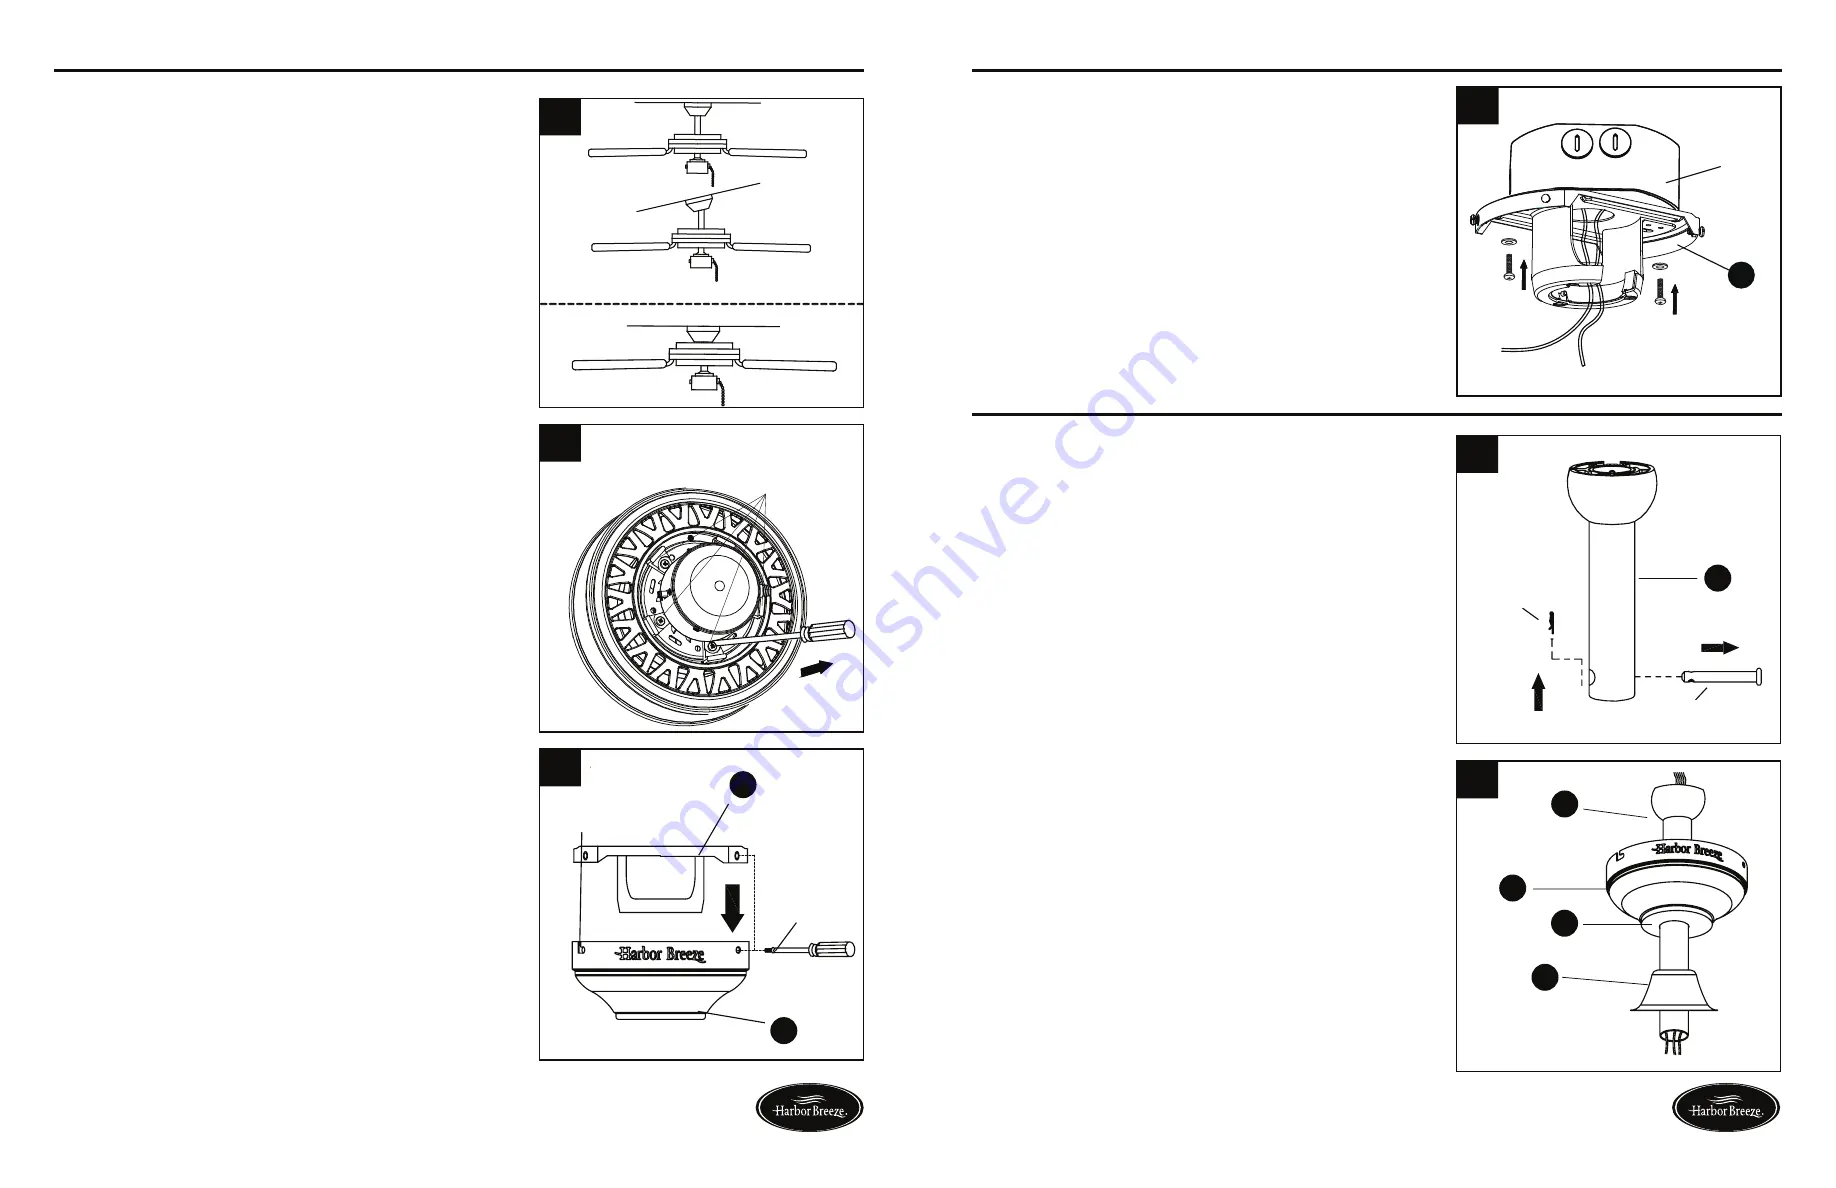
1.  Determine mounting method.

  A-Downrod Mount (normal or angled ceiling)

  B-Closemount (normal ceiling only)


IMPORTANT:

 If angle mounting, check to make 

sure the ceiling angle is not steeper than 20˚. 

2. 

Remove and discard the four rubber inserts and 

four mounting screws preassembled on the 

underside of the motor housing assembly (H).

3. 

Remove the mounting bracket (A) from the 

canopy (B) by loosening the four screws on the 

top of the canopy (B). Remove the two 

non-slotted screws and save.  

4. 

Install the mounting bracket (A) to the outlet box (not 

included) using the two screws provided with the outlet 

box. Tighten securely.


Note:

 If using the angle mount, make sure the open end 

of mounting bracket (A) is installed facing the ceiling.

  Follow mounting instructions for Downrod Style Fan 

Mounting on page 7 or Closemount Style Fan Mounting 

on page 8, depending on mounting method (A or B) 

chosen in Step 1 on page 6

1. 

Remove pin and clip from downrod (E).

2. 

Insert downrod (E) through canopy (B), canopy cover 

(C) and yoke cover (D). Thread wires from the motor 

housing assembly (H) through downrod (E).

Summary of Contents for CALERA CLRO52-II

Page 1: ...a registered trademark of LF LLC All Rights Reserved ATTACH YOUR RECEIPT HERE Lowes com harborbreeze UL MODEL CLRO52 II XXXXX Questions problems missing parts Before returning to your retailer call o...

Page 2: ...d local electrical codes Electrical installation should be performed by a qualified licensed electrician Electrical diagrams are for reference only Suitable for use in wet locations when installed in...

Page 3: ...Extension Qty 1 NOT TO SCALE Rubber Gasket Qty 1 NOT TO SCALE Blade Screw Qty 16 NOT TO SCALE Blade Bracket Screw Qty 10 NOT TO SCALE A B C D H G F E AA BB CC DD EE PREPARATION Estimated Assembly Time...

Page 4: ...g assembly H 3 Remove the mounting bracket A from the canopy B by loosening the four screws on the top of the canopy B Remove the two non slotted screws and save 4 Install the mounting bracket A to th...

Page 5: ...r a total of 3 screws and save 3 Place the rubber gasket CC over the remaining screws on motor housing assembly H Pull wires through hole in canopy B and attach canopy B to motor housing H using the t...

Page 6: ...rical tape not included Be sure no bare wire or wire strands are visible after making connection Place GREEN and WHITE connections on opposite side of box from BLACK and BLUE connections The splices s...

Page 7: ...ing bracket screws and downrod assembly PULL CHAIN The fan pull chain is for motor speed control High Medium Low and Off Pull the chain once for each position REVERSE SWITCH When the season changes yo...

Page 8: ...bility The manufacturer assumes no responsibility whatsoever for fan installation during the lifetime limited warranty Any service performed by an unauthorized person will render the warranty invalid...

Reviews: