


13
12
FINAL INSTALLATION
Lowes.com/harborbreeze
Lowes.com/harborbreeze
Lowes.com/harborbreeze
Lowes.com/harborbreeze
OPERATING INSTRUCTIONS
CARE AND MAINTENANCE
TROUBLESHOOTING
PROBLEM
POSSIBLE CAUSE
CORRECTIVE ACTION
BB
Hardware Used
x 1
Fan pull chain extension
BB
Hardware Used
x 10
Blade bracket screw
EE
5
F
H
EE
6
5.
Attach blade bracket (F) to the underside of motor
housing assembly (H) using 2 blade bracket screws
(EE). Tighten securely.
Repeat this step for the remaining blade assemblies.
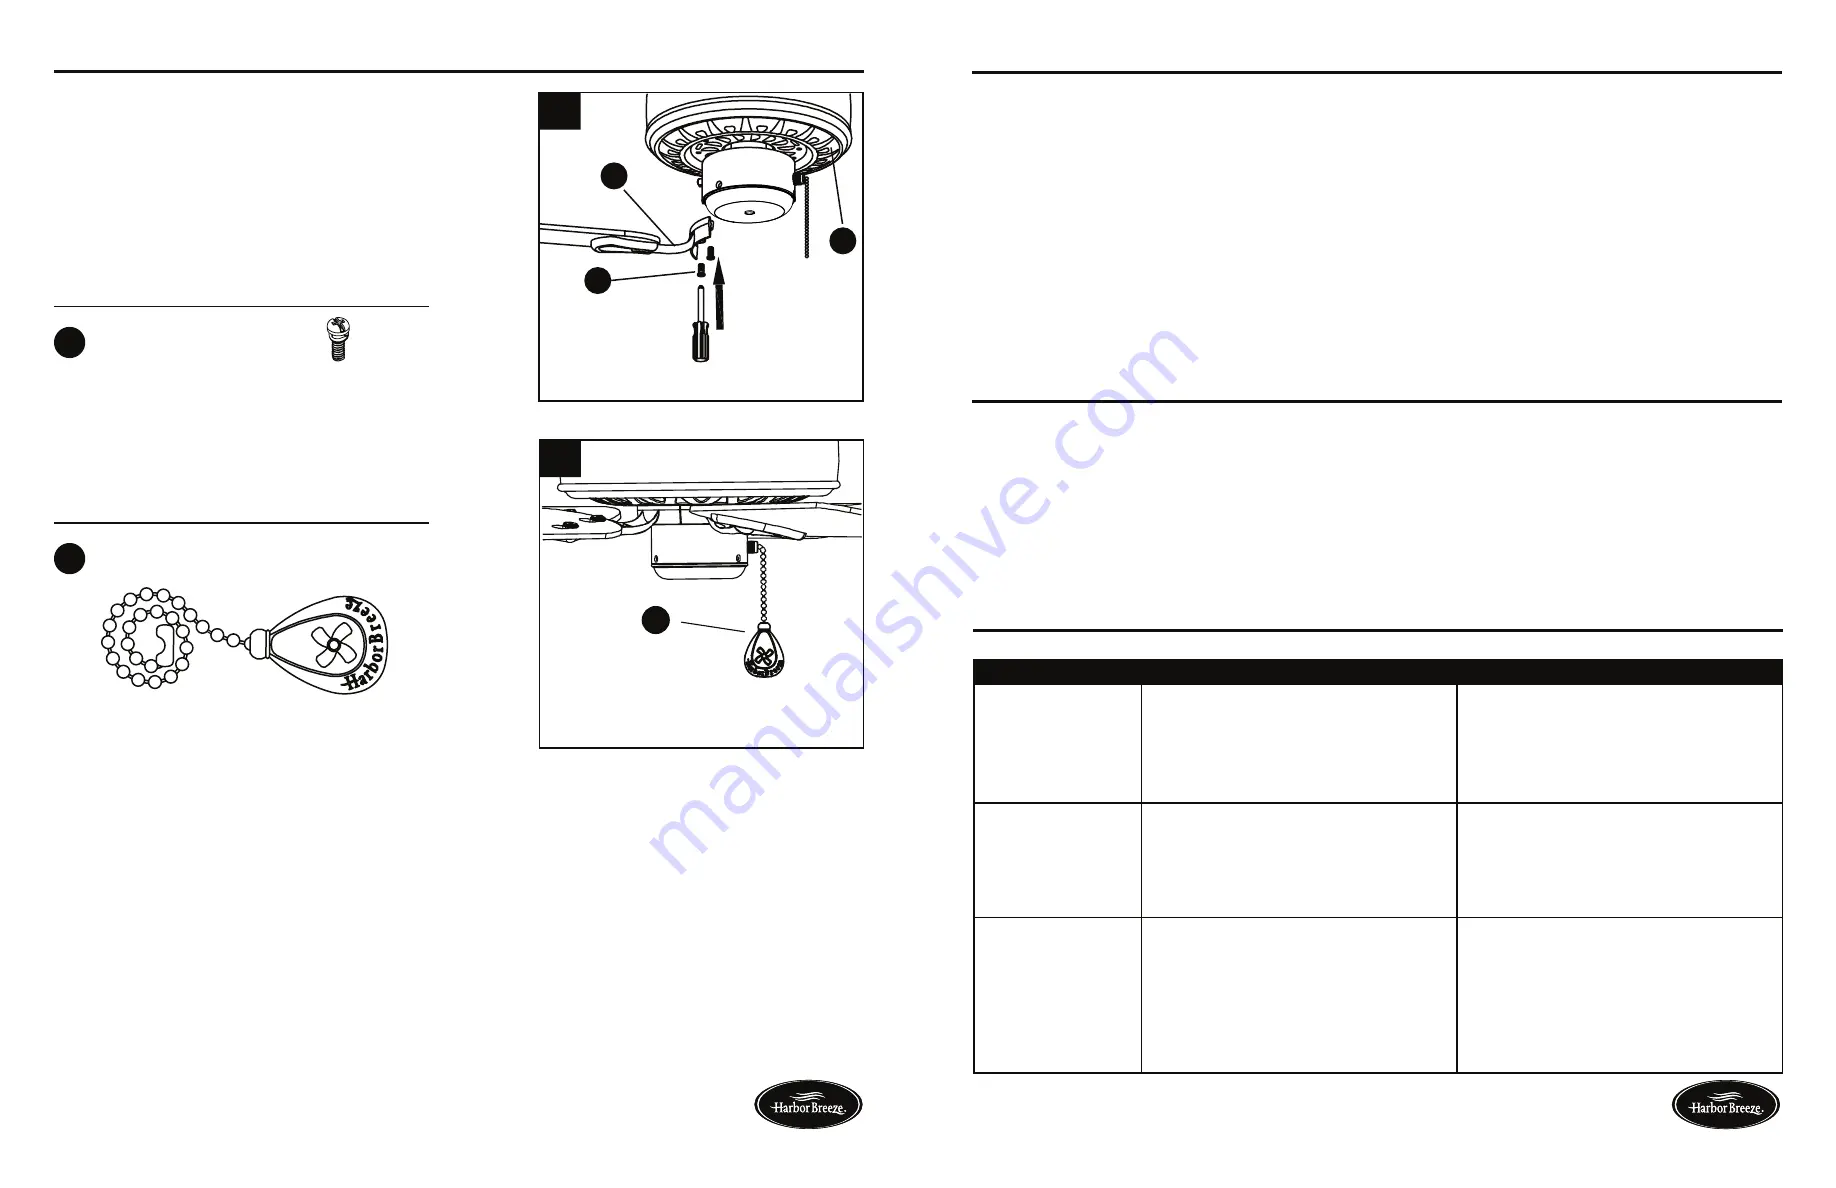
6.
Attach the fan pull chain extension (BB).
• To reduce the risk of fire, electric shock or injury to persons, care and maintain this fan.
•
IMPORTANT:
Shut off main power supply before beginning any maintenance.
• DO NOT use water or detergents when cleaning the fan or fan blades. A dry dust cloth or lightly
dampened cloth will be suitable for most cleaning.
• Clean fan housing with only a soft brush or lint-free cloth to avoid scratching the finish. Clean blades
with a lint-free cloth. You may occasionally apply a light coat of furniture polish to blades for added
protection.
• At least twice each year, tighten all screws and lower canopy to check mounting bracket screws and
downrod assembly.
PULL CHAIN:
The fan pull chain is for motor speed control: High, Medium, Low and Off. Pull the
chain once for each position.
REVERSE SWITCH:
When the season changes, you may want to change to the direction your fan spins. To switch
between clockwise and counterclockwise rotation, flip the fan reverse switch.
Note: Wait for the fan to stop befor reversing the switch
A. In cooler weather, clockwise rotation creates an upward air flow, which moves hot air from
the ceiling into the room. Push the switch UP.
B. In warmer weather, counterclockwise rotation creates a downward air flow, which cools the
air. Push the switch DOWN.
Fan does not move.
Noisy operation.
Excessive wobbling.
1. Chain switch is “off”
2. Faulty wire connection.
3. Reverse switch not engaged.
1. Pull chain switch.
2. Turn power off. Loosen canopy,
check all connections.
3. Push switch firmly either way.
1. Blades are loose.
2. Cracked blade.
3. Unapproved speed control.
1. Tighten all blade screws.
2. Replace blades (call customer
service).
3. Replace with an approved speed
control device.
1. Blades are loose.
2. Blade brackets incorrectly attached.
3. Fan not securely mounted.
4. Fan too close to vaulted ceiling.
1. Tighten all blade screws.
2. Reinstall blade brackets.
3. Turn power off. Carefully loosen
canopy; remount securely.
4. Lower fan or move it to another
location.


