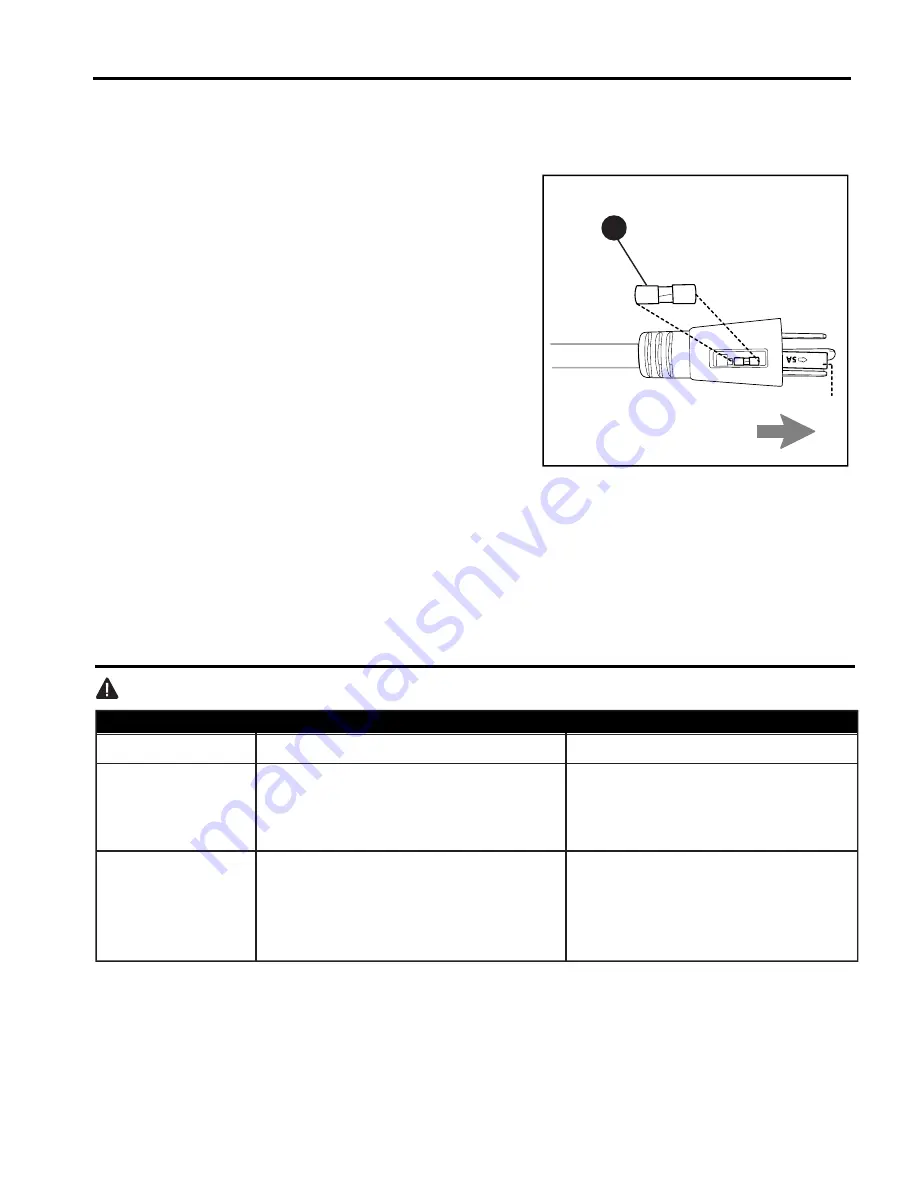
background image

L

12

At least twice each year tighten all screws on fan assembly and front cage. Clean fan assembly with 
only a soft brush or lint-free cloth to avoid scratching the finish. 

IMPORTANT:

 Shut off main power supply before beginning any maintenance. 


CARE AND MAINTENANCE


       WARNING

: Before beginning work, shut off the power supply to avoid electrical shock.

TROUBLESHOOTING

  PROBLEM 

  POSSIBLE CAUSE 

  CORRECTIVE ACTION

Fan does not move. Power is off or fuse is blown.

Turn power on or check fuse.

Noisy operation.

Fan is new.

 Allow fan a “break in” period of a  
 few days, especially when          
 running the fan at Medium and     
 High speeds.

Excessive 
wobbling.

1. Fan not securely mounted.   


2. Set screw on blade assembly is not     
    tightened properly.

1. Turn power off. Verify wall

 mounting bracket is secure.

2. Remove front cage screws and  
    tighten blade assembly set screw  
    securely.

Plug

Fuse Cover

The three-prong plug is installed with a fuse (L) 
that is a vital safety device. A filament inside the 
fuse (L) is designed to melt and cut the circuit if 
the current gets too high. This prevents damage 
to your fan and the person using it and stops the 
power cord from overheating to the point where it 
could catch fire.

If you should need to replace the fuse (L), unplug 
fan. Locate the fuse cover at end of the plug on 
the power cord. Slide fuse cover open to expose 
fuse. Using needle-nose pliers (not included), 
remove fuse. Inspect fuse -- the small, glass tube 
with metal on each end -- to determine whether it 
will need to be replaced. [If the fuse (L) is blown, 
it will look dark and smudged or the visible wire 
inside will be broken.] Use a replacement fuse 
with a rating of 5 amps,125 volts only, and insert 
fuse in between the metal brackets inside the 
fuse housing. Slide fuse cover shut.

Summary of Contents for MARINA COVE II

Page 1: ...JP18TI3 ATTACH YOUR RECEIPT HERE Purchase Date RR20391 Espa ol p 14 MARINA COVE II Questions problems missing parts Before returning to your retailer call our customer service department at 1 888 251...

Page 2: ...rical Code and ANSI NFPA 70 1999 Hire a qualified electrician or consult a do it yourself wiring handbook if you are unfamiliar with installing electrical wiring Make sure the installation site you ch...

Page 3: ...electrical shock the fan should be installed where it will be out of reach of children The fan is NOT a toy DO NOT play with the fan or allow anyone else to play with the fan To reduce the risk of per...

Page 4: ...sembly 1 B Wall Mounting Bracket 1 C Front Cage 1 D Blade Assembly 1 E Back Cage 1 F Blade Assembly Nut 1 preassembled G Back Cage Screw 3 preassembled DESCRIPTION PART QUANTITY DESCRIPTION PART QUANT...

Page 5: ...der Helpful Tools not included Level Pencil Do It Yourself and Wiring Handbook DANGER Make sure the wall mounting bracket is securely attached to the building structure and can support the full weight...

Page 6: ...he blade CAUTION If you are going to attach the fan assembly A to a wood stud or wood post the stud or wood post must be wide enough and thick enough to sustain the wall mounting bracket B and the wei...

Page 7: ...the wall and able to support the fan assembly A you are now ready to hang the fan assembly A Grab the fan assembly A firmly with two hands Align the four slots in the middle of the back of the fan ass...

Page 8: ...ack cage E to secure back cage E to motor on fan assembly A 9 9 7 7 G ASSEMBLY INSTRUCTIONS Align the three holes on the outer edge of the motor on fan assembly A with the three holes in the center of...

Page 9: ...secure 12 9 D F 12 Motor ASSEMBLY INSTRUCTIONS Partially loosen preassembled set screw on blade assembly D Place blade assembly D over motor shaft and lock pin making sure to align gap on the blade a...

Page 10: ...nly by a qualified electrician using copper wire only C 13 Hook H E Remove all six front cage screws H from edge of back cage E Place hook at top of front cage C over edge at top of back cage E NOTE M...

Page 11: ...fan to MEDIUM M Three turns will set the fan to LOW L OPERATING INSTRUCTIONS 1 2 2 2 2 1 A Test the oscillation function with the preassembled pull chain I Pull the chain I to start and stop If fan d...

Page 12: ...ure 2 Remove front cage screws and tighten blade assembly set screw securely Plug Fuse Cover The three prong plug is installed with a fuse L that is a vital safety device A filament inside the fuse L...

Page 13: ...climatic conditions this warranty does not cover changes in brass finish rusting pitting tarnishing corroding or peeling Brass finish fans maintain their beauty when protected from varying weather con...

Reviews: