


8
FINAL INSTALLATION
(continued from previous page)
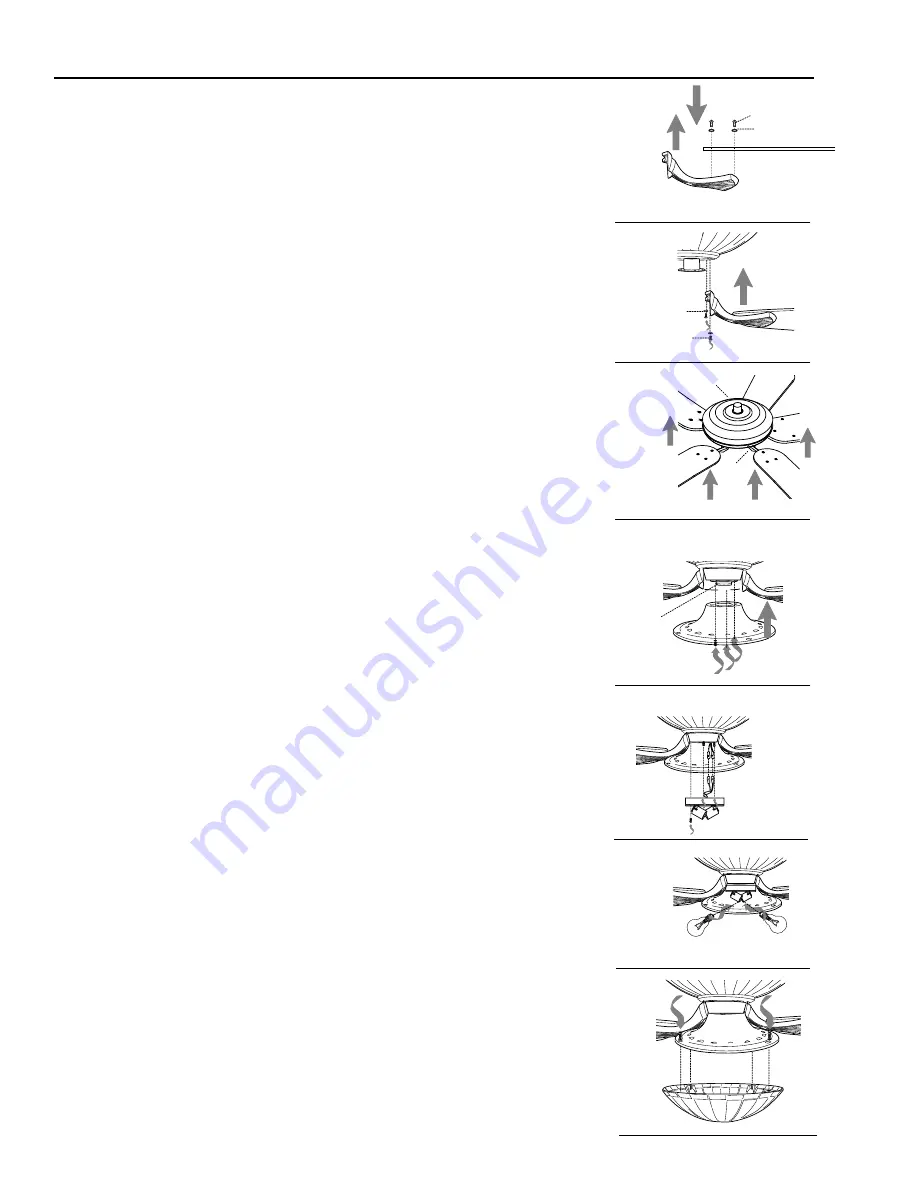
6.
Partially loosen two screws on the underside of the shade
fitter (F) and remove the other screw.
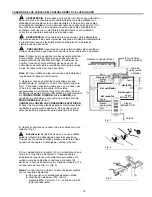
Connect
WHITE
wire from
light kit fitter (G) to
WHITE
wire from motor housing (E). Connect
BLACK
wire from light kit fitter (G) to
BLACK
wire from motor
housing (E). Make sure that molex connections snap together
securely.
Carefully arrange wiring within light kit fitter (G). Align slotted
holes in light kit fitter (G) with loosened screws in shade fitter (F).
Twist light kit fitter (G) to lock. Re-insert screw that was removed
and tighten all screws securely. [Fig. 6]
5.
Remove one screw on fitter plate (on underside of motor) and
loosen the other two screws. Align slotted holes in shade fitter (F)
with loosened screws in fitter plate. Twist shade fitter (F) to lock
and re-install screw that was previously removed. Tighten all
screws securely. [Fig. 5]
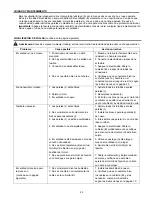
4.
Place remaining lock washers (N) and insert motor screws (K).
Repeat with remaining blade arms (I). Tighten all motor screws
(K) securely. [Fig. 4]
3.
Locate motor screws (K) and lock washers (N) that were
previously removed on page 5. (Additional motor screws (K) and
lock washers (N) are in hardware pack.) Insert only one motor
screw (K), along with lock washer (N), through blade arm (I) to
attach blade arm (I) to motor and partially tighten the motor screw
(K). Repeat with remaining blade arms (I). [Fig. 3]
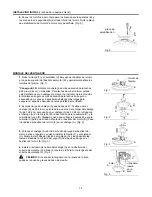
Fig. 2
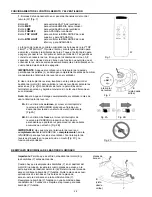
2.
Position blade arm (I) under blade (J) and secure blade arm (I)
with screws (L) and washers (O). Do not tighten screws (L) until
each screw (L) has been started. Then, tighten each screw (L)
starting with the center screw (L). Repeat for the remaining blades
(J). [Fig. 2]
E
F
fitter
plate
Fig. 5
Fig. 6
E
F
G
Fig. 4
J
I
E
Fig. 3
E
I/J
K
N
J
I
L
O
Fig. 8
E
F
H
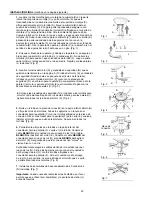
8
. Remove one screw from inside glass shade (H) and
partially loosen the other three screws. Align the three
loosened screws in glass shade (H) with slotted holes
in shade fitter (F). Twist glass shade to lock. Re-insert
screw that was previously removed and secure all four
screws with a Phillips screwdriver. [Fig. 8]
Tip
:Use a short Phillips screwdriver for easier access
to screws in shade fitter (F).
7.
Install two candelabra base 60 watt max. bulbs (R) included.
[Fig. 7]
Important:
When replacing bulbs, allow bulb(s) and glass shade
(H) to cool before touching them.
Fig. 7
R
F
E


