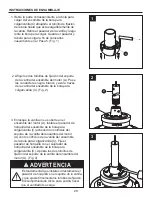
WARNING
The balancing clip must always be firmly
pushed onto the blade till it touches the
edge of the blade. Failure to do so could
allow clip to fly off and cause personal
injury.
BLADE BALANCING INSTALLATION INSTRUCTIONS
17
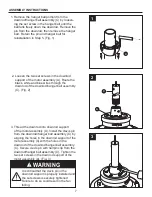
1. Interchanging positions of adjacent blades (H)
can redistribute the weight and result in a
smoother operation. If wobble decreases,
leave blades (H) as they are. If wobble
increases, switch back to original position.
Attach the balancing clip in the balance kit
(EE) to the mid-point on the top edge of one
blade (H). (Fig. 1)
2.
Run the fan at high speed (air downflow) and
observe wobble. Repeat steps 1 and 2 for
each blade (H). Note which blade (H) has the
least wobble. On that blade (H), install the
balancing clip in the balance kit (EE) to the top
edge of the blade (H) near the blade holder
arm (G). (Fig. 2)
Start the fan and notice wobble. Stop the fan
and move the balancing clip in the balance kit
(EE) in small steps toward the end of the blade
(H). At each incremental step, turn on the fan
and observe the wobble. Determine the
location of the balancing clip in the balance kit
(EE) that gives the least amount of wobble.
3. Peel the backing paper from one of the
weighted squares in the balance kit (EE).
Secure the weighted square in the balance kit
(EE) firmly to the top of the blade (H), centered
at the balancing clip in the balance kit (EE)
location and centered between the edges of
the blade (H). (Fig. 3)
Remove the balancing clip in the balance kit
(EE), start the fan and observe. If the wobble
still persists, repeat steps 1 through 3
until the wobble disappears.
GG
1
2
3
EE
G
H
H
H
EE
EE


