background image

Page 5

SKU 04826

Assembly
The unit comes from the factory with several strings keeping the hoses and stove parts in
place. Cut and dispose of the strings.
1.  Place the threaded bolt imbedded in the Rubber Leg (#3) through the metal foot bracket
on one of the bottom corners of the stove.  Secure it with one hand while adding a nut with the
other hand.  Repeat on the four other corners.
This Stove is designed to be fueled with (LPG. = Liquid Petroleum Gas) propane usually
found in cylinders like the type used in gas barbecues.

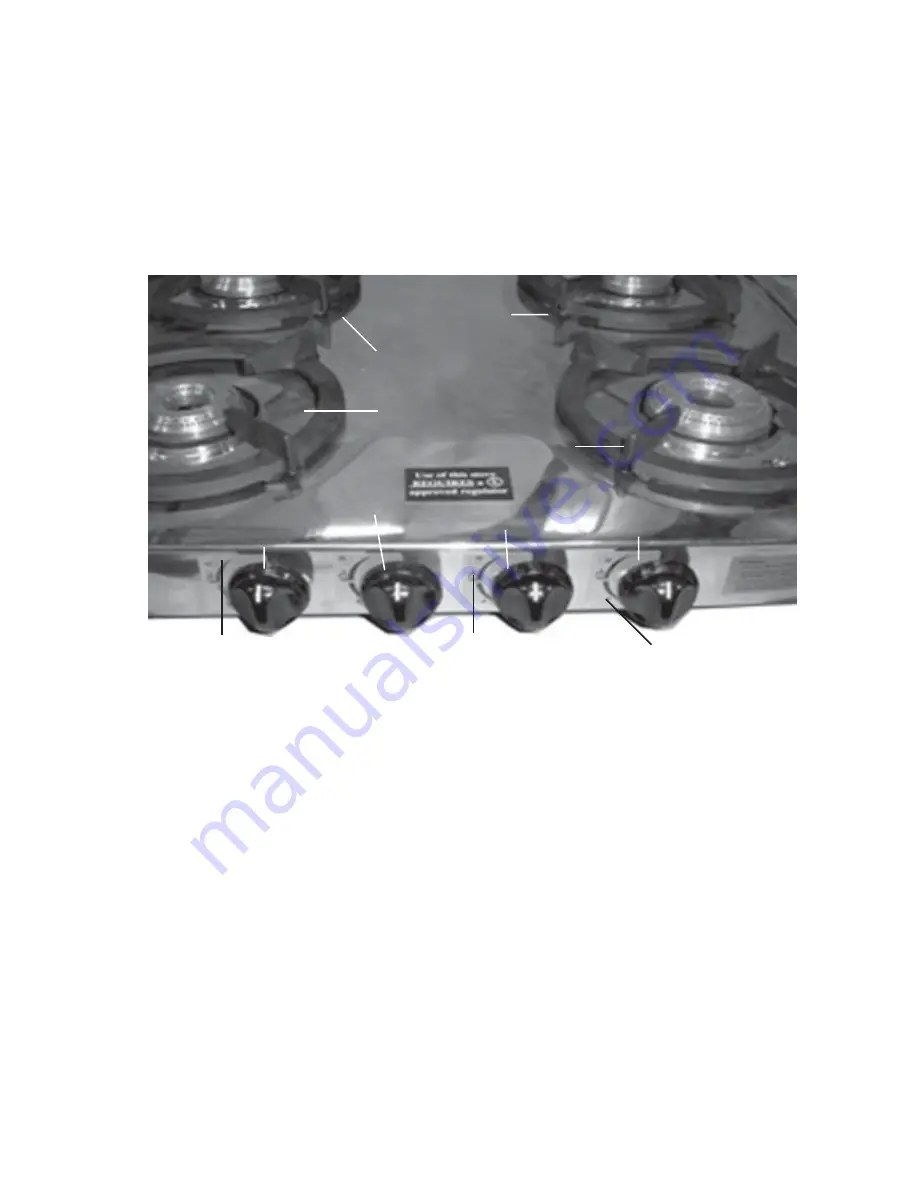
1.  Make sure the Knobs (#4) are all in the “Off” position. See FIGURE 1.
2.  Situate the propane cylinder (not included) outdoors, away from pilot lights, flames, sparks,
or other ignition sources.  Attach the male end of the regulator/hose to the cylinder.
Note:  Read and adhere to all safety warnings and instructions provided in the regulator
manufacturer’s manual.
3.  Attach the regulator/ hose (not included) from the propane cylinder by threading the female
end clockwise onto the Gas Inlet.  Hand tighten only.  Never use tools to tighten hoses onto
the valve assembly.  Turn on the propane cylinder.
4.  Check for gas leaks by:
a.  Listen for the hiss of escaping gas.
b.  If the cylinder feels extremely cold, a leak is possible.
c.  Smell for a rotten egg odor.
d.  Apply soapy water to all of the connections and look for bubbles.
If you find evidence of leakage, turn off the propane cylinder immediately.  Redo the connec-
tion and test again. If it continues to leak, turn off the propane cylinder and disconnect.  Con-
tact your local gas distributor to replace the cylinder and hose.  If the leakage comes from the
valve on the Stove, contact Harbor Freight Tools for a replacement part.
Caution! Explosion Danger:  Do not use the Stove if the gas is leaking.

Right Rear Burner

Left Rear Burner

Right Front Burner

Left Front Burner

FIGURE 1

Left Front
Burner Knob

Right Front
Burner Knob

Left Rear
Burner Knob Right Rear

Burner Knob

Attaching an propane cylinder.

High

Medium

To Light and Low

Note:  The Knobs (#4) are in the off position (12 o’clock) in FIGURE 1 above.

Summary of Contents for 04826

Page 1: ...http www harborfreight com For technical questions and replacement parts please call 1 800 444 3353 Copyright 2003 by Harbor Freight Tools All rights reserved No portion of this manual or any artwork contained herein may be reproduced in any shape or form without the express written consent of Harbor Freight Tools Model 04826 ...

Page 2: ... children 5 Use the right product for the job Do not attempt to force a small product to do the work of a larger industrial product There are certain applications for which this product was designed It will do the job better and more safely at the rate for which it was intended Do not modify this product and do not use this product for a purpose for which it was not intended 6 Dress properly Do no...

Page 3: ...hen servicing use only identical replacement parts Use of any other parts will void the warranty 15 Do not operate the Stove if under the influence of alcohol or drugs Read warning labels if taking prescription medicine to determine if your judgement or reflexes are impaired while taking drugs If there is any doubt do not operate the Stove 16 Maintenance For your safety maintenance should be perfo...

Page 4: ...s check the male connection threads on the propane cylinder and the female connection threads on the Stove Gas Valve Assembly for damage Do not use if you suspect damage to either the threads or the propane cylinder Return the cylinder to the gas distributor for replacement If you suspect damage to the Gas Valve Assembly on the Stove discontinue use and replace the damaged part 13 If any of the fo...

Page 5: ...propane cylinder by threading the female end clockwise onto the Gas Inlet Hand tighten only Never use tools to tighten hoses onto the valve assembly Turn on the propane cylinder 4 Check for gas leaks by a Listen for the hiss of escaping gas b If the cylinder feels extremely cold a leak is possible c Smell for a rotten egg odor d Apply soapy water to all of the connections and look for bubbles If y...

Page 6: ...tove to completely cool before disconnecting and removing the propane cylinder 5 Unscrew the regulator hose not included from the Assembly Valve in a counterclockwise direction Always disconnect the propane cylinder from the Stove when it is not in use Maintenance and Storage See FIGURE 1 on page 5 1 Clean the Stove with a damp cloth and mild detergent Dry the Stove Do not clean the Stove with cor...

Page 7: ... HE OR SHE IS QUALIFIED TO REPLACE ANY PARTS OF THE PRODUCT IN FACT THE MANUFACTURER AND OR DISTRIBUTOR EXPRESSLY STATESTHAT ALL REPAIRS AND PARTS REPLACEMENTS SHOULD BE UNDERTAKEN BY CERTIFIED AND LICENSED TECHNICIANS AND NOT BY THE BUYER THE BUYER ASSUMES ALL RISK AND LIABILITY ARISING OUT OF HIS OR HER REPAIRS TO THE ORIGINAL PRODUCT OR REPLACEMENT PARTS THERETO OR ARISING OUT OF HIS OR HER INS...

Page 8: ...Page 8 SKU 04826 Assembly Drawing 1 2 3 4 5 6 7 8 9 10 ...

Reviews: