Page 5
For technical questions, please call 1-800-444-3353.
Item 67437
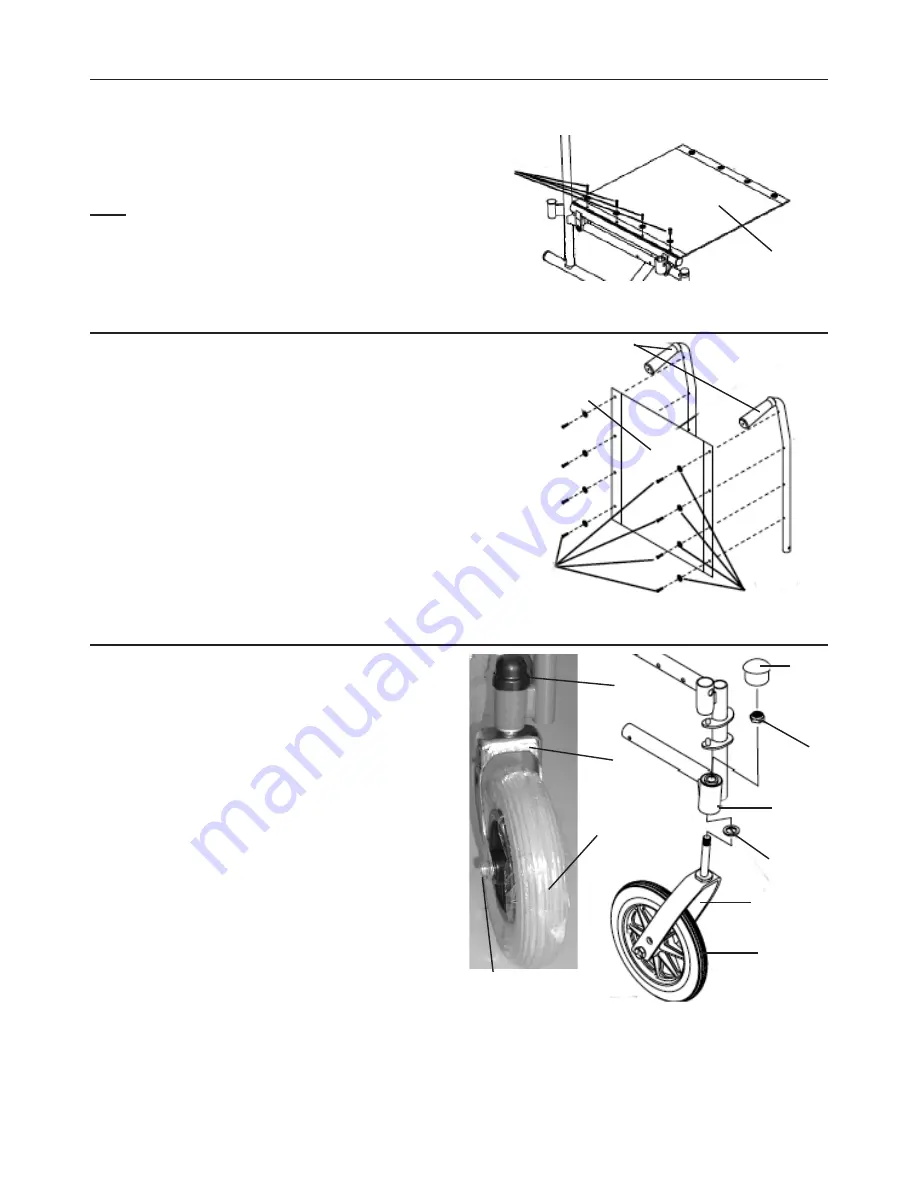
Replacing Seat
1. Wheelchair uses ten screws and washers
to secure Seat (6) to frame.
2. To replace the Seat, remove the screws
and washers that secure the Seat to
the cross braces. See Figure C.
Note:
Seat height cannot be adjusted.
3. Remove plate from Seat sleeve.
4. To install new Seat, insert plate into sleeve and fasten
Seat to cross bars using ten screws and washers.
Figure C
Seat
Screws and
Washers
Replacing Back Pad
1. Remove the eight screws and washers that secure
the Back Pad (7) to the back of the Handles (8).
2. Remove upholstery from Wheelchair and,
using the screws and washers, securely
fasten the new back upholstery to the back
of the Handles. See Figure D, below.
Figure D
Handles
Back Pad
(7)
Screws
Washers
Adjust and Replacing Front Wheels
1. Should the Casters need to be adjusted,
first tip back of Wheelchair to floor.
2. To tighten or loosen Casters, remove the Dust
Cover from the top of the Caster Head tube and
adjust Locknut allowing for looser or tighter Caster
swing (Casters should swing down to one side and
immediately rest after being held straight at the
top of the arc.) Too much swing indicates Casters
need to be tightened; not enough swing means
Casters should be loosened. See Figure E.
3. Test Wheelchair for maneuverability.
Once both Casters are properly readjusted,
snap Dust Cover back into place over Locknut.
4. To replace Casters, remove Hex Screws, Washers,
and Locknut holding each Caster in place in the Yoke.
5. Set new Wheel in the Yoke and fasten in place using
Hex Screws, Washers and Locknuts. See Figure E.
Dust
Cover
Locknut
Caster
Headtube
Washer
Front
Caster (5)
Yoke
Hex
Screw
Dust
Cover
Yoke
Front
Caster (5)
Figure E
Summary of Contents for 67437
Page 1: ......


