background image

SKU 91006

    Page 6

Maintenance

1.

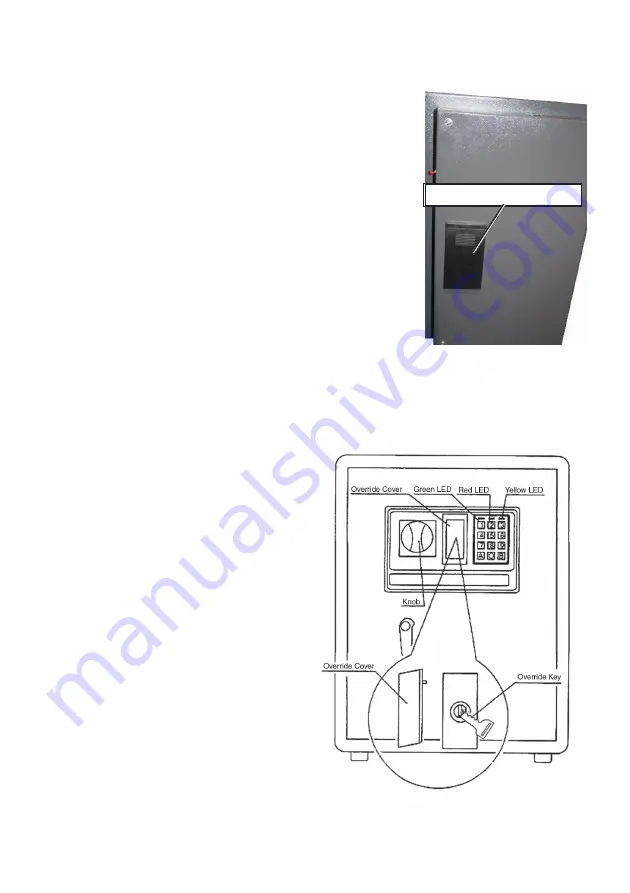
To install the batteries: Open the safe door. The

battery compartment is located on the inside of the
safe door. Slide the batter y cover off the
compartment. Remove the old batteries, and install
4 new ‘C’ batteries in their place. Be sure to align
the polarity of the batteries as indicated in the battery
compartment.  Replace the battery compartment
cover.  Reset the code - see instructions on page 5.

2.

Low battery power warning: The red LED light on

the keypad will light when the batteries wear down.
When you observe the red LED light on, immediately
replace the batteries. To do this, follow the
instructions above.

3.

Protect the safe from moist or wet conditions.

This may cause electronic fault in the keypad, or
corrosion of the steel construction.

4.

Occasionally wipe the safe and keypad with a soft dry cloth or brush to

remove dust.

5.

Occasionally apply a small

amount of light oil or lock
lubricant to the mechanical lock
mechanism. Be careful not to get
any oil or other liquids on or near
the electronic mechanism.

6.

Occasionally apply a small

amount of oil to the wheel axles.

7.

Occasionally vacuum or brush

dust from the carpet lining of the
safe.

Battery Compartment

REV 05/04

Summary of Contents for 91006

Page 1: ...91 Mission Oaks Blvd Camarillo CA 93011 Visit our Web site at http www harborfreight com Copyright 2004 by Harbor Freight Tools All rights reserved No portion of this manual or any artwork contained h...

Page 2: ...m i D e d i s n I D 5 2 1 1 x W 5 7 2 1 x H 5 2 8 1 y t i c a p a C t o o f c i b u c 5 1 n o i t c u r t s n o C g n i s u o h e t a l p l e e t s a g 9 e m a r f r o o d e t a l p l e e t s a g 6 r...

Page 3: ...ts Before using any safe any part that appears damaged should be carefully checked to determine that it will operate properly and perform its intended function Check for alignment and binding of movin...

Page 4: ...pad then press the A key Once the green light comes on turn the knob Then turn the handle and pull the door open NOTE The knob must be turned within 5 seconds of the green light coming on If the knob...

Page 5: ...ing holes on the wall using a pencil or other marker Move the safe aside and drill suitable pilot holes in the wall These should be just smaller than the diameter of the bolts to be used hardware not...

Page 6: ...e batteries wear down When you observe the red LED light on immediately replace the batteries To do this follow the instructions above 3 Protect the safe from moist or wet conditions This may cause el...

Page 7: ...URER AND OR DISTRIBUTOR EXPRESSLY STATES THAT ALL REPAIRS AND PARTS REPLACEMENTS SHOULD BE UNDERTAKEN BY CERTIFIED AND LICENSED TECHNICIANS AND NOT BY THE BUYER THE BUYER ASSUMES ALL RISK AND LIABILIT...

Reviews: