SKU 94069
For technical questions, please call 1-800-444-3353.
Page 5
ASSEMBLY INSTRUCTIONS
PREPARING THE CEMENT
1.
The Solar Garden Light Post must be installed in a sunny location where it will
receive at least 8 hours of sunlight each day. Any cover, shade, or shadowing will
prevent the light solar panel from absorbing sunlight, decreasing the Solar Garden
Light Post’s effectiveness.
2.
The location should not be near a nighttime light source such as a porch light or
street light, as these may keep the Solar Garden Light Post from automatically
turning on.
3.
Once a proper location has been selected (i.e., along edge of walks, patios, near
steps and driveway entrances), mark the area on the cement using the Post Base
(39) as a template. This will measure the distance of the holes that are to be drilled
into the cement.
Note:
It is not recommended that this Solar Garden Light Post be
mounted on soil, wooden decks or other surfaces.
4.
Once the measurements have been marked, drill a 1/2” diameter x 3.5” deep hole
into each of the three marked holes on the cement. Make sure there are no hidden
electrical cables or wires in the drilling path. Harbor Freight Tools is not
responsible for damage to concrete.
PREPARING THE SCREWS TO BE PLACED IN THE CEMENT
1.
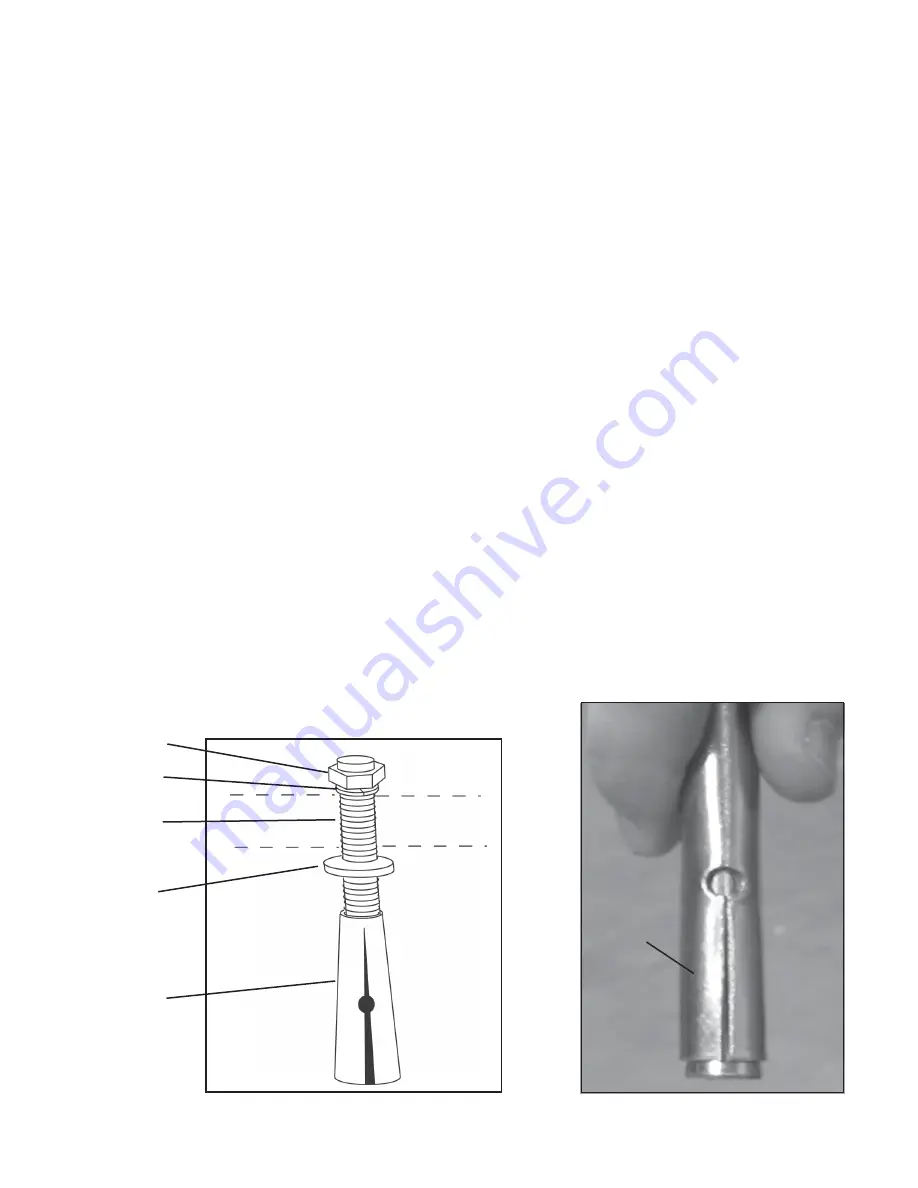
Place a Brass Sleeve with the slots facing downward on each of the Anchor Bolts
(41). Place the Brass Washer into the brass sleeve. Tighten down, securing and
anchoring each brass “sleeve”. See
Figure 1.
2.
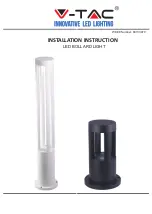
With a hammer, gently tap the “sleeve” with the Anchor Bolt (41) into each of the
drilled holes in the cement. Leave enough of the threads of the Screw exposed so
the Base (39) can be assembled. Tighten the nut securely to expand the Brass
Sleeve.
See Figures 1 & 2
.
Brass Washer
Anchor
Bolt (41)
Lock Washer
Nut
Sleeve
Figure 1
Figure 2
“Sleeve”
Screw (41)
(Base)
(Cement)


