background image

SKU 94840   

For technical questions please call 1-800-444-3353. 

Page 4

aSSembly

Your Biplane will require some assembly.  It is important that you read the entire man-

ual to become familiar with the product BEFORE you assemble and use the Biplane.  Be 

sure that you have all parts described in the Parts List located on page 7 of this manual.

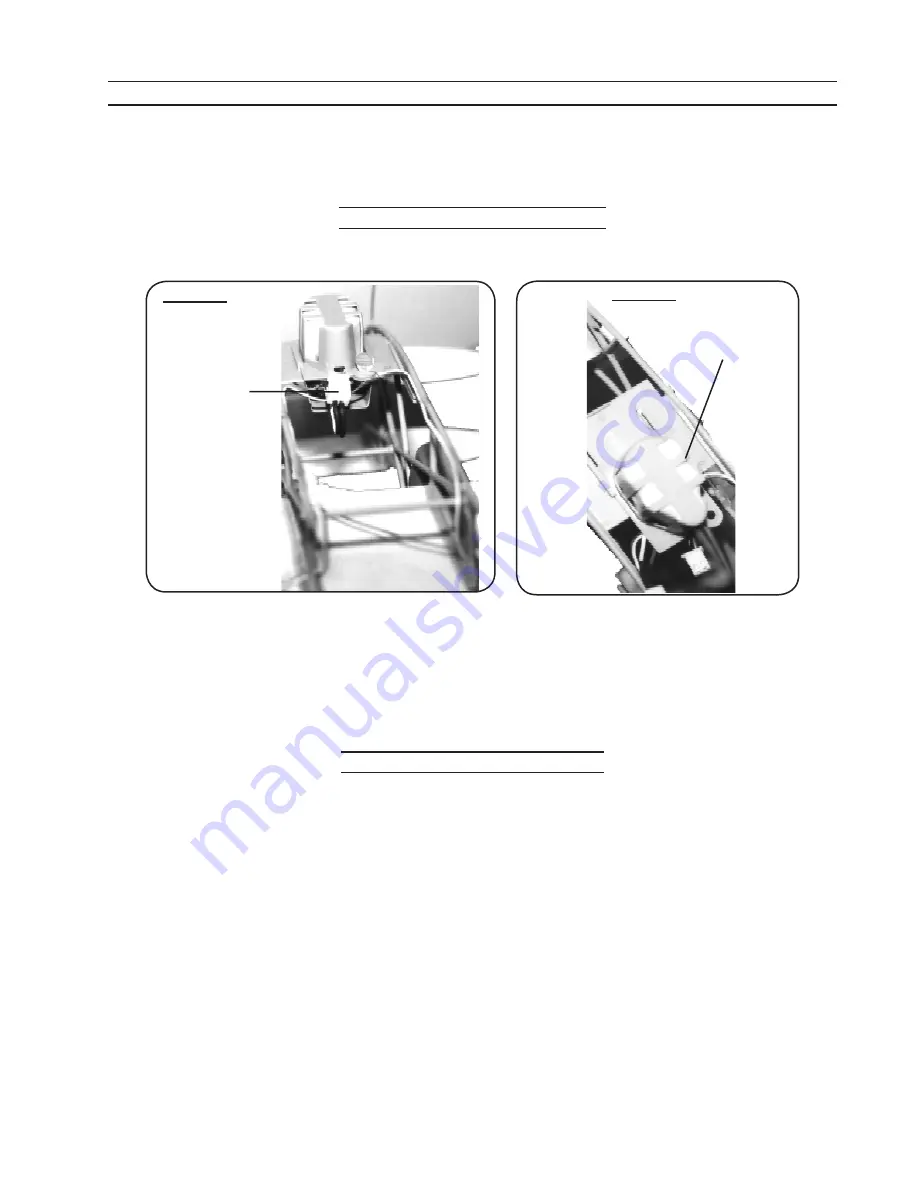
attaching the battery pack

turn off the power before connecting the battery pack to the biplane.  

1. 

Plug in 

Battery Pack 

here

Figure 1

Brackets for 

Battery Pack (4)

Figure 2

2.  Plug the Battery Pack (4) into the outlet located on the Biplane as seen in Figure 1.

Please note: The Battery Pack is installed from the rear by sliding it forward until it 

3. 

rests against the lip/stop on the airframe, as seen in Figure 2. Once installed, the Bat-

tery Pack should be locked into place by inserting the rubber pin through the holes in 

the battery tray and airframe.

charging the battery pack

The Battery Pack (4) is charged from the Transmitter/Charger Unit (2).  Place the bat-

1. 

tery on a fireproof surface and plug the Battery Pack (4) into the Charging jack, locat

-

ed at the side of the Transmitter/Charger Unit (2)-see Figure 3.
Hold down the red button until the battery indicator turns orange.

2. 

A charge time of three to five minutes is usually sufficient.

3. 

During charging the Battery Pack will get warm.  Make certain it does not get overly 

4. 

hot.
The Battery Pack must have three to four initial charges of a longer duration before 

5. 

they obtain a full run time of 4 to 6 minutes.

Summary of Contents for 94840

Page 1: ...Save this manual Copyright 2006 by Harbor Freight Tools All rights reserved No portion of this manual or any artwork contained herein may be reproduced in any shape or form without the express writte...

Page 2: ...oduct Safety Warnings and Precautions WARNING When using product basic safety precautions should always be followed to reduce the risk of personal injury and damage to equipment Read all instructions...

Page 3: ...e batteries 15 Use the Biplane in a large area free from interference from trees electrical pow 16 er lines and other obstacles Do not fly near buildings cars busy streets or at other people or animal...

Page 4: ...by sliding it forward until it 3 rests against the lip stop on the airframe as seen in Figure 2 Once installed the Bat tery Pack should be locked into place by inserting the rubber pin through the ho...

Page 5: ...icates the batteries are at half capacity Red indicates the batteries need replacing The Radio Transmitter Charger is turned ON and OFF with the On Off Switch located 4 midway between the Control Stic...

Page 6: ...e Biplane move the right Turn control stick to the left to steer to the left and 6 right to steer it right Move the Turn Control Stick slightly to adjust for minor changes in direction and tilt of the...

Page 7: ...ger Unit 1 3 Antenna 1 4 Battery Pack 2 5 Wind Gauge Flag 1 6 Spare Propeller 2 7 Vertical Stabilizer 3 8 Display Stand 1 9 Horizontal Stabilizer 1 10 Battery Cover 1 PLEASE READ THE FOLLOWING CAREFUL...

Reviews: