


Page 10
For technical questions, please call 1-888-866-5797.
Item 57042
RETURNS NOT ACCEPTED & WARRANTY VOID
if Sprayer is not properly cleaned immediately after every use.
Clean Sprayer immediately to prevent permanent damage.
S
AFETY
O
PERA
TION
M
AINTENANCE
S
ETUP
Assembly
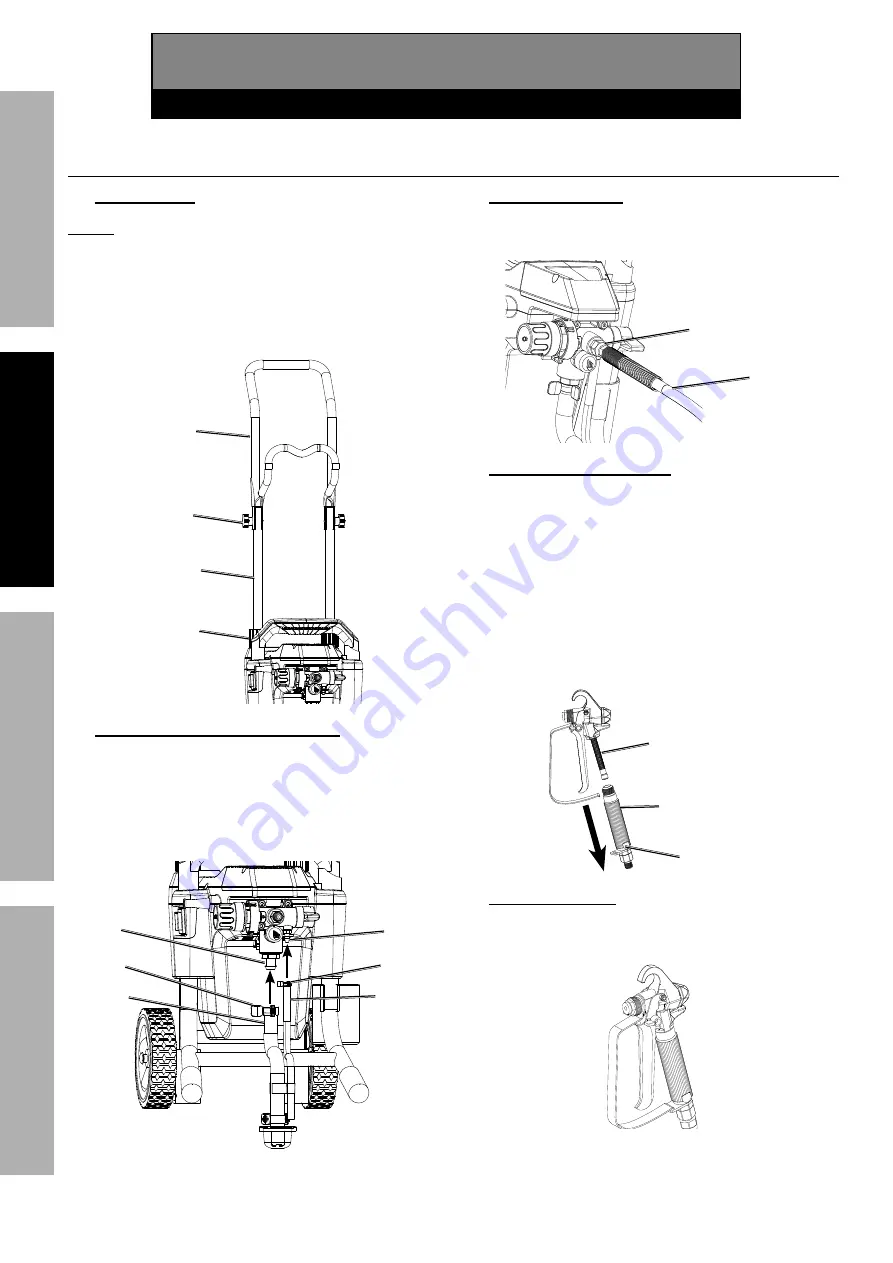
1.
Attach Handle
NOTE:
Handle can be reversed so that Spray
Gun/Hose Holder faces backward if desired.
a. Insert Handle Posts into Handle Post
Collars. Tighten Collars securely.
b. Place Handle over Handle Posts.
c. Insert Handle Knobs and tighten securely.
Handle
Post
Handle
Post
Collar
Handle
Handle
Knob
2.
Attach Suction and Priming Hoses
a. Remove cap covering Inlet Valve.
b. Attach Suction Hose to Inlet
Valve. Secure with Clamp.
c. Attach Priming Hose to Outlet
Valve. Secure with Clamp.
Inlet
Valve
Suction
Hose
Clamp
Clamp
Priming
Hose
Outlet
Valve
3.
Attach Spray Hose
Attach Spray Hose to Spray Hose Outlet.
Tighten securely with included wrench.
Spray
Hose
Spray
Hose
Outlet
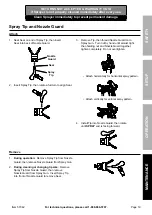
4.
Install Filter in Spray Gun
a. For water-based paints, use
pre-installed 60 mesh coarse filter.
b. For oil-based paints, remove coarse filter and
install 100 mesh fine filter. Use proper Spray
Tip according to
Tip Chart on page 8.
• Remove Handle from Spray Gun
with included wrench.
• Remove filter by turning it counterclockwise.
• Replace filter and reassemble Spray Gun.
Secure
wrench on
flat spots
Handle
Filter
5.
Attach Spray Gun
Attach Spray Gun to Spray Hose. Tighten
securely with two included wrenches.


