


Page 15
For technical questions, please call 1-888-866-5797.
Item 57042
RETURNS NOT ACCEPTED & WARRANTY VOID
if Sprayer is not properly cleaned immediately after every use.
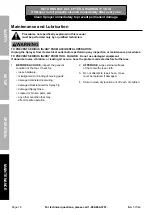
Clean Sprayer immediately to prevent permanent damage.
S
AFETY
O
PERA
TION
M
AINTENANCE
S
ETUP
Spraying
WARNING! TO PREVENT SERIOUS INJURY: Only water-based materials or materials with a
minimum flash point of 38°C (100°F) should be used for spraying and cleaning.
Only use water
or mineral spirits for priming and cleaning. Only use water-based or oil-based paint for spraying.
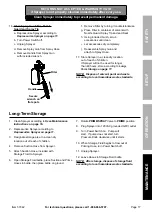
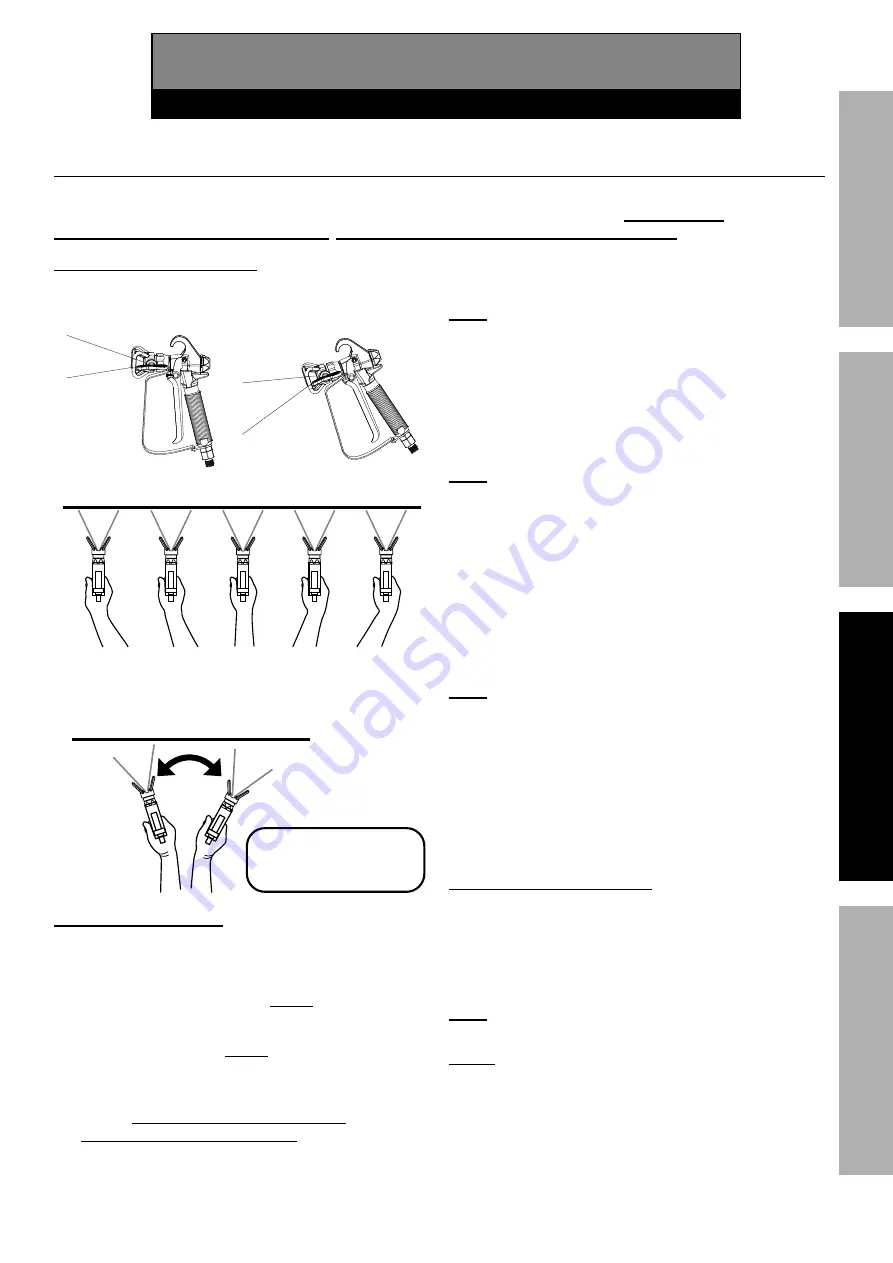
Proper Spraying Techniques
Keep the Spray Gun upright and
at a right angle to the workpiece.
Correct
Incorrect
Incorrect
Gun
Angle
Do not pivot your wrist or
wave the gun like a fan.
Correct Gun Angle
Move your arm, not just your wrist.
Point gun directly towards the surface and
maintain an even, steady distance and speed.
To Avoid Paint Build Up
Apply two thin coats rather than one thick
coat. Overlap 1/3 to 1/2 on second coat.
Start moving the Spray Gun before
fully depressing Trigger.
Fully depress Trigger before
contacting the workpiece.
When finished with the stroke, release the
Trigger while still moving the Spray Gun
and after passing the workpiece.
Before use, the Sprayer must be primed
according to
Priming on page 12.
Note:
Remove or cover objects that you want
to protect from overspray and paint mist.
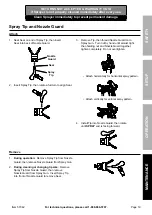
1. Attach Nozzle Guard and Spray Tip according to
Spray Tip and Nozzle Guard on page 19.
2. Rotate
PRIME/SPRAY
Valve to
SPRAY
position.
3.
Turn Pressure Knob to
HIGH SPRAY
indicator.
Note:
Practice painting techniques
on a scrap workpiece.
4.
Point Spray Gun 10" - 12" away
from scrap workpiece.
5. Unlock and press Trigger fully, spraying,
following
“Proper Spraying Techniques”
and
“To Avoid Paint Build Up”
.
6. Adjust Pressure Knob as necessary to achieve
desired consistency and reduce overspray.
Note:
The motor has thermal overload
protection. If unit overheats, allow
approximately 45 minutes for unit to cool.
7.
When finished spraying:
a. Rotate
PRIME/SPRAY
Valve to
PRIME
position.
b. Turn Power Switch off.
c. Clean according to
User-Maintenance
Instructions on page 16.
Clearing Spray Tip Blockage
a. Lock Trigger.
b. Reverse Spray Tip.
c. Unlock Trigger and Spray on scrap workpiece.
d. Release and lock Trigger.
Note:
If Spray Tip won’t clear, replace
according
to
Spray Tip and Nozzle Guard on page 19.
NOTE: Dispose of solvent, paint and waste
according to local hazardous waste standards.


