Page 10
For technical questions, please call 1-888-866-5797.
Item 93762
SAFET
y
Op
ERA
TION
M
AINTENAN
c
E
SETU
p
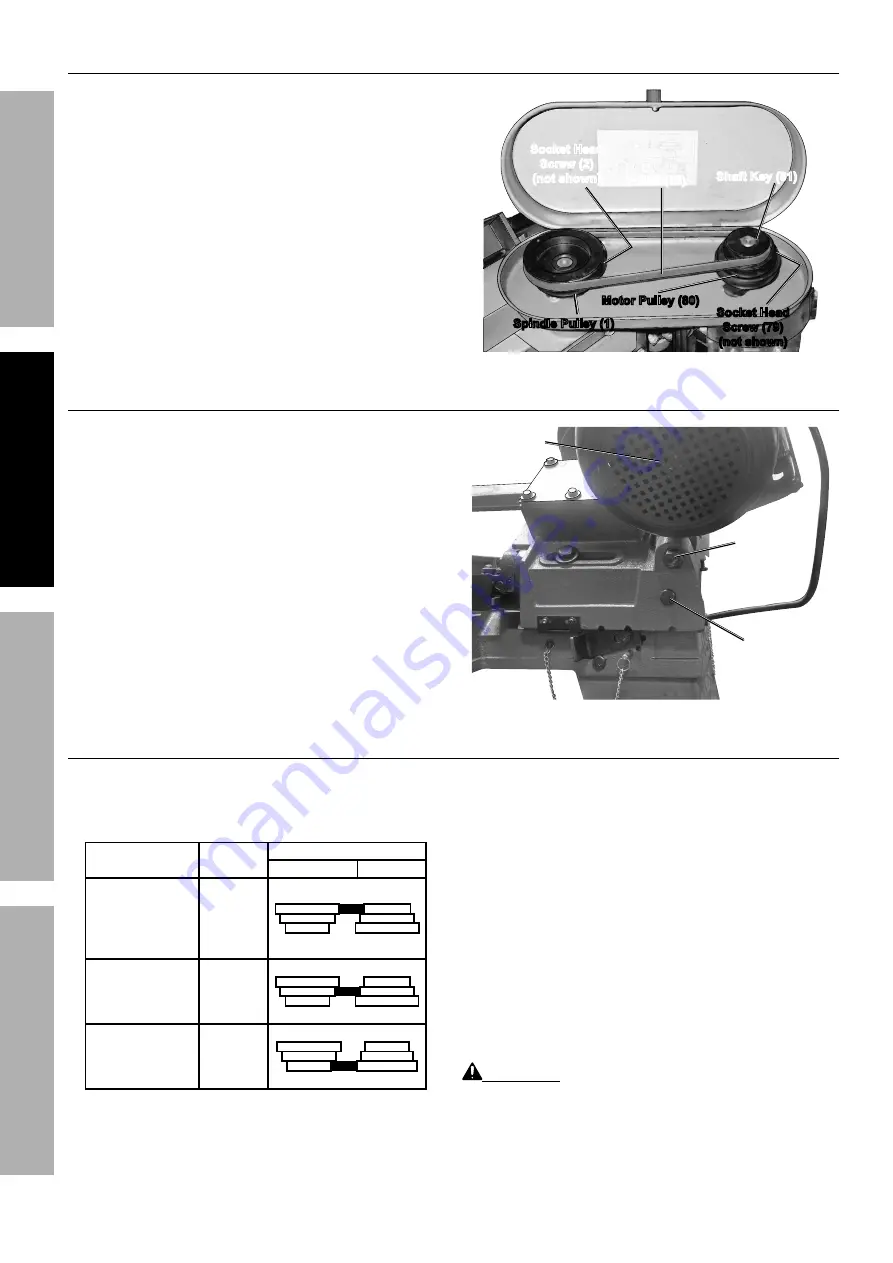
To Attach the Spindle pulley and Motor pulley
1. Slide the Spindle Pulley (1) fully onto the
Worm Shaft (12). Then secure the Spindle
Pulley to the Worm Shaft, using one Socket
Head Screw (2)
(see Figure F)
.
2. Insert the Shaft Key (81) in the slot on the Motor
Shaft. Align the slot in the Motor Pulley (80) with
the Shaft Key. Slide the Motor Pulley fully onto the
Motor Shaft. Then secure the Motor Pulley to the
Motor Shaft, using one Socket Head Screw (79)
.
Motor pulley (80)
Shaft Key (81)
Spindle pulley (1)
V-Belt (13)
Socket Head
Screw (2)
(not shown)
Socket Head
Screw (79)
(not shown)
Figure F
To Install the V-Belt
1. Loosen the Bolts (70 & 74) and press the
Motor (82) toward the Body
(see Figure G)
.
2. Place the V-Belt (13) around the top
grooves in the Spindle Pulley (1) and
Motor Pulley (80)
(see Figure F)
.
3. Adjust the position of the Motor to obtain
approximately 1/2″ depression in the V-Belt
when applying pressure with your thumb.
4. Re-tighten the Bolts to anchor the Motor in place.
Bolt (70)
Motor (82)
Bolt (74)
Figure G
To Adjust the cutting Speed
1. The Band Saw is designed to cut at three different
speeds: 80, 120, and 200 FPM
(Feet Per Minute)
depending on the type of material being cut.
MATERIAL
SpEED
(FpM)
pULLEy GROOVE
SpINDLE MOTOR
Tool Steel,
Stainless
Alloy Steels,
Bearing
Bronze
80
LARGE
SMALL
Medium to High
Carbon Steels,
Hard Brass
or Bronze
120
MEDIUM
MEDIUM
Low to Medium
Carbon Steels,
Soft Brass,
Aluminum, Plastic
200
LARGE
SMALL
Figure H
2. Refer to the Chart at left to determine
the proper cutting speed for a specific
type of material being cut.
3. The cutting speed can be adjusted by
changing the position of the V-Belt:
a. Loosen the Bolts (70 & 74) and press
the Motor (82) toward the Body.
b. Place the V-Belt around the desired grooves in
the Spindle Pulley (1) and Motor Pulley (80).
c. Ease the Motor back to its original position
to tighten the tension on the V-Belt.
d. Re-tighten the Bolts to secure the Motor
in place
(see Figure F, Figure G)
.
WARNING!
Always securely close the
Lid on the Pulley Cover after installing a
V-Belt or adjusting the cutting speed.
Summary of Contents for Central Machinery 93762
Page 1: ......


