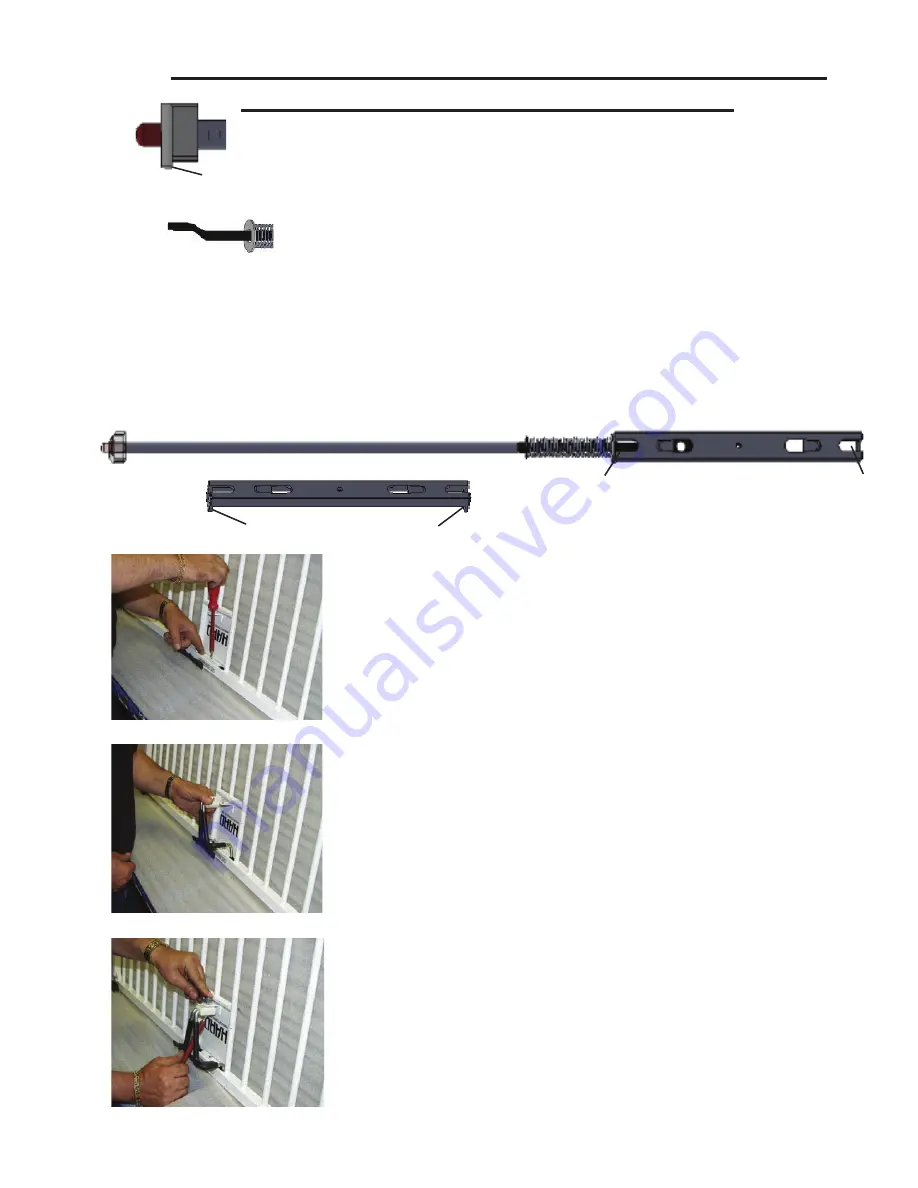
9. The trigger barrels are spring loaded, so to line up the hole
in the trigger barrel with the hole in the bracket and opening in
the rail, push in on the white plastic bushing on the end of the
trigger until the holes line up on one side, then insert one half
of the handle. Repeat on the other side and insert the second
half of the handle.
10. To insert screw in the retaining block through the metal
bracket in the shield plate, twist the retaining block and screw
up into the hole from an angle and secure with lock washer
and acorn nut.
6. Slide one half of the trigger assembly barrel 3/4 of the way
into the rail making sure the red tip goes in
fi
rst. The white plastic
bushing attached to the red trigger tip has a tab on one edge,
be sure it faces downwards as shown. The opposite end of the
trigger should be in the upright position as shown to the left.
SIDE TRIGGER ASSEMBLY OR JOHNS HOPKINS
HANDLE REPLACEMENT CONTINUED
Reassembly is now complete.
Tab
7. Take the black plastic center trigger bracket, and hook it onto the trigger barrel making
sure the tabs on the bracket face downwards. Push the completed portion into the rail tube
leaving half the bracket exposed for the other trigger barrel. With the red trigger tip now
facing the opposite direction, hook the second trigger barrel into the bracket again
making sure the tab on the white bushing at the tip is facing downwards. Push the
completed assembly fully into the side rail.
Tabs facing downwards
Insert trigger barrels in bracket holes
8. Prior to putting the shield plate back on, be sure the holes
in the black bracket for the triggers line up with the openings
in the side rail as well as the hole for the screw. Reinstall the
shield plate, and insert the screw to fasten the shield plate
and bracket.
Opposite end in upright position
16


