27
4 - Sprayer setup
General info
Before putting the sprayer into operation
Although the sprayer has been supplied with a strong and protective surface treatment on steel parts, bolts etc. in the
factory, it is recommended to apply a film of anticorrosion oil (e.g. CASTROL RUSTILO or SHELL ENSIS FLUID) on all metal parts
in order to avoid chemicals and fertilizers discolouring the enamel.
If this is done before the sprayer is put into operation for the first time, it will always be easy to clean the sprayer and keep
the enamel clean for many years. This treatment should be carried out every time the protection film is washed off.
Unloading the sprayer from the truck
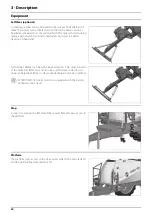
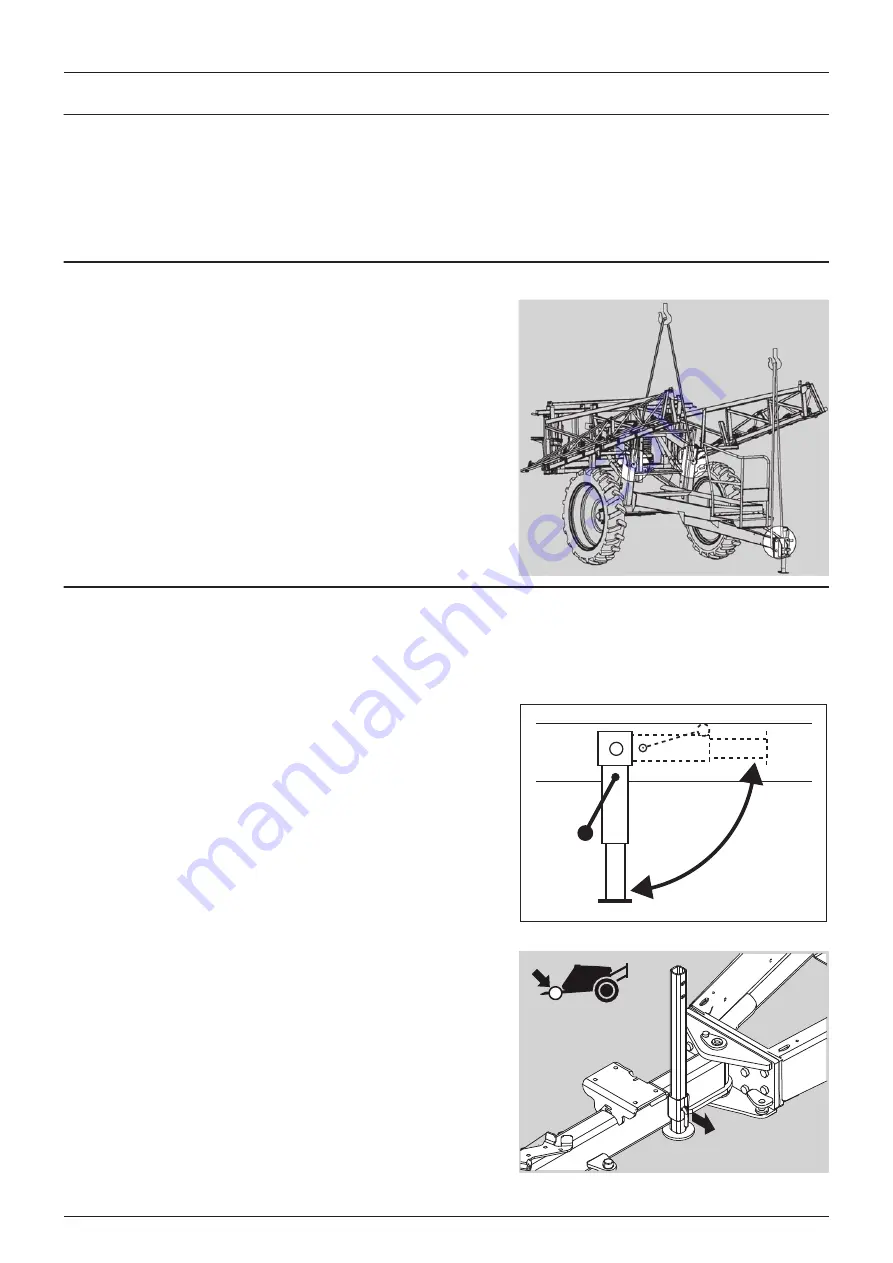
For the unloading of the sprayer, you need a crane. When unloading
with a crane please observe the lifting points as shown in the picture,
and make sure that the straps or belts used for lifting are strong enough.
μ
ATTENTION! Only lift the sprayer when the tanks are empty!
Support leg
Depending on whether the sprayer have SELF STEER or not, the support leg may differ.
NOTE! The support leg and jack capacity is sufficient to carry the drawbar weight with full tank on level ground.
Without SELF STEER
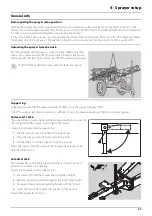
The support leg is stored in retracted horizontal position and secured by
the lock pin when the sprayer is attached to the tractor.
How to place sprayer on the support leg:
1.
Pull the lock pin out and tilt down the support leg.
2.
Place the lock pin into the horizontal locking hole.
3.
Turn handle to lower the support leg to the ground
When the support leg fully supports the sprayer, the sprayer can be
detached from tractor.
With SELF STEER
The drawbar has a retractable support leg that is stored in hoisted
position to minimise crop damage.
How to place sprayer on the support leg:
1.
Use tractor lift to lift the sprayer above standing height.
2.
Remove lock pin to lower the support leg to standing height.
3.
Fix support leg at selected standing height with the lock pin.
4.
Lower the tractor lift to place the sprayer on the ground.
Detach the sprayer from tractor.
Summary of Contents for RANGER EAGLE
Page 8: ...1 EC Declaration 8 ...
Page 12: ...2 Safety notes 12 ...
Page 26: ...3 Description 26 ...
Page 40: ...4 Sprayer setup 40 ...
Page 60: ...5 Operation 60 ...
Page 84: ...6 Maintenance 84 ...
Page 95: ...8 Technical specifications 95 Charts Boom hydraulic Z Boom hydraulic Y ...
Page 96: ...8 Technical specifications 96 ...
Page 100: ...HARDI INTERNATIONAL A S Helgeshøj Allé 38 DK 2630 Taastrup DENMARK ...


