9
Performa
™
Winch
60.2 STP E/HY
Installation and Maintenance Manual - Mod.D
NOTICE
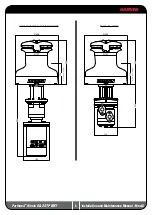
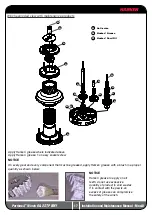
Before closing the winch, make sure the holes and drainage channels in the base of the winch are not obstructed.
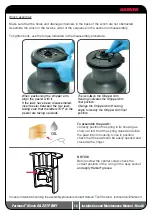
Positioning the self-tailing arm
Position the self-tailing arm so that the line leaving the winch is led into the cockpit.
Motor installation procedure
WARNING!
Make sure that the power is switched off before installing or carrying out maintenance on
the winch.
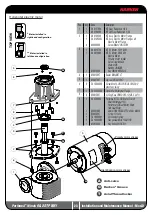
Once you have installed the winch on the deck, proceed with motor installation. The motor can be coupled to
the winch in different positions. Check the space available below deck and choose the suitable position.
Tools needed
A number five hex key
A number six hex key (only for vertical electric motor)
A number ten hex key (only for hydraulic motor)
Two number thirteen wrenches
Motor installation procedure
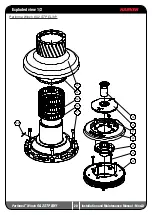
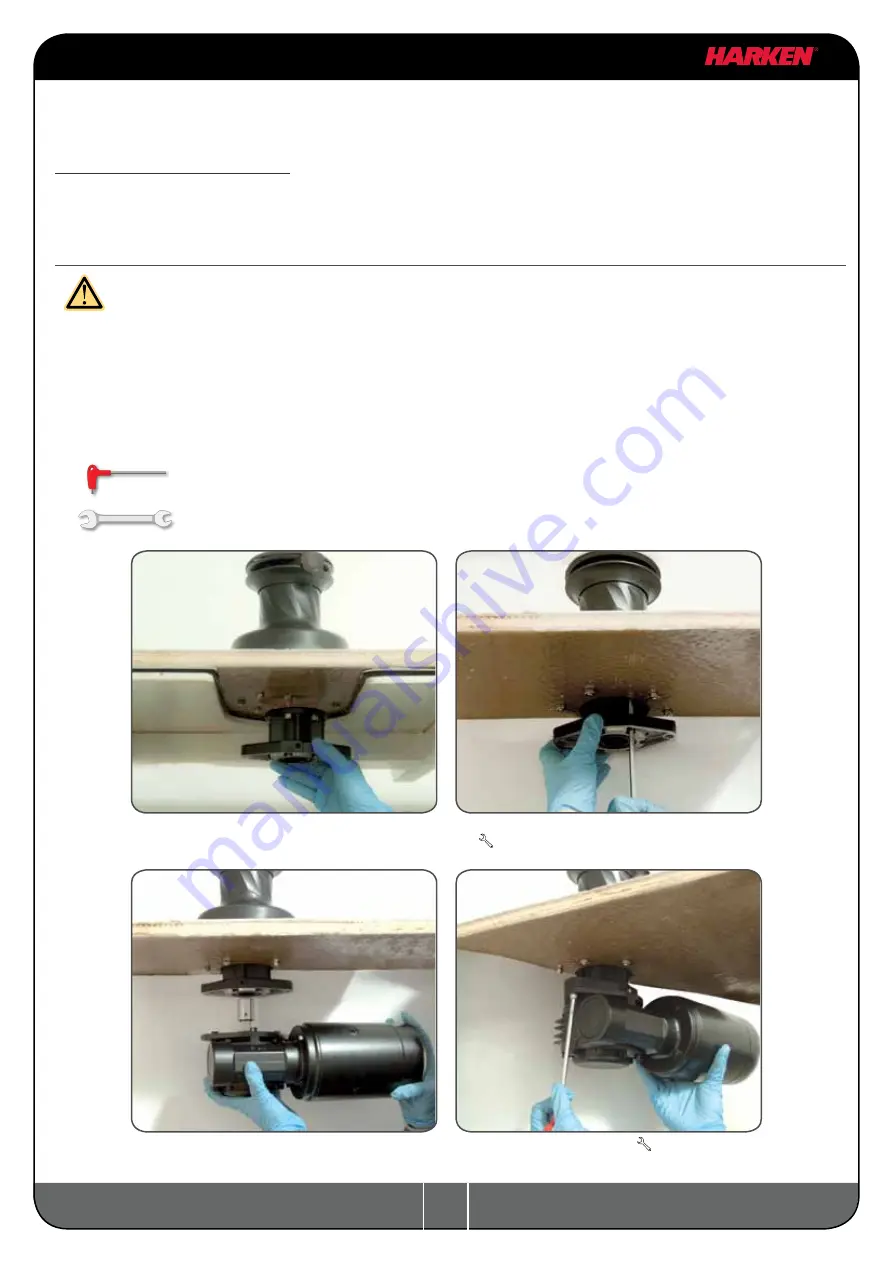
1. Position the flange (see Page 10)
3. Position the reduction gear and motor
2. Tighten six M6 precote coated screws
( 8 Nm/ 71 in-lb)
4. Tighten the two screws ( 8 Nm/ 71in-lb).
Be sure to align the flange.


