10
ing on the LCD. The cursor will flash at the position you have
chosen. Press button
y
and
u
to select the mode you need.
Then press button
t
to confirm and leave right and left handed
chord setting.
z
Tuner mode:
1. After entering this mode,
Dr. Chord Pro can start
tuning automatically if
there is any sound input.
Choose tuning with Mic or
input jack: When tuning
with Mic,Don’t plug any
object in the input jack.
Otherwise the Mic will not
work. And please try to
make the sounding part
of the music instrument
closer to the Mic of Dr. Chord Pro to get best tuning result.
When tuning with input jack, please plug the output plug of
pickup in the input jack of Dr. Chord Pro.
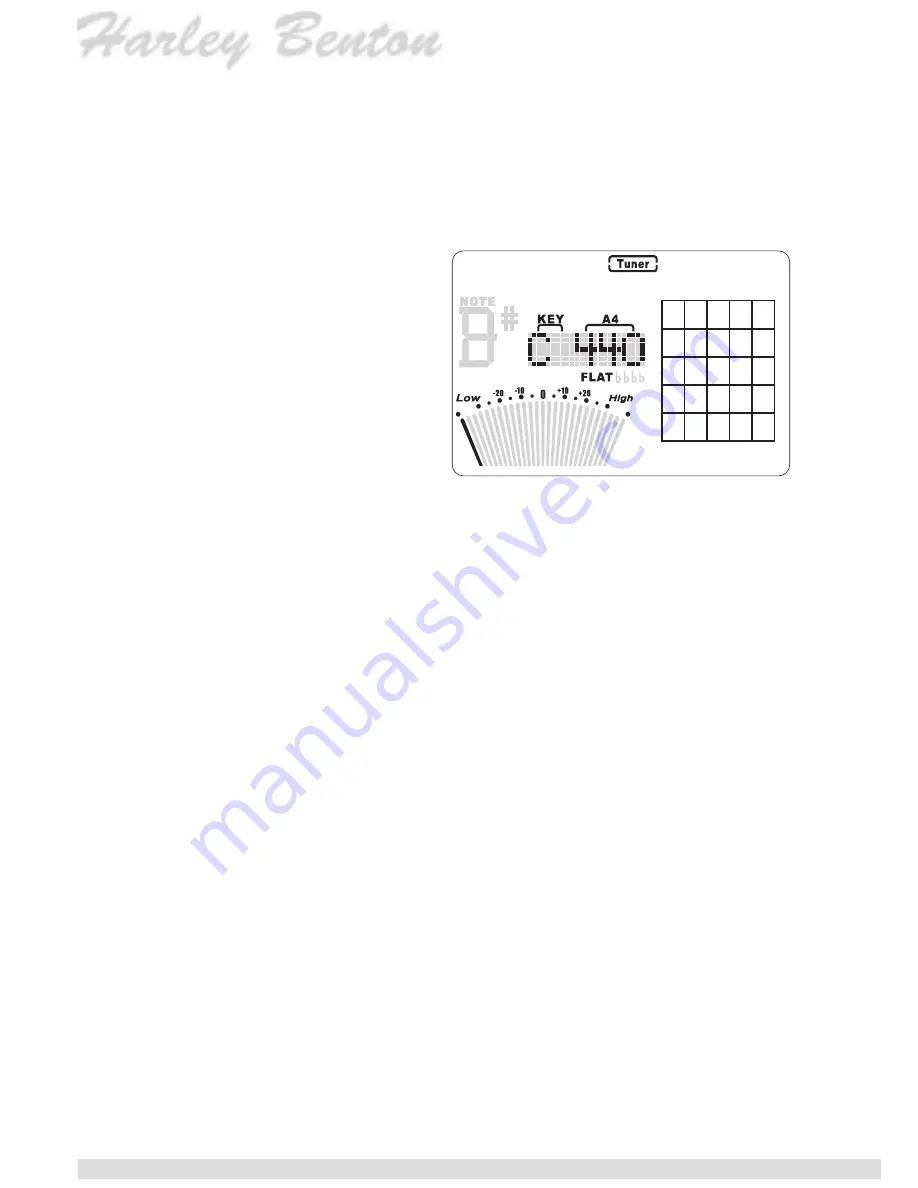
Key selecting:
Press button
e
and
r
to move the flashing cursor to the
position KEY in above picture. Then press button
y
and
u
to
select the key you need. You can choose among C,Bb,Eb and
F. The key you selected will display at the position KEY.
A4 calibration:
Press button
e
and
r
to move flashing cursor to position
A4 in above picture. Then press button
y
and
u
to select
the A4 frequency you need. The A4 frequency will increase
or decrease every time with 1 Hz step. A4 range is from
410Hz~480Hz. Keeping pressing this button will automatically
increase or decrease A4 frequency continuously. A4 frequency
will display at position A4 in the above LCD picture.
Tuner mode LCD
* The gray parts are possibly to be displayed.
Only the black parts are displayed for certain.


