13
MAIN REMOTE CONTROL FUNCTIONS
The AVR 7550HD remote is capable of controlling up to 14 devices,
including the AVR itself, an iPod docked in the included The Bridge II,
a USB device and a Network device (see page 37 for details). During
the installation process, you may program the codes for your source
components into the remote. To operate a component, press its
Selector button to change the device mode. The device mode will
appear on the top line of the remote’s LCD Display.
NOTE:
Four of the sources do not have dedicated Source
Selectors: Source A, Source B, Source C and Source D. To
select one of these sources, first press the AVR Settings Button,
then press the appropriate Soft Key: Red for Source A, Green
for Source B, Yellow for Source C and Blue for Source D. These
sources may also be selected using the AVR Settings menu.
Each Source Selector has been preprogrammed to control certain
types of components, with only the codes specific to each brand and
model changing, depending on which product code is programmed.
The AUX and Cable/SAT Source Selectors may be used for multiple
device types. All of the external Source Selectors may be reassigned
to other device types (see Initial Setup section).
AUX Source Selector:
CD player, VCR, HDTV set-top box,
PVD or TiVo
®
set-top box.
Cable/SAT Source Selector:
Cable set-top box or satel-
lite set-top box.
IMPORTANT NOTE:
All of the AVR 7550HD’s audio and
video inputs are independently assignable. Select the inputs
to which the device is physically connected during Initial
Setup. Any device may be connected to any compatible input
and given any name (e.g., DVD or Game).
Most of the buttons on the remote have dedicated functions,
although the precise codes transmitted vary, depending on the
device mode. Due to the wide variety of functions for various source
devices, only a few of the most-often used functions on the remote
have been included: alphanumeric keys, transport controls, television-
channel control, menu access, and power on and off.
Buttons dedicated to the AVR are available at any time, even in
another device mode: AVR Power On and Off, Audio Effects, Video
Modes, Surround Modes, Volume, Mute and Sleep Settings. Press
the AVR Settings Button near the bottom of the remote to return it
to AVR mode.
A button’s function depends on which component is being con-
trolled. See Table A14 in the appendix for listings of the functions
for each type of component.
IR Transmitter Lens:
As buttons are pressed on the
remote, infrared codes are emitted through this lens.
AVR Power On Button:
Press to turn on the AVR. The
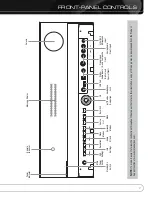
Master Power Switch behind the front-panel door must be on.
AVR Power Off Button:
Press to turn off the AVR 7550HD.
Device Power On Button:
Press a device’s Source
Selector, then press this button to turn on the device.
Device Power Off Button:
Press a device’s Source
Selector, then press this button to turn off the device.
LCD Display:
This two-line text display informs you of the
current device mode (i.e., which source is active) on the upper line.
When you press a key, the command will appear briefly on the
lower line.
Source Selectors:
Press one of these buttons to select a
source device, e.g., DVD, CD, cable TV, satellite or HDTV tuner. This
will also turn on the receiver and switch the remote’s device mode
to operate the source. The first press of the Radio Selector switches
the AVR to the last-used tuner band (AM, FM or XM). Each succes-
sive press changes the band. Similarly, the Network Button toggles
between the Network and Internet Radio sources.
Audio Effects:
Press to directly access the Audio Effects
submenu, which allows adjustment of the AVR’s tone and other
audio controls. See the Initial Setup section for more information.
Video Modes:
Press for direct access to the Video Modes
submenu, which contains picture settings to be used after you
have adjusted the picture settings on the video display or TV.
See the Advanced Functions section for more information.
Surround Modes:
Press to directly access the Surround
Modes submenu. Scroll to the lines for the Surround Mode categories:
Auto Select, Virtual Surround, Stereo, Movie, Music or Video Game.
The surround mode will change when the menu line is highlighted.
To change the surround mode for the selected category, press the
OK Button when the menu line for the Surround Mode category
matching the audio program is highlighted, and select one of the
available surround mode options using the
1
/
5
Buttons. Press the
OK Button.
See the Advanced Functions section for more information on
surround modes.
Alphanumeric Keys:
Use these buttons to enter numbers
for radio station frequencies or channels, or to select station presets.
Last Channel:
When controlling the tuner; a cable, satellite
or HDTV set-top box; or a TV, press this button to return to the
previous station or channel. For Internet Radio, this is only available
to toggle between stations previously saved as presets.
Activity:
With this button, up to 11 Activities may be pro-
grammed to transmit a series of commands with a single press.
Execute an Activity by pressing this button, then the Alphanumeric
Key (or the AVR Power On or Off Button by themselves) into which
it was programmed. See the Advanced Functions section for more
information on Activities.
Back/Exit:
Press to return to the previous menu or to exit the
menu system.
Menu Button:
This button is used within the Now Playing
menu for the tuner (including XM Radio), USB, The Bridge II, Internet
Radio and the Network, and to display the main menu on some
source devices. To display the AVR 7550HD’s main menu, press the
AVR Settings Button.
Navigation
(
1
/
57
/
3
)
and OK Buttons:
These buttons
are used to make selections within the menu system and to operate
the tuner.
AVR 7550HD OM.qxd 2/25/09 11:52 AM Page 13


