Show Angle Icon:
This setting controls the activation
of the Angle Icon. When this setting is turned
ON
,
the Angle Icon, which is a small image of a movie
camera, will appear in the upper right corner of the
screen when multiple-angle material is available on the
disc being played. When the icon appears, press the
Angle Button
s
on the remote to switch between
the available views or program material.
Audio Setup Menu
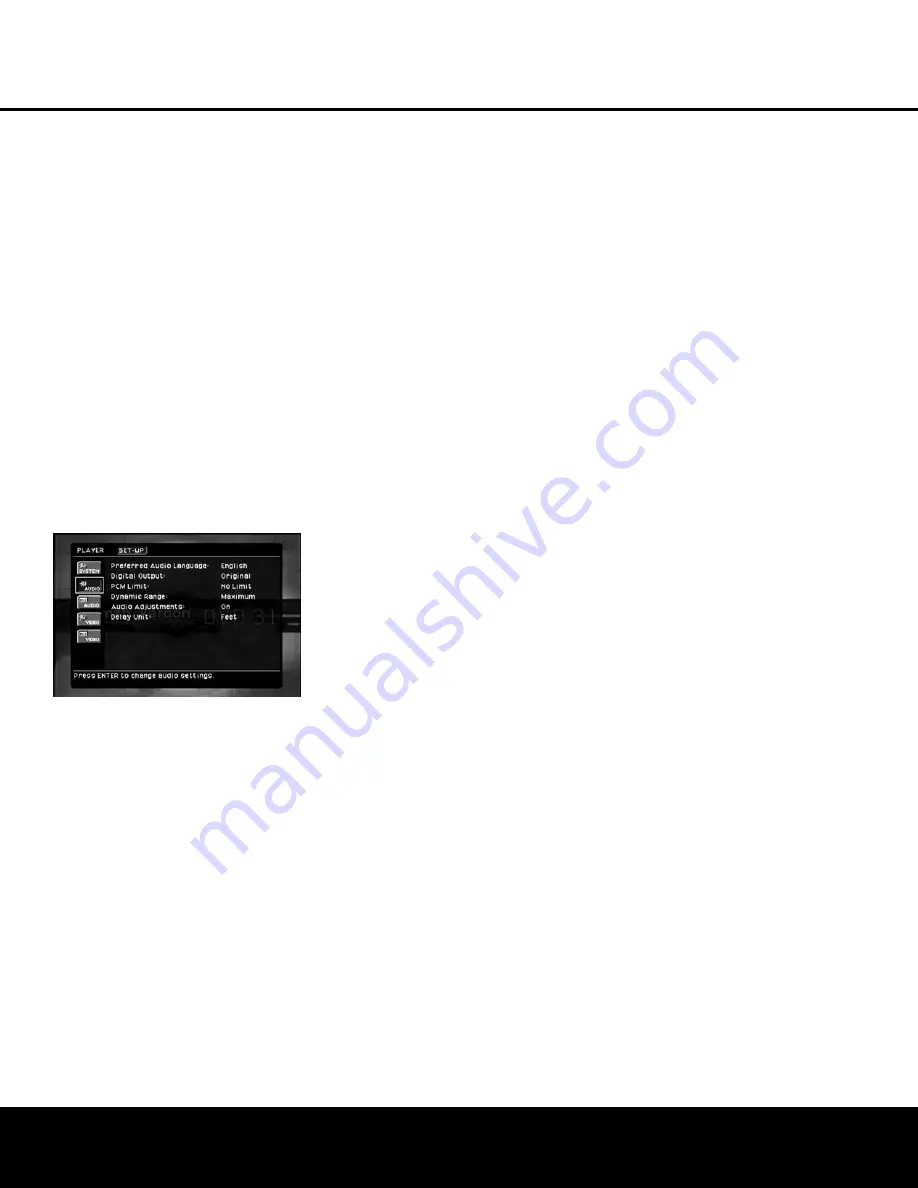
This menu establishes the DVD’s configuration for
general audio settings, such as preferred language and
digital audio settings.
As with all setup menus, press the
OSD Button
`
to activate the main menu screen, and then press the
‹
/
›
Navigation Buttons
e
so that
SETUP
is
highlighted. Press
Enter Button
z
, and then use
the
K
/
L
/
‹
/
›
Navigation Buttons
e
until the
AUDIO SETUP
menu is highlighted within a
white outline and press the
Enter Button
z
again.
Finally, press the
K
/
L
/
‹
/
›
Navigation Buttons
e
once more to move the highlight to the
Control
Settings
ç
side of the menu screen.
The following adjustments are available on the
AUDIO SETUP
menu:
Preferred Audio Language:
This setting is used to
select the default language that will be used for pro-
gram playback. The factory default setting is English,
but you may choose French, Spanish, German or
Italian by making a selection on the
Adjustment
Options
É
line. To select a language other than
those shown, select
OTHER
from the choices on
the
Adjustment Options
É
line and press the
Enter
Button
z
. Then, use the
Numeric Keys
p
to
enter the four-digit code listed on page 30 for the
desired language. This selects a preferred audio pro-
gram language, but it will only be available when the
disc being played contains that language. The list of
languages available on any given disc is always shown
on the disc jacket, usually at the bottom of the back
cover. Note that the audio playback language may
also be changed at any time during playback using
the
Audio Button
c
, as described on page 24,
but any changes made will only be effective during
playback of that disc.
Digital Output:
This setting selects the digital audio
data stream that is routed to the
Optical Digital
Output
¡
or the
Coaxial Digital Output
™
.
Two choices are available:
•
ORIGINAL
, which is the default setting, sends
the Dolby Digital or DTS soundtrack, as selected
from the disc’s menu or by using the
Audio Button
c
, as explained on page 25. This setting should
be used when your receiver or processor is capable of
decoding signals in the Dolby Digital or DTS format.
•
PCM
, which outputs a standard PCM signal for
decoding by standard digital-to-audio converters that
are not compatible with Dolby Digital or DTS data
streams.
PCM Limit:
This setting selects the maximum sample
rate for the digital audio output of the DVD 31. Before
making a selection for this option, consult the owner’s
manual for your receiver or processor to determine
the maximum sampling rate your receiver or processor
is capable of handling. Three choices are available:
• If your receiver is not capable of resolving digital
signals greater than 48kHz, or if you are uncertain
of your equipment’s capabilities, select the 48kHz
option. The DVD 31 will down-sample any program
material with higher sample rates so that it is com-
patible with your equipment.
• If your receiver or processor is capable of handling
digital signals up to 96kHz, select that option. The
DVD 31 will down-sample any program material
with higher sample rates so that it is compatible with
your equipment.
• If your receiver or processor is capable of handling
digital signals up to 192kHz, select the No Limit
option. In this case all signals will be passed through
at their native rates without down-sampling.
If you are unsure of the capabilities of your receiver or
processor, we suggest that you start with the 96kHz
option. If you select this setting and do not hear any
audio when a high-resolution disc is played, change
the setting to 48kHz so that the audio will be properly
downsampled.
Dynamic Range:
This setting allows you to take
advantage of the programming present on some
Dolby Digital recordings to reduce the volume of
louder, peak passages while maintaining intelligibility
of quieter passages. This means that you may listen
to programs at a level that allows the full impact of a
soundtrack to be heard at a volume that is lower than
you might otherwise use to avoid complaints about
loud volume levels. The DVD 31 accomplishes this by
compressing the audio to a greater or lesser degree,
depending on which setting you choose. Three options
are available:
•
MINIMUM
does not make any changes to the
original playback, and should be used when the
volume setting in the listening room may be as loud
as you desire.
•
MEDIUM
applies a moderate amount of compres-
sion so that louder passages are a little bit quieter.
•
MAXIMUM
applies more compression so that
louder passages are much softer.
Feel free to experiment with the settings at any time.
Note that if your receiver or processor also allows you
to program the dynamic range setting, also known as
the “Night Mode,” you do not need to make any
adjustments on the DVD 31 and should leave the
setting at
MINIMUM
.
Audio Adjustments:
This setting activates the
AUDIO ADJUSTMENTS
menu’s options. If
your DVD 31 is connected to a receiver or processor
that does NOT have the capability to adjust bass man-
agement/speaker size, output levels and delay times
on its “direct” inputs, the proper setting here is On.
However, if your receiver or processor does allow
adjustment for these settings, we recommend that you
make them there and select Bypass on this submenu.
Delay Unit:
This setting selects the measurement sys-
tem used in entering delay times when the
AUDIO
ADJUSTMENTS
menu is activated. Distance
entry in feet is the default, but you may alternatively
choose to enter the distances in meters.
Audio Adjustments Menu
This menu allows you to adjust the settings that con-
trol the audio output on the
5.1-Channel Audio
Outputs
¢
for bass management (speaker size),
output level and delay times. The proper adjustment of
these settings is key to optimal reproduction of DVD-
Audio discs, particularly when the DVD 31 is used with
a receiver or processor that does not have audio
adjustment capabilities for the direct inputs.
Important Note:
In order to avoid audio problems,
when the DVD 31 is connected to a receiver or
processor that DOES have the capability to adjust
audio and bass management parameters internally for
direct inputs, you may use that capability or adjust the
settings in the DVD 31. As noted above, the preferred
method of operation is to use the receiver for these
adjustments. In that case, remember to set the
AUDIO ADJUSTMENTS
setting in the
AUDIO SETUP
menu to
BYPASS
. If you
make the adjustments using the DVD 31's settings, it
is important that the receiver's settings for the “direct”
inputs be disabled or set to “Large” for the speakers
and “0” for the level adjustments and delay times, pro-
vided that these settings are separate for the “Direct”
inputs from the rest of the receiver’s operation. If you
have any questions about the capabilities of your
receiver or processor, we recommend that you consult
its owner’s manual or the manufacturer’s Web site for
further information.
SYSTEM SETUP
SYSTEM SETUP 19
DVD 31 (120V) OM 6/25/04 11:40 AM Page 19


