background image

INSTALLATION  

9

Installation

To prevent possible damage to your speakers
and other components in your audio system, it is
important that ALL components, including the
HD 755 and your receiver or preamp and ampli-
fiers, are turned off and unplugged from their AC
power source when installing any new compo-
nent.

Connecting the HD 755 to your audio system is
simple. Using standard RCA-to-RCA interconnect
cords, connect the left and right 

Audio Output

jacks 

on the rear panel to the CD input jacks

on your receiver, surround processor or preampli-
fier.

If your system includes an optional external 
digital-to-analog converter, or if you are using a
receiver or other processor that has the capabili-
ty to decode PCM digital input signals, connect
the 

Digital Output

jack 

¡

to the Coaxial

Digital input on the decoder. Make certain to use
a coaxial-style interconnect cable, as standard
audio cables will not perform as well.

Install two AA batteries by turning the remote
over so that you are holding the bottom side up.
Press lightly on the embossed arrow on the
cover and gently slide the cover towards you in
the direction of the arrow. Insert the batteries
inside the compartment, being careful to follow
the + and – polarity indications at the bottom of
the compartment. Replace the cover by placing it
on the remote and sliding it back towards the
top of the remote.

NOTE:

When replacing batteries, always replace

both at the same time. When the unit will not be
used for an extended period of time, it is also a
good idea to remove the batteries so that the
potential for corrosion or damage is avoided.

If the HD 755 is installed behind a cabinet or
other obstruction that may block the path
between the front-panel 

Remote Sensor

3

and the location of the remote, an optional
external IR sensor may be used. Connect the
sensor to the 

Remote IR-In Jack

£

on the

rear panel. This jack may also be connected to
the IR-Output jack of another compatible
Harman Kardon component or a compatible IR-
system- remote product.

You may also use the IR Sensor in the HD 755 to
send commands to other compatible remote
controlled products. Connect the 

Remote IR-

Out jack

¢

to the input of the other product

or system.

Connect the power to a nonswitched AC wall
outlet or to the accessory outlet on the rear of
another audio device in your system and you are
ready to go!

NOTE:

When using the accessory outlet on

another product to power the HD 755 make cer-
tain that it has the compatibility to power a
device that draws at least 14 watts of current in
addition to being able to handle the require-
ments of the other devices that may be plugged
into the accessory outlets. If you use a
“switched” outlet, it is important to remember
that the host product must be turned on in order
for the HD 755 to operate.

Summary of Contents for HD 755

Page 1: ...HD 755 CD Player OWNER S MANUAL HD 755 Power for the Digital Revolution...

Page 2: ...panel controls and rear panel connections certain conventions have been used EXAMPLE bold type indicates a specific remote control or front panel button or rear panel connection jack EXAMPLE bold type...

Page 3: ...to Outboard Digital to Analog Converters Sophisticated Programming Features to Automatically Play Tracks in Preprogrammed or Random Order Intro Search to Automatically Scan a Brief Portion of Each Tr...

Page 4: ...o assure proper operation and to avoid the potential for safety hazards place the unit on a firm and level surface When placing the unit on a shelf be certain that the shelf and any mounting hardware...

Page 5: ...tructions on programming the HD 755 9 Intro Button Press this button to put the HD 755 in the Intro Scan mode When you press the button the unit will play the first 10 seconds of each track on the dis...

Page 6: ...reamplifier Remote Control Input Connect the output of a remote infrared sensor or the remote control output of another compati ble Harman Kardon product This will enable the remote control system to...

Page 7: ...AY 7 8 9 CLEAR TRACK NO OFF ON A B POWER i h k j d l E m f g n e c a b F q Power Off Power On Numeric Controls Program Button Clear Button Repeat Button Repeat A B Button Skip Buttons Search Buttons P...

Page 8: ...egment of the disc Press the button once to mark the start of the portion to be repeat ed Press it again at the end of the desired sequence The marked passage will play continu ously until the Stop bu...

Page 9: ...ng it on the remote and sliding it back towards the top of the remote NOTE When replacing batteries always replace both at the same time When the unit will not be used for an extended period of time i...

Page 10: ...Play To play a disc first turn the HD 755 on using the Power Switch 1 on the front panel or the Power On button 1 on the remote control When the unit is turned off to Standby press ing any button on t...

Page 11: ...HDCD process effectively cancels the additive distortions caused by artifacts of the A D and D A conversion processes and simul tanously provides additional data to reduce the subtractive distortions...

Page 12: ...the disc The Skip buttons may be used when the HD 755 is either playing or stopped If the unit is stopped the Skip buttons may be used to locate the first track to be played The Play button 4 9 must...

Page 13: ...number shown at the right side is not programmed yet now you can change the track number with the Skip buttons 7 7 or the Numeric buttons 2 as described above and add it to the program list by pressi...

Page 14: ...f tracks To program the unit for A B play first locate the point on the disc where you wish to begin the repeated section At that point press the Repeat A B button 6 The REPEAT indicators will light i...

Page 15: ...ain AC power cord is plugged into a live outlet Turn on Power Switch Install fresh batteries observing polarity indications Remove obstructions from the front panel sensor or connect a remote sensor t...

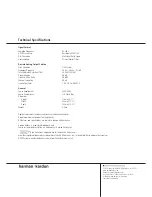
Page 16: ...measurement includes knobs buttons and connection jacks Height measurement includes feet and chassis All features and specifications are subject to change without notice Harman Kardon is a registered...

Reviews: