


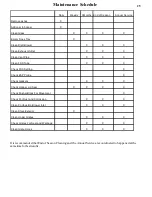

2 1
A 3-month cleaning will give you a base line
as to how often your DVC500 needs to be cleaned.
Cleaning intervals will differ from other DVC500
owners because of the ash content of the coal and
the amount of coal burned.
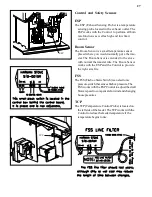
NOTE: Unit should be out & cooled down
enough to perform these maintenance items:
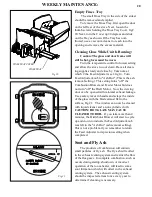
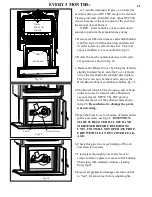
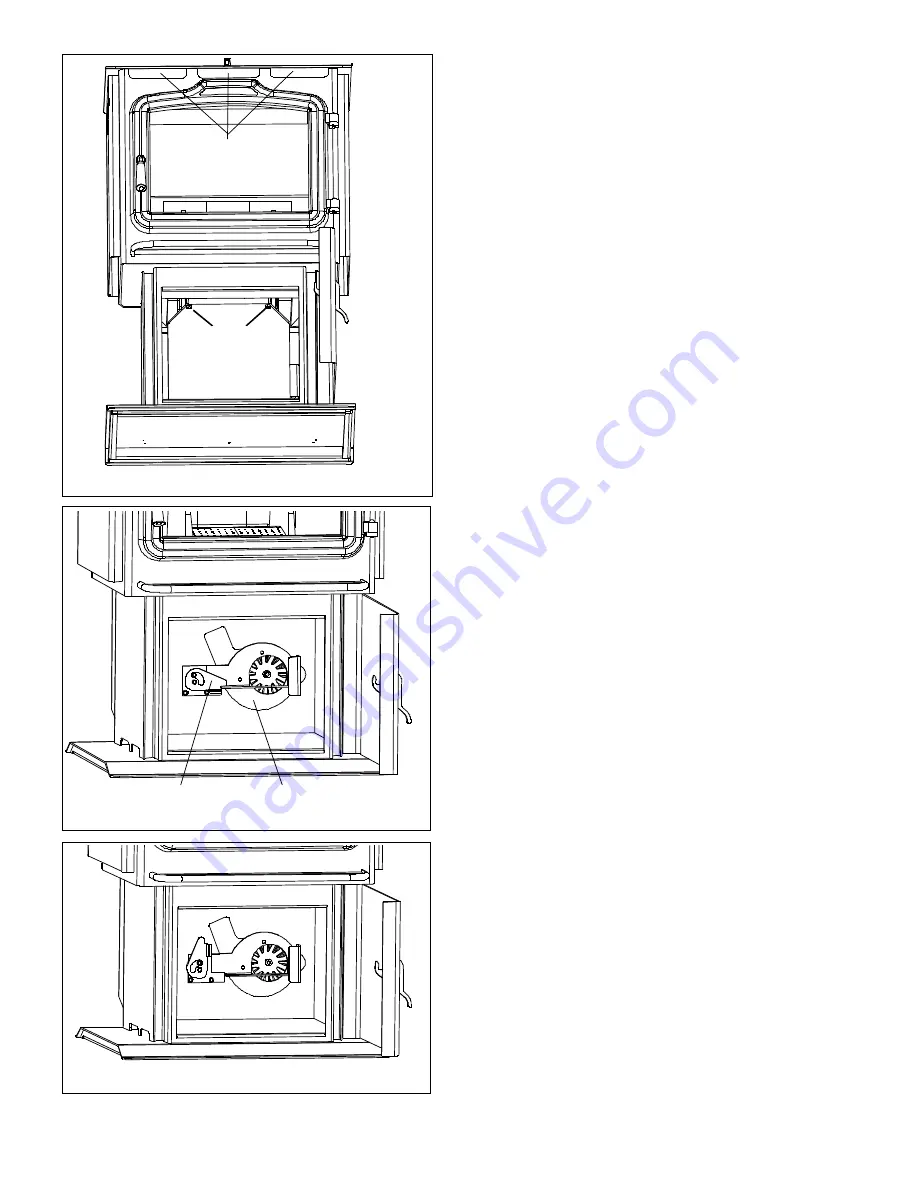
1. Remove Ash Pan then remove ash shield behind
Ash Pan, fig.22. Lift the shield up and forward
in order to remove it from the stove. This will
expose the Blower Cover and Latch, fig.23.
2. Rotate the Latch counterclockwise to the verti-
cal position as shown in fig. 24.
3. Remove the Blower Cover by tilting the left side
slightly forward. Next, slide the Cover left and
out of the slot that holds the right side in place.
The Cover can now be removed to expose the
Draft Blower Wheel and Exhaust Outlet, fig. 25.
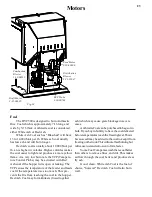
4. The blower wheel, blower housing, and exhaust
outlet can now be cleaned with a brush and
vacuum cleaner. NOTE: The ESP probe is
located at the rear of the exhaust outlet shown
in fig 28.
Be careful not to damage the probe
when cleaning.
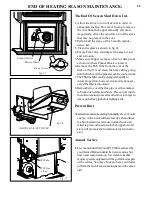
5. Open the Fines Cover on bottom of feeder under
grates and clean, see fig.26.
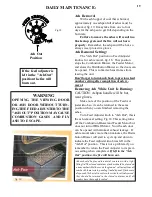
ATTENTION:
MAKE SURE COVER IS CLOSED AND
TIGHTENED BEFORE RELIGHTING
UNIT. UNIT WILL NOT OPERATE PROP-
ERLY WITH CLEAN OUT COVER LEAK-
AGE.
6. Check flue pipe for excess buildup of fly ash
and clean if necessary.
7. Clean glass thoroughly, use safety razor to
scrape surface of glass to remove sulfur buildup.
Then clean with standard window cleaning
fluid, fig.21.
8. Inspect all gaskets for damage and turn control
to "test", for motor test before relighting fire.
Ash Shield
Tabs
Fig 22
Fig 23
Latch
Blower Cover
Fig 24
EVERY 3 MONTHS:
Never
Block Air
Outlets
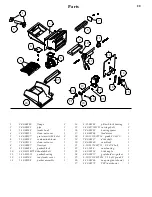
Summary of Contents for DVC500-C
Page 2: ...2 ...
Page 10: ...10 Installation Open ...
Page 12: ...12 Installation ...
Page 13: ...13 Installation ...
Page 16: ...16 ESP Control HopperLid Latch Ash Door Latch Handle GlassDoor Latch Handle Side Panel Latch ...
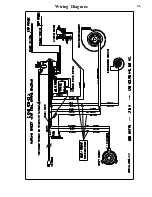
Page 26: ...26 Wiring Diagram ...


