7
OPERATION
room temperature.
15. Set the High-Low Regulator to desired setting:
Turn fully counterclockwise for High and fully
clockwise for Low.
16. Press the rear burner switch to the “ON” or
“OFF” position as desired. This switch will
return to the center position after it is pressed.
This is normal as well as a faint click when
pressed. The main burner must be lit before the
rear burner will light. The rear burner may be
turned “ON” or “OFF” at any time.
NOTE: An odor, resulting from the initial heating
of new materials in your heater, is not unusual
during the first fire, and in most cases will
disappear after an hour or two.
HOW TO TURN OFF THE FIRE
1. If using optional thermostat, set thermostat to
the lowest position.
2. Turn off the electric power to the appliance.
3. Turn the ON-OFF/THERMOSTAT switch to
the OFF position.
4. Push in the gas control knob slightly and turn it
clockwise to “OFF.”
NOTE: The knob cannot be turned from “PILOT”
to “OFF” unless it is pushed in slightly. Do not
force it.
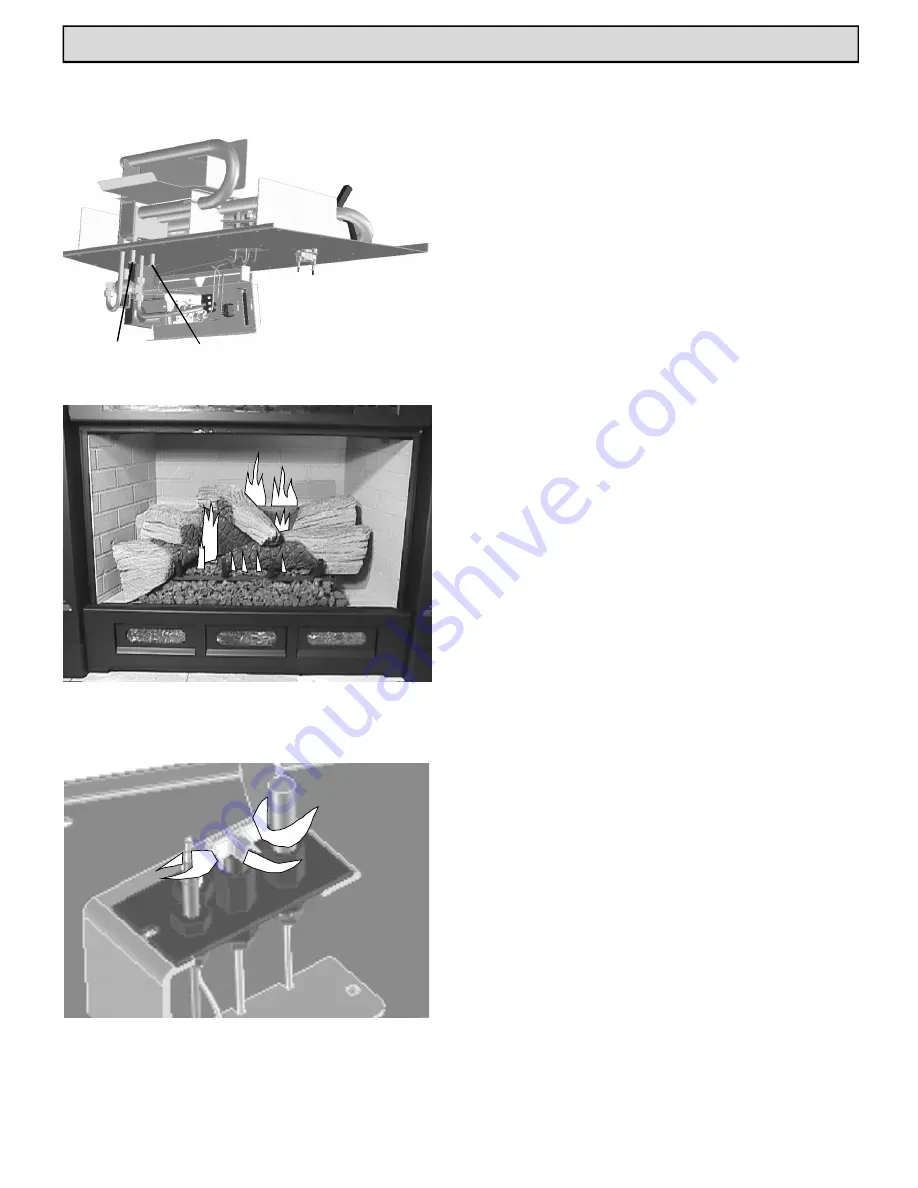
FLAME HEIGHT ADJUSTMENT
There are separate adjusters for the front and
rear burners. These adjusters can be accessed by
reaching to the left side of the control panel and to
the back of the unit. Turn the adjusters counterclock-
wise (up) to increase flame height and clockwise
(down) to decrease. See above left. Adjusting the
flames too high will cause them to have black tips
and cause sooting. Sooting can cause the glass to get
dirty.
Pilot Flames
If pilot flames are less than shown at left, use
pilot adjuster shown on page 36, to increase flames,
Warning: The unit and adjuster may be hot. Wear
gloves and arm protection if making adjustments
while in operation
Rear Burner
Adjuster
Front Burner
Adjuster
Bottom rear view of burner module.
Normal Flame pattern. Note: Flames will vary in height and
position depending on the placement and the amount of
ember wool.


