background image

Summary of Contents for P68

Page 1: ......

Page 2: ......

Page 3: ...ay showing liveworking data for easiertroubleshooting The platinum combination is Harman s Patented Feeder Burn Pot and ESP Control which have been developed to their highest state These featureswork together to allow amazing heatoutput with different fuel quality ash content and moisture We suggest that our pellet he products be installed ands rvieed by profeselonals whoarecer Hed hthe U S by the...

Page 4: ...ile home pot Makesure that the flame guide isfully seated on the vertical sides of the burn pot and that the back of the guide rests against the body of the I stove RearCover INSTALL EXHAUST VENT AT CLEARANCES Panels SPECIFIED BY THE MANUFACTURER Most pellet pipes require a minimum of 3 of clearance to combustible materials DO NOT INSTALLA FLUE DAMPER IN THE EXHAUST VENTING SYSTEM OF THlS UNIT DO ...

Page 5: ...formation on the draft test procedure re fer to Page 19 Mobile Home Installation When installing this unit in a mobile home sev eral requirements must be followed 1 The unit must be bolted to the floor This can be done with 114 lag screws through the 2 holes in the base plate 2 The unit must also be connected to outside air See page 8 3 Floor protection and clearances must be fol lowed as shown 4 ...

Page 6: ...90 cm above a gas meterlregulator assembly when measuredfrom the horizontalcenter lineof the regu 1ator I must be a minimum of 6 feet l J The clearance to a non mechanical air sup ply inletto the building or the combustion air inletto any other appliance must be a minimum of 48 l K The clearance to a mechanical air supply inlet must be a minimum of 10 feet l with outside air installed 6 feet L The...

Page 7: ... be increased from 3 to 4 because a larger pipe causes less flow resistance Be sure to use ap proved pejlet vent pipe wall and ceiling pass through fittingsto go through combustiblewalls and ceilings The use of a starting collar is not al ways necessary The first piece of pipe should be fastened securely with at least 2 fasteners to the flue collar of the stove If a starting collar is used to atta...

Page 8: ...n small very tight houses To installoutsideair use2 318 I D non com bustibleflex pipe There isa break awayholeon the rear panelof the P68stovewhich must be removed before connecting the flex pipe The pipe should be run outside and terminate 3 feet or moreto the side or below the vent pipe outlet Never terminate the outsideair abovethe vent pipeoutlet The maximum length run of this pipe is 15 feet ...

Page 9: ...esexcellentventing for normaloperationbutrequiresthe stoveto beinstalled farther from the wall The vertical portionof the vent should be three to five feet high and at least three inches from a combustible wall This vertical sec tion will provide naturaldraft in the event of a power failure Ifthe stove is installedbelowgradebesurethe vent termination is at least 18 above grade The outlet must also...

Page 10: ...to an existing fireplace chimney US only This methodprovidesexcellent ventingfor nor mal operation This method also provides natural draft in the event of a power failure If the chimney condition is questionable you may want to install a liner as in method 6 The chimney should be inspected and cleaned beforeinstallingyour stove Ifyou discoverthat the chimneydoes not havea claytile liner or hascrac...

Page 11: ...tings Seal pipejoints with silicone or aluminum tape in addition to the sealing system used by the manufacturer Pipe size should be in creased to 4 using this method Fig 12 7 Installing into an existing chimney US and Canada This methodprovidesexcellentventingfor nor mal operation This method also provides natural draft inthe event of a powerfailure In Canada and some places in the US it is re qui...

Page 12: ...e air be installedwith this venting configurationto reduce smoke and creosote smell inthe room in the event of powerfailure 8 Installing through the ceiling Through the ceiling vent follow PLvent Fig 15 manufacturers recommendations when using wall I and ceilingpassthrough Note Do notplacejoints within wall pass throughs I 1 12 min wall to outlet clearance to any ustible material Fig 6 12 P68Pelle...

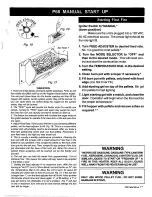
Page 13: ...r toggle switch When the toggle switch is in the Auto positionthe igniterlocatedinsidethe burnpot is readv POWER 0 STATUS 0 DISTRIBUTION 0 BLOWER COMBUSTION 0 BLOWER I FEED 0 MOTOR IGNITER IGNITER 0 MANUAL to adomatically 17ghtthe fire when required When the lRoom Temperature Mode This setting see above wil toggle switch set to the Manual positionthe stove can be lit manuallywith either a gel or a...

Page 14: ...viewing fire without blowingextra heat intothe room Duringoperation with the temperature dial set at 7 5 or less the distributionfan will not operate A 5 on the temperature dial and a 5 on the feed adjuster is approximately 80 output It is not necessary to oper ate the distribution blower below this point Therefore the control allows a higher burn rate a larger viewing fire without an excess of ho...

Page 15: ... feed adjuster to 4 Fig 17 This is a conservative temperature number and will probably need to be increased After you know a feed rate setting that works well use that setting Remember if your feed rate is too high you may waste fuel 8 Turn Mode Selector to Room Temperature or 5 his is usually a weekly maintenance procedure cleaning the StoveTemperature burn pot with the scraper with a small amoun...

Page 16: ...mpera ture Mode and Manual Room Temperature Mode is that the fire will not go out as the room temperature goes abovethe controlboardsetting The unitcanonly go to low burn and will remain there until it runs out of fuel or until more heat is needed and the feed rate in creases Feed rate adjustments and dial settings are the sameas AUTO settings The blowerwill shutoff completelyifthetemperatureonthe...

Page 17: ...rom approximately 1 ton of premium fuel This means the ashes will only need to be emptied a few times a year 7 Setting the feed adjuster for maximum burn With the unit bumingin AUTO turn to StoveModenandput thefan on H Set the Temperature Dial to 7 Allow the unit to burn for about 30 minutes and check ash on front of burn pot Fig 21 If the ash line is larger than l turn thefeed adjuster from 3 to ...

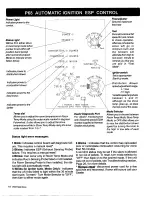
Page 18: ...lso allowsyou Fahrenheit It also allowsyou to adjust the stove monitorsupplied toH a n to vary the distributionblower temperature whilein Stove TempMode using theinner Dealersexclusively speed by turning the knob to scale marked from 1 to 7 the high or low side of each mode Status light error messages 1 Blink lndicatescontrol board self diagnostic fail 6 Blinks lndicatesthat the control has calcul...

Page 19: ...If the unit is adjusted too high only effiency is lost Ifthe unit is adjustedtoo low the low draft pressureswitch will not allow the feed motoror the igniterto operate Draft Meter bolt holelocation On a P6 the draft tesf hole is under the leff rear 4 corner of the 1 firebox 1 Fig 23 A simple draft test should be performed after completingtheflue pipe installation To recordthe results for future re...

Page 20: ... nearthe distributionfan workswell because the sensor monitors the room air being drawn intothe distributionfan NOTE Distances of more than 25 feet from the unit or in another room are not recommended The room sensor is essential for the P68 s excel lent efficiency NOTE It is recommended that the room sensor be installed even if only installed on the rear of the unit as a returnair sensor Room 5 1...

Page 21: ... latch the door by pushingin on latch handle Cleaning The stove should be cleaned after burning approximately 1 ton of pellets 50 bags The cleanerthe stovethe moreefficient itwill be You will burnlesspelletsand heatoutputwillbegreater Mote Higherash content pelletswill require HeatExchangerFins more frequent cleanings 1 Shut down stove and disconnect powercord to insurethat all motors are stopped ...

Page 22: ...cover in place Burn pot coverpartly o v e d Burn clean out is closed pot clean outis open 9 Use a brush to clean the Rue being careful not to damage the ESP probe see Fig 30 The flue goes straight through into the vent pipe Fig 27 therefore the vent pipe can also be cleaned to some extent through the flue outlet 10 Reinstallblowercover and relatch 11 Slide ash pan into stove and latchthe door Fig ...

Page 23: ...he igniter element Fiaure 36 The igniter ismadeto be removablefor service by insulated malelfemale wire connectors These connections between the hot leads the wires inside the burn pot and the cold leads the wires from the control board are always pulled to the inside rear of the feeder body Not coiled inside the burn pot It isvery importantthat these connections are to the inside rear of the feed...

Page 24: ... boltsandtestfor proper seal as described above Once the proper seal is attained openthe door andfinish tighteningthe bolts If proper adjustment cannot be accomplished then a new gasket should be installed Over a period of time the gasket will wear out and a new gasket will haveto be installed To install a new gasket you must removethe old gasket After the gasket is removedthe gasket channel shoul...

Page 25: ...of this must be performed To clean out fines 1 Remove right rear cover panel see rear cover installation on page4 2 Removewing nutandfeeder cover onthe rightside of the feeder 3 Use a vacuum cleaner to remove all fines 4 Reinstallfeed cover wing nut and right rear cover panel 5 16 Hex Head Fig 39 P68PelletStove 25 ...

Page 26: ...ONE OUT 1 No pellets in hopper 2 Draft setting is too low 3 Something is restrictingfuel flow 4 Feed motor or combustion blower has failed 5 Power failure or blownfuse SMOKE IS VISIBLE COMING OUT OF VENT 1 Air fuel ratio is too rich A Feed ratetoo high 6 Draft too low caused by a gasket leak LOW HEAT OUTPUT 1 Feed ratetoo low 2 Draft too low because of gasket leak 3 Poor quality or damp pellets 4 ...

Page 27: ... FEEDER GASKET 3 44 24721 8 3 50 00365 BEARING RETAINER 2 00 04035 PRY OUT PLUG 3 31 03065 AUGER MTNG BOLT 2 3 30 13 1812513 CAM TO AUGER BOLT 3 30 1252007514 CAM BEARING BOLT PUSHER ARM 1 10 06719 3 30 1371612513 3 30 8131 181 RUBBER GROMMET 3 31 2761 MOTOR MOUNT 2 no 01534 GEARMOTOR Weight Blower Feed Rate Hopper Capacity Fuel Flue Size OutsideAir Size Fuse Rating Specifications 290 Ibs 135 cfm ...

Page 28: ...veTileIGreySlate Options The hopperextensionallowsyouto putmorepellet The decorative tile and slate measure 11 938 x fuel in the hopper and extends burn time on one 5 938 The tilelslate trim is necessaryto hold the load of pellets The hopper extension adds 60 tilelslate in place on the stove There are 10 pounds to the existing 76 pound hopper capacity decorative tile choices and 4 decorative slate...

Page 29: ...PROBE n OL 0 0 OW TWISTED WIRE w W m m 3 MALE FEMALE CONNECTIONS E WHITE WlRE ON COMMON TERM co N O CONTACTS BROWN 1 EMPTY 7 7 YELLOW 8 W COMBUSTION MOTOR DISTRIBUTION BLOWER RED 10 1 MOTOR WlRE MALE FEMALE CONNECTION BLACK 1 1 3 480 WATTS 4 0 A 1 2 0 VOLTS A C 6 0 HZ PART NO 3 89 06504 ...

Page 30: ...ollar 2 O tions HopperExtensionAssembly OutsideAir Assembly 3 Flex Pipe Log Set Side Heat Shields FloorProtector 25 x 33 Air Grill Door Frame wlash lip tilelslate trim Tile Pack 1 piece DecorativeSlate 1 piece 04800248 1 1045800 1 1006723 20046468 1 20006468 2 200 773850 300 674069 3 2048727 3 20 00744 3 2000906 3 2005374 3 208301 3 20602221 3 2148639 3 21 22647 331 199110 331 90131101 3 20 29685 ...

Page 31: ......

Page 32: ......

Reviews: