


Harman TL300 17
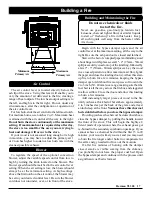
building a Fire
Begin with the bypass damper open, and the air
control lever at the maximum setting, all the way to the
right. Be sure the ash pan door is closed and latched.
Start with a bed of crumpled paper and kindling sized
about finger width; place several 1" - 2" (25mm - 50mm)
split pieces of dry wood on top of the kindling, followed by
a few 2" - 3" (50 mm - 80 mm) split pieces. Lay the wood
in a crossed pattern to allow maximum air flow. Ignite
the paper and close the loading door(s). Allow this start-
up fire to burn for a few minutes, keeping the bypass
damper open. Add about five more pieces of wood in the
2 to 3 inch (50 - 80mm) size range, making sure that the
fuel bed is all the way across the firebox and staggered
to allow airflow. Close the door and allow this loading
to burn a few minutes.
Add increasingly larger pieces of wood to the fire
until you have a thick bed of hot embers, approximately
2 to 3 inches deep at the back of the grate and at least
an inch deep at the front.
You must have this charcoal
bed established before you close the bypass damper.
Providing you have the charcoal bed described above,
close the bypass damper by pulling the handle toward
the front of the stove. This will begin the highly ef-
ficient mode of operation where the exhaust gases get
re-burned in the secondary combustion package. If you
cannot achieve a charcoal bed within the first 15 to 20
minutes, your wood is likely too wet, and you may need
to burn the fire longer and/or hotter to compensate for
the extra energy needed to drive out the moisture.
If, after five minutes of burning with the damper
closed, smoke is visible coming from the chimney,
you probably do not have the proper coal bed. Open
the bypass damper and continue with the process until
a significant coal bed is formed.
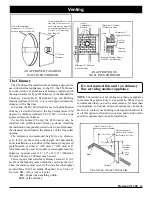
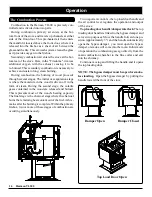
To regulate the speed of the optional convection
blower, adjust the variable speed control from low to
high by turning the knob located on the blower. The
blower speed should be matched to the air control lever
setting. When the air setting is low, the blower should
always be at the minimum setting. At high settings,
above the first notch on the air control, the blower may
be set to your desired control level. Be sure the blower
cord does not run under, over, or in front of the stove.
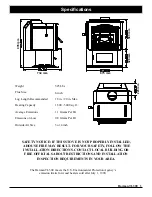
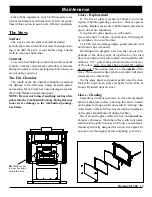
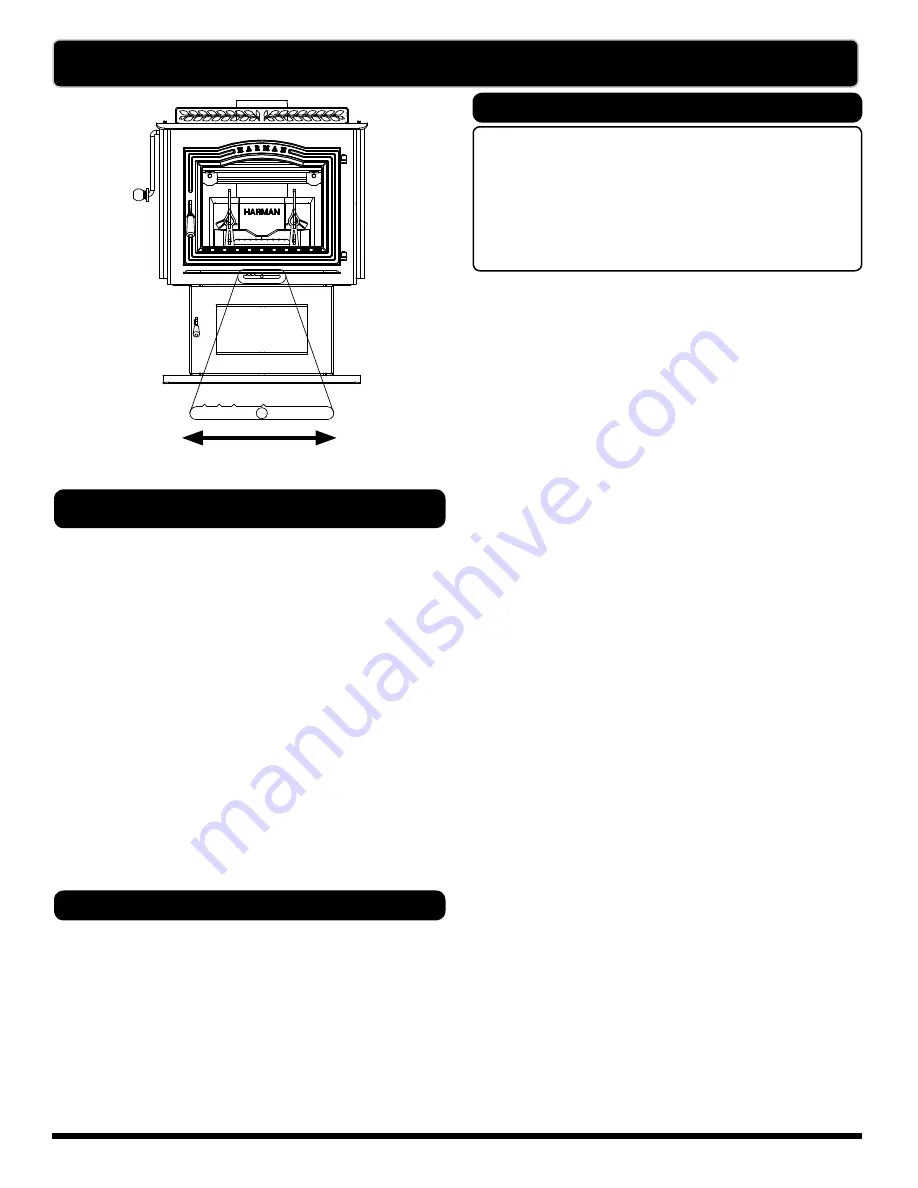
The air control lever is located directly below the
ash lip of the stove. Using this lever will enable you to
vary the amount of air delivered to the fire, creating a
range of heat outputs. The low heat output setting is to
the left, and high is to the far right. Do not, under any
circumstances, alter the configuration or operation of
the air control lever.
For low burn, slide the air control to the leftmost notch.
For medium burns, use notches 2 or 3. Maximum heat
is attained with the air control all the way to the right.
Do not burn the stove continuously at the maximum
setting. If maximum heat is required day after day,
the stove is too small for the area you are trying to
heat and damage will occur to the stove.
If your wood is not seasoned long enough or is high
in moisture, you may have to adjust the primary air 1
or 2 notches higher to sustain a low burn rate with the
cleanest possible exhaust.
Building and Maintaining the Fire
Do not use chemicals or fluids
to start the fire.
Never use gasoline, gasoline-type lantern fuel,
kerosene, charcoal lighter fluid, or similar liquids
to start or “freshen up” a fire in this heater. Keep
all such liquids well away from the heater while
it is in use.
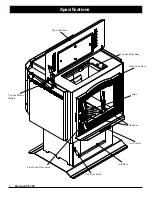
Blower
Air Control
Minimum
Primary Air
Maximum
Primary Air
Summary of Contents for TL300
Page 2: ...2 Harman TL300 ...
Page 26: ...26 Harman TL300 This page intentionally left blank ...
Page 27: ......
Page 28: ......
Page 29: ...Harman TL300 29 Notes ...
Page 30: ...30 Harman TL300 Notes ...
Page 31: ......