Installation
18
Instruction Manual - Massio ControlPads and Keypads
Installation
Overview
This chapter describes installing Massio ControlPads and Keypads. The MCP-106 and MKP-106 mount onto standard 1 gang US,
UK, or EU back boxes. The MCP-108 and MKP-108 mount onto standard 2 gang US, UK, or EU back boxes.
NOTE:
Before touching the device, discharge the static electricity from your body by touching a grounded metal object.
NOTE:
It is best to install button labels before mounting the device. Doing so keeps you from disassembling the ControlPad after
mounting it. For instructions on installing button labels, see the Button Labeling section on page 20.
Mounting Procedures
AMX recommends mounting each type of ControlPad or Keypad in standard a conduit box per NEC specs section 370. You can
mount the MCP-108 and MKP-108 to a podium using the provided metal mounting bracket.
NOTE:
Before installing and mounting the device, you should test it to see that it can receive power. See the Applying Power section
on page 15 for more information.
Wallbox Mounting
Perform these steps to mount the device into a back box:
1.
Install the back box into the surface of the desired location for the device. Be sure to thread any appropriate wiring through
the back box.
IMPORTANT:
Leave 3/8" (9.52mm) of space between the top of the mounting bracket and any overhanging or otherwise obstructing
surface. The extra space is required for attaching the device frame to the mounting bracket.
2.
Once the back box is installed and secured, secure the metal mounting bracket to the back box using the provided screws.
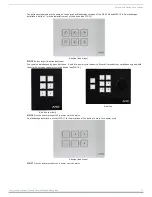
FIG. 18 displays the location of the screw holes for the metal mounting brackets for each type of Massio device.
FIG. 18
Location of screw holes on metal mounting brackets.
3.
Peel the plastic covering off of the insulator on the rear panel of the device. You can discard the plastic covering after removing
it.
4.
Make all necessary connections to the ports on the rear panel of the ControlPad. Be sure to connect category cable to the LAN
port to supply power to the device. See the
section on page 15 for more information.
5.
Attach the device frame to the mounting bracket by hooking the top of the device frame onto the extended lip at the top of the
mounting bracket.
MCP-106
MCP-108


