background image

12

CPi2000 Cinema Processor 

User Guide

controls, set the global output volume, and navigate through menu screens or edit parameters. 

• 

To unlock front panel controls (only operatable when the CPi2000 is controlled through front panel controls 

other than its GUI software)

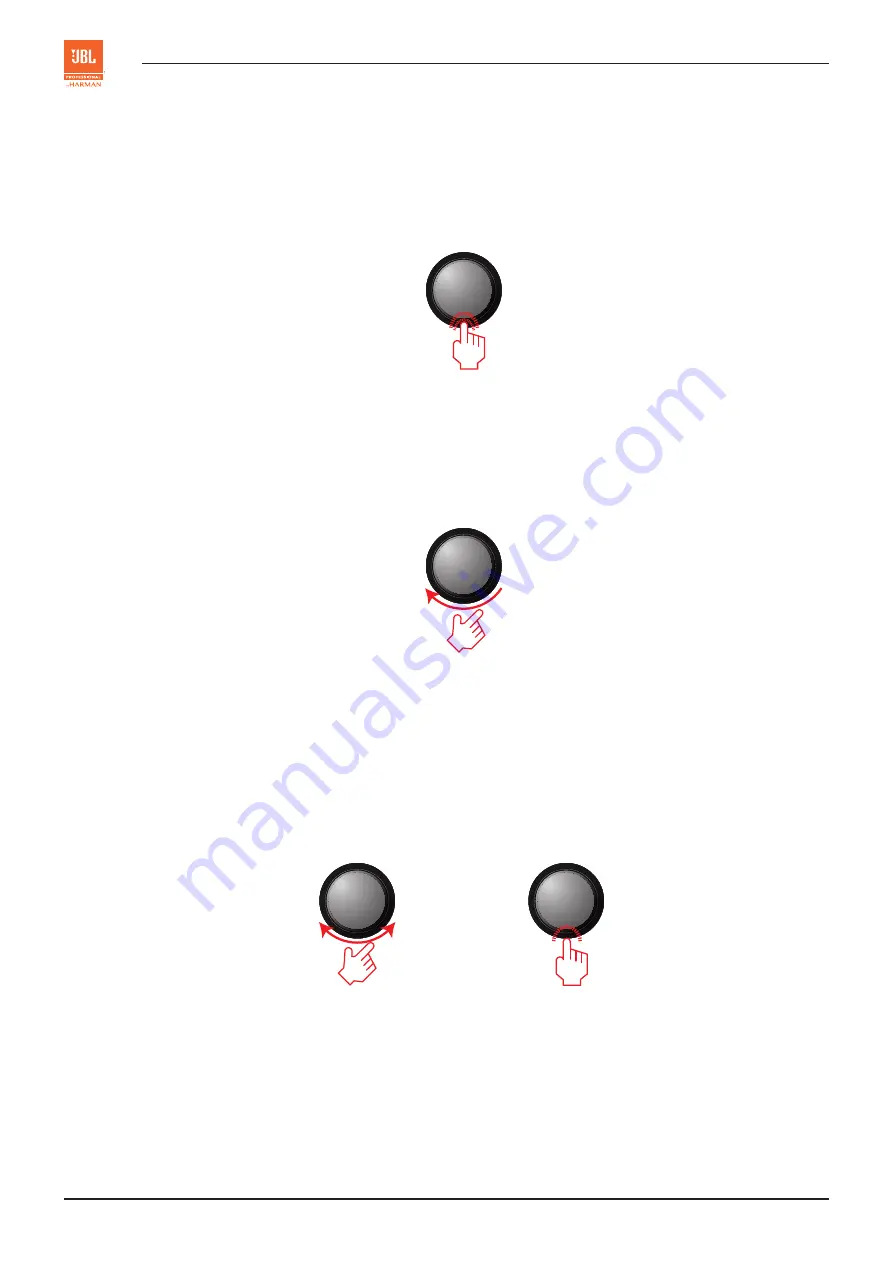
1) Long press the Encoder for 2 seconds.  

Sel

Menu

Long press 2 seconds to unlock.

• 

To set the global output volume:

1) Ensure the LCD display is showing the home screen.

2) Rotate the Encoder clockwise to increase the volume or counter-clockwise to decrease the volume.  

Sel

Rotate clockwise to increase the volume.

• 

To navigate through menus or parameters under the Menu button (2 @ front panel):

1) Press the Menu button (2 @ front panel) to navigate the LCD screen to the Menu section. 

2) Rotate the Encoder to select the sub-menu which is going to be checked or edited. 

3) Short press the Encoder to navigate to next level menues. Or short press to confirm the any parameter 

editing. 

CPi2000  

Cinema Processor


Sel

Rs

LFE

Bsl

Bsr


Vol


7.0

Sel

Menu

Rotate to navigate among 

menus or parameters. 

Short press to confirm or navi-

gate to next level menues.

Summary of Contents for JBL CPi2000

Page 1: ...HALL 1 CPi2000 Cinema Processor User Guide...

Page 2: ...onal Contacts Contact the JBL Professional Distributor in your area A complete list of JBL Professional international distributors is available at www jblpro com Customer Service 400 166 7806 Monday F...

Page 3: ...ABLE OF CONTENTS SAFETY INSTRUCTIONS 4 WARRANTY INFORMATION 6 INTRODUCTION 7 PANEL OVERVIEW 8 FRONT PANEL 8 REAR PANEL 13 INSTALLATION 15 MOUNTING 15 QUICK CONNECTION 16 RESETTING 18 MENU STRUCTURE 19...

Page 4: ...stall near any heat sources such as radiators heat resistors stoves or other apparatus including amplifiers that produce heat Do not block any ventilation openings Install in accordance with the manuf...

Page 5: ...ate JBL dealer The socket outlet shall be installed near the equipment and shall be easily accessible THIS UNIT MUST BE EARTHED Under no circumstances should the mains earth be disconnected from the m...

Page 6: ...sure to save the original shipping cartons because a charge will be made if replacement cartons are requested Payment of shipping charges is discussed in the next section of this warranty How To Obtai...

Page 7: ...put volume Its specially designed GUI software helps users set up a cinema audio system in an easy and effortless way CPi2000 provides a 1 3 octave GEQ for room tuning via the GUI software and is buil...

Page 8: ...dicates the CPi2000 s USB Connector 6 rear panel is short circuited appears if one of the following scenario occurs The CPi2000 is controlled through the front panel controls which are left idle for 2...

Page 9: ...een will be backed in white For instance will turn to when Mic Input is selected using the Mic Input button INPUT LEVEL Screen OUTPUT LEVEL The OUTPUT LEVEL screen is used to monitor the global output...

Page 10: ...cted by scrolling the information through the screen FAULT DETECTION Screen USB The USB screen is used to load a preset from or save a preset to a USB device connected to the USB connector 6 rear pane...

Page 11: ...nate to indicate the selection 6 Music Non Sync Input Button By pressing the Music Non Sync Input Button input source from the Music Non Sync Input 3 rear panel will be used and the button will illumi...

Page 12: ...oder clockwise to increase the volume or counter clockwise to decrease the volume Sel Rotate clockwise to increase the volume To navigate through menus or parameters under the Menu button 2 front pane...

Page 13: ...ntom power is available and can be switched on or off through the GUI software provided This connector normally connects to a RTA microphone for room EQ tuning By pressing the Mic Input button 4 front...

Page 14: ...with activity LEDs and provides an interface for TMS Theatre Management System communication This port can also be used for GUI software operation or firmware upgrades 9 Analog Output 1 The 8 channel...

Page 15: ...rack Before mounting or installing the unit please disconnect its power cable from power supply completely To rack mount the unit fix its front panel to the rack using the screws provided See Figure R...

Page 16: ...first To start a quick connection of your theatre audio system please refer to Figure Quick Connection Guide 1 Connect input devices e g microphone CD DVD player cinema server control PC etc 2 Connect...

Page 17: ...SIGNAL CH 2 CH 1 XLC2500 JBL 3252 XLC2500 FAULT CLIP SIGNAL CH 2 CH 1 XLC2800 XLC2500 XLC2500 FAULT CLIP SIGNAL CH 2 CH 1 JBL 9400 JBL 9400 Quick Connection Guide NOTE Ensure all the devices are powe...

Page 18: ...ory settings 1 Press down both the Mic Input button 4 front panel and the Mute button 8 front panel 2 Switch on the Power button 7 front panel 3 Continue to hold the Mic Input button and the Mute butt...

Page 19: ...FAULT DETECTION RETURN TO PANEL Firmware Version INPUT LEVEL Analog Input Mic Input Digital Input Music Input IP Address DHCP Static Subnet Mask Gateway IP ADDRESS Eject Return Load Save USB Mute Unm...

Page 20: ...ced use connect Pin 1 to 3 1 Ground Screen 2 Hot 3 Cold 3 Digital Input 13 1 25 14 Female HD 25 Connector Connection 1 AES common 2 CH 1 2 3 CH 3 4 4 AES common 5 CH 5 6 6 CH 7 8 7 AES common 8 No con...

Page 21: ...3 BLS 4 GND 5 C 6 BRS 7 GND 8 R 9 GND 10 LS 11 RS 12 SW 13 GND 14 L 15 GND 16 BLS 17 C 18 GND 19 BRS 20 R 21 GND 22 GND 23 LS 24 RS 25 SW 5 Analog Output 2 10 x HD 15 Connectors 1 6 10 11 15 5 Female...

Page 22: ...l CH2 Null CENTER 1 CH1 Center MF CH1 Center LF CH1 Center CH2 Center HF CH2 Center HF CH2 Null CENTER 2 CH1 Center LF CH1 Null CH1 Null CH2 Null CH2 Null CH2 Null RIGHT 1 CH1 Right MF CH1 Right LF CH...

Page 23: ...e 25K Ohms Max input level 14 2 dBu OUTPUT Analog Output 1 Redundant Output Connector Male HD 25 Balanced or Unbalanced Impedance 30 Ohms Balanced or 15 Ohms Unbalanced Max level 14 2 dBu Frequency re...

Page 24: ...CPi2000 Cinema Processor User Guide SZ 27 11 2017...

Page 25: ...CPi2000 HALL 1...

Page 26: ...2 CPi2000 JBL Professional JBL Professional www jblpro com 400 166 7806 9 00am 6 00pm www jblpro com www jblpro com registration...

Page 27: ...3 CPi2000 4 6 7 8 8 13 15 15 16 18 19 20 23...

Page 28: ...4 CPi2000 JBL JBL JBL JBL...

Page 29: ...5 CPi2000 Pb Hg Cd Cr VI PBB PBDE O O O O O O O O O O O O O O O O O O X O O O O O O O O O O O O SJT 11363 2014 X SJT 11363 2014 SJT11364 2014...

Page 30: ...6 CPi2000 JBL CPi2000 3 JBL JBL A JBL JBL JBL JBL B JBL JBL JBL JBL JBL JBL 400 166 7806 JBL JBL JBL JBL...

Page 31: ...7 CPi2000 CPi2000 JBL CPi2000 CPi2000 CD DVD RTA CPi2000 10 HD 15 25 CPi2000 LCD CPi2000 1 3 CPi2000 CROWN JBL RJ45 TMS 8 7 1 CROWN JBL 1 3 2U LCD 10 25 USB TMS 1 x CPi2000 1 x 250VAC 10A 1 x...

Page 32: ...8 CPi2000 1 2 3 4 5 6 7 8 9 1 LCD LCD 320x160 LCD IP LCD CPi2000 1 CPi2000 10 CPi2000 USB 6 CPi2000 2 9 2 CPi2000 2 MENU LCD 1 9 INPUT LEVEL 5 3...

Page 33: ...9 CPi2000 4 5 2 4 3 6 OUTPUT LEVEL CPi2000 IP IP ADDRESS IP IP CPi2000 IP IP 192 168 1 102 255 255 255 0 192 168 1 101 MAC IP 5 1 7 1 5 1 7 1 INPUT 5 1 7 1 5 1 5 1 BLS BRS LS RS...

Page 34: ...10 CPi2000 5 1 7 1 FAULT DETECTION USB USB USB USB 6 USB CPi2000 USB RETURN TO PANEL CPi2000 LCD 9...

Page 35: ...11 CPi2000 3 5 4 2 5 4 6 3 7 8 9 CPi2000 1 2 Sel Menu 2...

Page 36: ...12 CPi2000 1 LCD 2 Sel 1 2 LCD 2 3 CPi2000 Cinema Processor Sel Rs LFE Bsl Bsr Vol 7 0 Sel Menu...

Page 37: ...0 1 2 3 4 5 6 8 9 11 7 10 1 100 240VAC 50 60Hz 20W 2 XLR RTA dB 40 dB 12V 4 3 RCA CD DVD 6 4 DIGITAL INPUT HD 25 7 1 PCM 96 48 44 1 32kHz 16 20 24 Dolby Digital 5 ANALOG INPUT HD 25 8 300mVRMS 6 USB A...

Page 38: ...0 7 REDUNDANT OUTPUT HD 25 ANALOG INPUT 5 8 LAN RJ45 LED TMS Theatre Management System 9 1 ANALOG OUTPUT 1 1 HD 25 8 10 BACKUP DC 4 XLR Cat No 994 12V 2A 11 2 ANALOG OUTPUT 2 2 10 HD 15 1 2 1 2 1 1 2...

Page 39: ...15 CPi2000 CPi2000 2U 1U 231 88 482 mm CPi2000 1U 1U...

Page 40: ...16 CPi2000 1 CD DVD 2 3 4 CPi2000 LCD...

Page 41: ...0 JBL 3252 XLC2500 FAULT CLIP SIGNAL CH 2 CH 1 XLC2500 JBL 3252 XLC2500 FAULT CLIP SIGNAL CH 2 CH 1 XLC2500 JBL 3252 XLC2500 FAULT CLIP SIGNAL CH 2 CH 1 XLC2800 XLC2500 XLC2500 FAULT CLIP SIGNAL CH 2...

Page 42: ...18 CPi2000 CPi2000 IP CPi2000 1 4 8 2 7 3 10 LCD RESTORING FACTORY RESETTINGS NOW 4 20 CPi2000 5 LCD...

Page 43: ...19 CPi2000 IP DHCP IP USB 5 1 7 1 5 1 7 1...

Page 44: ...2 CH 1 2 3 CH 3 4 4 AES common 5 CH 5 6 6 CH 7 8 7 AES common 8 No connection 9 AES common 10 No connection 11 No connection 12 AES common 13 No connection 14 CH 1 2 15 AES common 16 CH 3 4 17 CH 5 6...

Page 45: ...GND 10 LS 11 RS 12 SW 13 GND 14 L 15 GND 16 BLS 17 C 18 GND 19 BRS 20 R 21 GND 22 GND 23 LS 24 RS 25 SW 5 2 ANALOG OUTPUT 2 10 x HD 15 1 6 10 11 15 5 HD 15 1 CH 1 Output 2 Null 3 Null 4 CH 1 Amp Stat...

Page 46: ...Center HF CH2 Center HF CH2 Null CENTER 2 CH1 Center LF CH1 Null CH1 Null CH2 Null CH2 Null CH2 Null RIGHT 1 CH1 Right MF CH1 Right LF CH1 Null CH2 Right HF CH2 Right HF CH2 Null LS RS 1 CH1 LS CH1 LS...

Page 47: ...40 dB E I N 113dB 20K Hz RCA 25K Ohms 14 2 dBu 1 HD 25 30 Ohms 15 Ohms 14 2 dBu 20 Hz 20K Hz 1K Hz 1dB 0 01 20 Hz 20K Hz 102 dB 2 10 x HD 15 30 Ohms 15 Ohms 14 2 dBu 20 Hz 20K Hz 1K Hz 1dB 0 01 20 Hz...

Page 48: ...CPi2000 SZ 27 11 2017...

Reviews: