10
seTUP InsTRUCTIons
Setup Instructions
When first powered on, here are the factory set-
tings of the HK 990 stereo integrated amplifier:
source listen: CD
•
source record: CD
•
Processor input: analog unbalanced
•
CD input: analog unbalanced
•
Tuner input: analog unbalanced
•
aux input: analog unbalanced
•
CDR input: digital coaxial 1
•
Tape input: analog unbalanced
•
TV input: digital coaxial 2
•
Phono (turntable) input: analog MM (moving
•
magnet)
HK 990 – Setup
Speaker 1 & 2 (Front panel only)
When pressing the buttons speaker 1 or speaker
2, you will first see the current status setting,
then pressing one more time within 5s on
speaker 1 and/or speaker 2 will change the set-
tings on or off. Up to two speaker pairs can be
connected and amplified at the same time. noTe
the minimum load warning above.
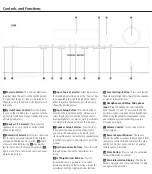
Source < and > (Front panel only)
The source buttons can be used in 2 ways:
Directly, giving access to the Playback source,
•
switched with immediate effect.
after having entered the Record out mode to
•
select the source to be routed to the Record
path.
Record Out (Front panel only)
When pressing the Record out button, you will
have access to the selection of the source you
would like to get directed to the Record outputs.
scroll through the list of record sources with the
< and > buttons: CD, TUneR, aUX, CD-R, TaPe,
TV and PHono until the desired source appears
in the display.
Whether the source is analog or Digital, the
HK 990 will deliver the Record signal in both
domains simultaneously through both the ana-
log (CD-R and Tape) and the Digital (Coaxial)
outputs. This means that any analog Input can
be recorded digitally without addition of an
external analog/Digital converter.
Input Setup
(Front panel and remote control)
each Input of the HK 990 can be configured to
match the system and your personal taste. In the
following you can read a description of the Input
setup settings in detail, followed by the options
available for each Input. Pressing the Input
setup button on the front panel or the remote
control enters and exits the Input setup menu.
note that the selection and navigation through
the setup menus is made using the arrow but-
tons Up, Down, left and Right and the enTeR
button.
Input Type
each Input can be configured to the following
connections on the rear panel:
CD
• Unbalanced Analog
• Balanced Analog
• Coaxial 1
• Coaxial 2
• Optical 1
• Optical 2
• HRS-Link
Digital
TUNER
• Unbalanced Analog
• Coaxial 1
• Coaxial 2
• Optical 1
• Optical 2
Digital
PHONO
• Moving Magnet Analog
• Moving Coil Analog
TV
• Unbalanced Analog
• Coaxial 1
• Coaxial 2
• Optical 1
• Optical 2
Digital
AUX
• Unbalanced Analog
• Coaxial 1
• Coaxial 2
• Optical 1
• Optical 2
Digital
CDR
• Unbalanced Analog
• Coaxial 1
• Coaxial 2
• Optical 1
• Optical 2
Digital
TAPE
• Unbalanced Analog
• Coaxial 1
• Coaxial 2
• Optical 1
• Optical 2
Digital
PROCESSOR • Unbalanced Analog
The physical rear panel connection that you have
associated with each Input in the Input setup
Procedure also determines the recording signal
source when you select that device in the Record
out menu.
Audio mode
The HK 990 can handle analog as well as Digital
signals. It can process any Input in the Digital
Domain to equalize the signal and tailor the
sound to the loudspeakers and room acoustics,
once either the ezset / eQ or the Manual bass
Management has been set up (see below).
You choose the method and the processing
according to your preference within the Input
setup menu.
The five audio Modes are as follows:
Direct Path:
1.
selection of the Direct Path
is an analog-Input only option. It bypasses
all digital processing (aDC, DsP and DaC)
to reduce the signal path to an absolute
minimum, consisting of volume control only.
being an analog-only option, if you select an
Input to be associated with a Digital source,
the Direct Path setting is not available.
DSP Path:
2.
selecting the DsP Path opens
access to the Tone Control circuits. In this
mode, the analog signals are routed to the
a/D Converter, the Digital sound Processor
and D/a Converter path prior to Volume
adjustment.
EQ1 LF (Low Frequency correction):
3.
This
Mode should be selected once the ezset / eQ
setup has been carried out (see below). If
selected before the ezset / eQ setup, it will
simply provide the same result as the DsP
Path, being a flat response with access to
the Tone Controls. The eQ1 lf Mode is the
first Preset available after the ezset / eQ
Calibration has been carried out. This Preset
processes the subwoofer channels only, cor-
recting the acoustics of the room in the low
frequency range while keeping the response
curve of the main speakers unchanged.


