background image

Harman Oakwood

9

always wear gloves when 

operating the stove.

do not burn wet wood!

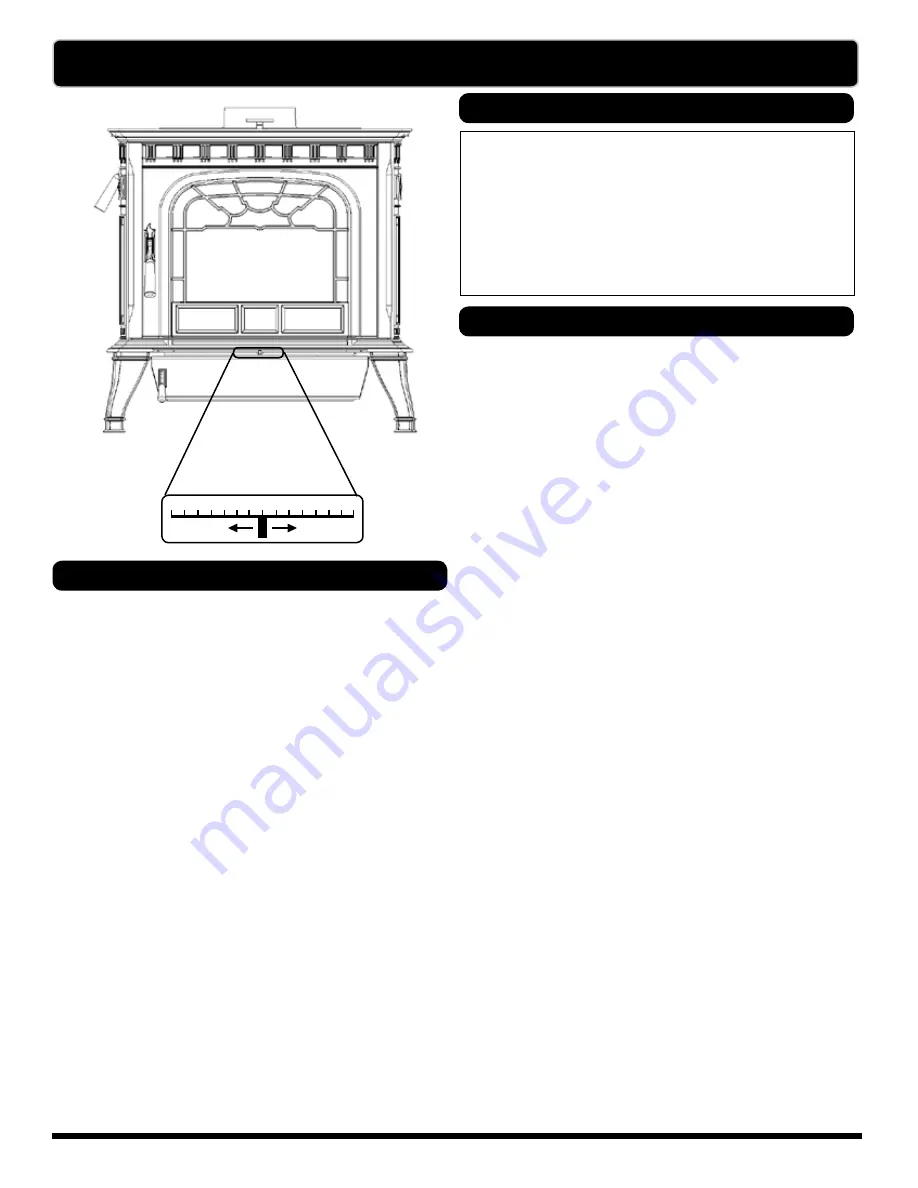
minimum 

primary air

maximum 
primary air

buIldIng a FIre

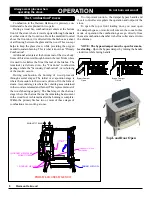
air Control

The air control lever is located directly below the ash 

lip of the stove. Sliding this lever allows you to vary the 

amount of air to the fire, creating a range of heat outputs. 

The lowest heat output setting is to the left, and the high-
est is to the right. The notches are provided as a reference 
for  your  comfortable  heat  settings.  Do  not,  under  any 

circumstances, alter the configuration or operation of 

the air control lever.

For  low  burn,  slide  the  air  control  to  the  left.  For 

medium burns, use notches 4,5 & 6. Maximum heat is 
attained with the air control all the way to the right. Do 
not burn the stove continuously at the maximum setting. 
If maximum heat is required day after day, the stove is 
too small for the area you are trying to heat.

If your wood is not seasoned long enough or is high 

in moisture content, you may need to adjust the primary 
air 1 or 2 notches higher to sustain a low burn rate with 
the cleanest possible exhaust.

Building and maintaining the Fire

Do not use chemicals or fluids

 to start the fire.

Never  use  gasoline,  gasoline-type  lantern  fuel, 

kerosene, charcoal lighter fluid, or similar liquids to 

start or “freshen up” a fire in this heater.  Keep all such 

liquids well away from the heater while it is in use.

Building a Fire 

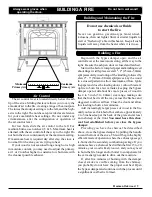
Begin  with  the  bypass  damper  open,  and  the  air 

control lever at the maximum setting, all the way to the 
right. Be sure the ash pan door is closed and latched.  

Start with a bed of crumpled paper and kindling sized 

about finger width; place several 1" - 2" (25mm - 50mm) 

split pieces of dry wood on top of the kindling, followed by 

a few 2" - 3" (50 mm - 80 mm) split pieces. Lay the wood 

in a crossed pattern to allow maximum air flow. Ignite 

the paper and close the loading door(s). Allow this start-

up fire to burn for a few minutes, keeping the bypass 

damper open. Add about five more pieces of wood in 

the 2 to 3 inch (50 - 80mm) size range, making sure 

that the fuel bed is all the way across the firebox and 

staggered to allow airflow. Close the door and allow 

this loading to burn a few minutes. 

Add increasingly larger pieces of wood to the fire 

until you have a thick bed of hot embers, approximately 
2 to 3 inches deep at the back of the grate and at least 
an inch deep at the front. 

You must have this char

-

coal bed established before you close the bypass 

damper.


Providing  you  have  the  charcoal  bed  described 

above, close the bypass damper by pulling the handle 
toward the front of the stove. This will begin the highly 

efficient mode of operation where the exhaust gases get 

re-burned in the secondary combustion package. If you 

cannot achieve a charcoal bed within the first 15 to 20 

minutes, your wood is likely too wet, and you may need 

to burn the fire longer and/or hotter to compensate for 

the extra energy needed to drive out the moisture. 

If, after five minutes of burning with the damper 

closed,  smoke  is  visible  coming  from  the  chimney, 
you probably do not have the proper coal bed. Open 
the bypass damper and continue with the process until 

a significant coal bed is formed. 

Summary of Contents for R11

Page 1: ...E IN THE U S AND CANADA The Oakwood is not approved for mobile home installation IF THIS HARMAN STOVE IS NOT PROPERLY INSTALLED A HOUSE FIRE MAY RESULT FOR YOUR SAFETY FOLLOW INSTALLATION DIRECTIONS C...

Page 2: ......

Page 3: ...tions may result in property damage bodily injury or even death Harman Home Heating 352 Mountain House Road Halifax PA 17032 U S A INDEX INDEX Introduction 4 Specifications 5 Operation Building a Fire...

Page 4: ...catalytic stoves Top loading makes adding wood easier and allows you to view your beautiful fire through the extra large glass door The glass stays cleaner because of specially coated glass and the e...

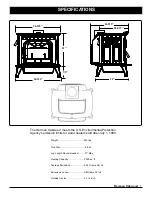
Page 5: ...n limits for wood heaters sold after July 1 1990 Weight 440 lbs Flue Size 6 inch Log Length Recommended 21 Max Heating Capacity 2 000 sq ft Average Emissions 2 32 Grams Per Hr Emissions on Low 0 8 Gra...

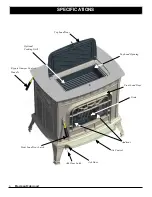
Page 6: ...Harman Oakwood Andirons Grate Top Load Opening Air Control Front Load Door Top Load Door Bypass Damper Control Handle Ash Door Ash Door Latch Front Load Door Latch SPECIFICATIONS Optional Cooking Gril...

Page 7: ...y passing a poker back and forth across the grate The andirons keep the fuel from coming into direct con tact with the glass and keep hot coals and embers from spilling out while reloading Never build...

Page 8: ...ges The initial or evaporation stage is where the moisture in the wood is driven off in the form of steam A second stage is where the volatile gases contained in the wood are released and burned This...

Page 9: ...etting all the way to the right Be sure the ash pan door is closed and latched Start with a bed of crumpled paper and kindling sized about finger width place several 1 2 25mm 50mm splitpiecesofdrywood...

Page 10: ...bypass before taking the ashes outside for safe disposal Ashes should be placed in a metal container with a tight fitting lid The closed container of ashes should be placed on a noncombustible floor o...

Page 11: ...pproved by either the CAN CSA B365 standard Canada or NFPA 211 U S Contact your building authority for information if you are interested in reducing clearance distances other than those presented here...

Page 12: ...12 Harman Oakwood INSTALLATION CLEARANCES See NFPA 211 for more installation clearance reductions when using USM wall protection etc 21 25...

Page 13: ...Harman Oakwood 13 INSTALLATION CLEARANCES See NFPA 211 for more installation clearance reductions when using USM wall protection etc...

Page 14: ...14 Harman Oakwood installation clearances See NFPA 211 for more installation clearance reductions when using USM wall protection etc...

Page 15: ...rth weight limitations The Oakwood should not be installed into a factory built fireplace unless the hearth area is designed to take the maximum weight of the stove The Oakwood loaded with wood weighs...

Page 16: ...loset or other concealed space or through a floor or ceiling Whenever possible avoid passing the connector through a combustible wall if you must use an approved wall pass through described later in t...

Page 17: ...200 mm may be used For square or rectangular masonry chimneys nominal sizes of 8 x 8 or 8 x 12 200 mm x 200 mm 200 mm x 300 mm may be used Codes require that solid fuel chimneys extend 3 ft 0 9 m abo...

Page 18: ...e of the chimney liner and both must be firmly cemented in place with refractory cement Athimble is a masonry pipe which is inserted through the chimney wall and is frequently the preferred method a b...

Page 19: ...id fuels are burned completely they pro duce water and carbon dioxide However in long slow burns a substantial amount of carbon monoxide may be produced If allowed to build up carbon monoxide which is...

Page 20: ...Chimney Support Standard Ceiling Installation with Factory Built Chimney Chimney Cap Factory Built Metal Chimney Sealed Storm Collar Finishing Col lar Chimney Connector Cathedral Ceiling Installation...

Page 21: ...Space Three Sheet Metal Screws per Joint of Chimney Connector Mantel and Trim Pro tection Floor Protection in Accordance with Solid Fuel Appliance Listing Airtight insulated Clean out Chimney Breach F...

Page 22: ...Extend to Flue Liner Minimum 8 Masonry Thickness in Front of Smoke Chamber Use Damper Adapter or Seal with Non Combustible Material Floor Protection in Accordance with Solid Fuel Appliance Listing Ai...

Page 23: ...ace Trim Protection for Reduced Clearance UL1777 Stainless Steel Liner System or Other approved lining system Follow liner manufacturer s instructions on insulation and support Floor Protection in Acc...

Page 24: ...Clearance for Complex ity Exterior Chimney or 2 Clearance for Interior Chimney and 2 Clear ance for NFPA 211 Type Approved Thimbles Floor Protection in Accordance with Solid Fuel Appliance Listing Ch...

Page 25: ...work the controls back and forth several times during the summer or any prolonged period when you are not using your stove The Fire Chamber The inside of the fire chamber should be examined for damag...

Page 26: ...check these gaskets from time to time and replace them when necessary The gaskets are made of fiberglass of different sizes obtainable from your Harman dealer and some are fixed in place with a high...

Page 27: ...n the smoke deflec tor may not be needed on the top vent models The Cozy Screen can be used from the start of a fire or can be used with an existing one When starting a fire with the Cozy Screen smoke...

Page 28: ...ck 1 90 02490 2 Charcoal 1 90 02490 3 goldenfire 1 90 02490 4 Metallic blue 1 90 02490 5 Honey glo 1 90 02490 10 Mojave red 1 90 02490 12 Forest green 1 2 3 4 6 8 9 10 15 16 17 18 21 22 23 24 25 26 27...

Page 29: ...Top 4 00 249105P 11 Top Load Door 3 00 249115P 12 Top Load Handle 2 00 249148 13 Left Side Panel 4 00 249103D 14 Inner Front 4 00 249111S 15 Andiron Qty 2 Req 3 00 249101P Y 16 Front Load Door 4 00 24...

Page 30: ...31 2 Inlet Brick Right 3 40 00104 Y 31 3 Logo Brick 3 40 00101 Y 31 4 Inlet Brick Left 3 40 00103 Y 31 5 Upper Brick Clip Pkg of 2 1 00 249172 Y 31 6 Rear Brick Clip Pkg of 2 1 00 249153 Y 31 7 Cast L...

Page 31: ...2494 32 4 Bottom Heat Shield Kit 1 00 02491 Hardware Packages Bolt 5 16 18 x 2 Zinc Plated Carriage Pkg of 25 3 30 4001 25 Y Bushing 3 8 OD X 1 4 OAL Pkg of 5 3 50 00058 5 Y Nut 1 4 20 Zinc Plated Fin...

Page 32: ...32 Harman Oakwood...

Page 33: ...Harman Oakwood 33...

Page 34: ...34 Harman Oakwood notes...

Page 35: ......

Page 36: ...Proudly Printed On 100 Recycled Paper...

Reviews: