
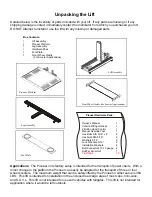


Unpacking the Lift
Detailed below is the inventory of parts included with your lift. If any parts are missing or if any
shipping damage is noted, immediately contact the distributor from which you purchased your lift.
DO NOT attempt to install or use the lift with any missing or damaged parts.
Pioneer Hardware Pack:
Owner’s Manual
1
Vehicle Wiring Harness
1
2 Button Hand Control
1
Manual Override Tool
1
Hex Bolts DIA 5/16” x 4”
2
Hex Nuts DIA 5/16”
2
Washers 5/16”
2
Lock Washers 5/16”
2
Installation Washers
2
Butt Connectors 10-12 gauge
2
Rubber Grommet
1
Tie Wraps
10
1
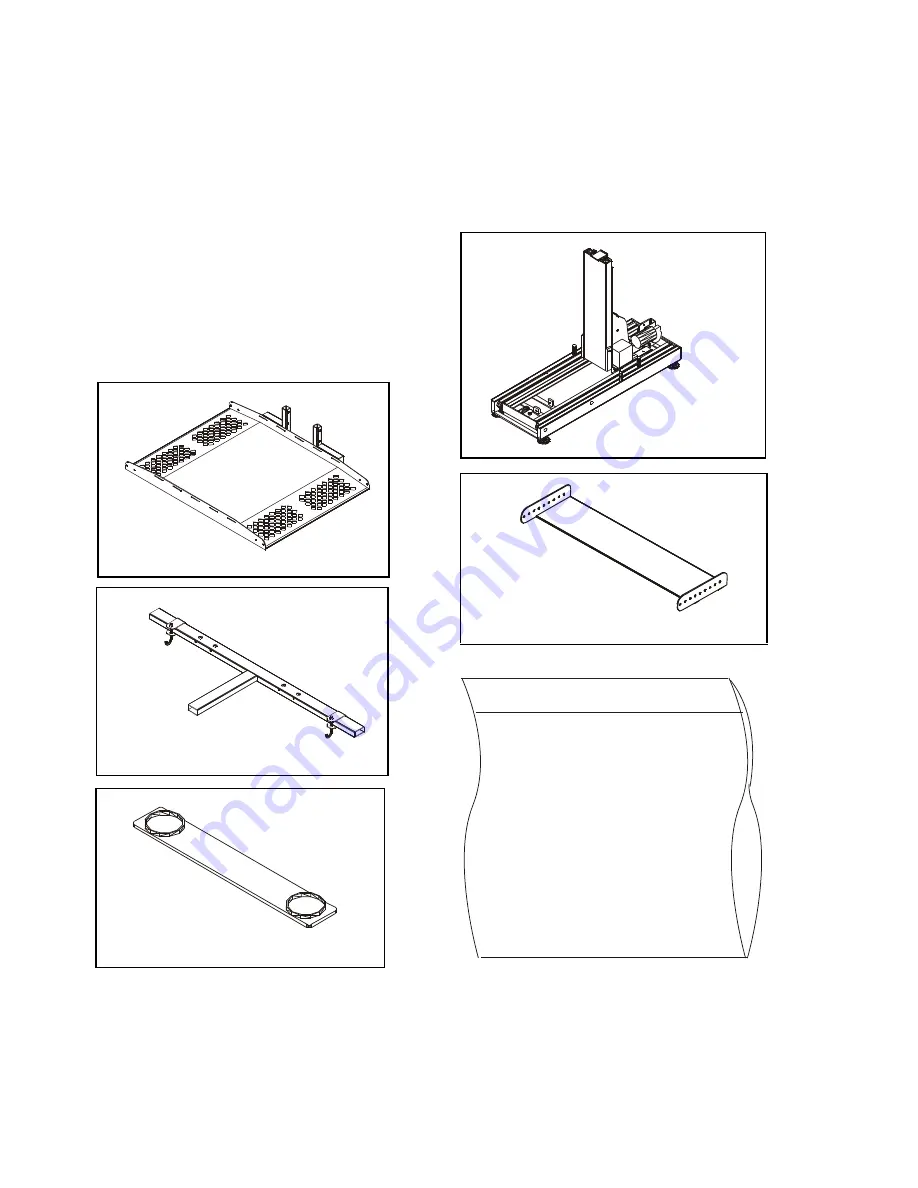
Lift Assembly
1
Pioneer Platform
1
Leg Assembly
1
Hardware Pack
1
Foot Plate
1
Front Wheel Cradle
(For Scooter Applications)
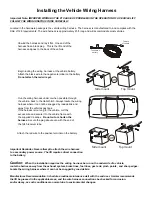
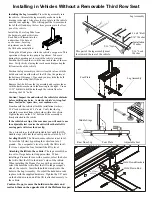
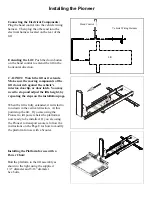
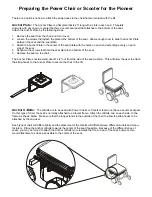
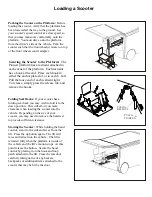
Applications:
The Pioneer in its factory setup is intended for the transport of power chairs. With a
minor change to the platform the Pioneer can easily be adapted for the transport of three or four
wheel scooters. The maximum weight that can be safely lifted by the Pioneer in either setup is 350
LBS. This lift is intended for installation in the enclosed rear cargo area of most vans, mini-vans,
and S.U.V.s. This lift is not intended for use with vehicles with tailgates. This lift is not intended for
application where it would be left outdoors.
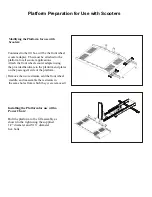
Foot Plate
Pioneer Platform
Lift Assembly
Leg Assembly
Front Wheel Cradle (for Scooter Applications)
Box Contents:


