
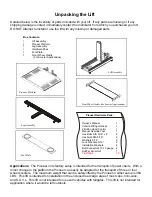

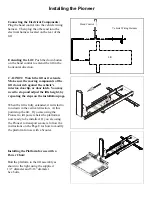
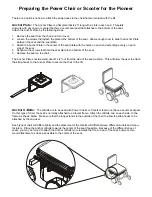

Installing the Pioneer
Extending the Lift:
Push the down button
on the hand control to extend the lift in the
horizontal direction.
CAUTION:
Watch the lift as it extends.
Make sure the moving components of the
lift do not rub against the vehicle’s
interior, door lip, or door latch. You may
need to stop and adjust the lifts height, by
repeating the steps on the installation page.
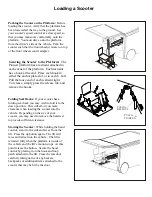
When the lift is fully extended, it will start to
run down in the vertical direction. At this
point stop the lift. If you are using the
Pioneer to lift power chairs the platform is
now ready to be installed. If you are using
the Pioneer to transport scooters, follow the
instructions on the Page 8 for how to modify
the platform for use with a Scooter.
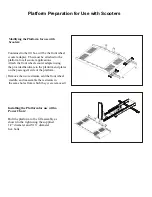
Installing the Platform for use with a
Power Chair:
Bolt the platform to the lift assembly as
shown to the right using the supplied
1/2” diameter and 5/16” diameter
hex bolts.
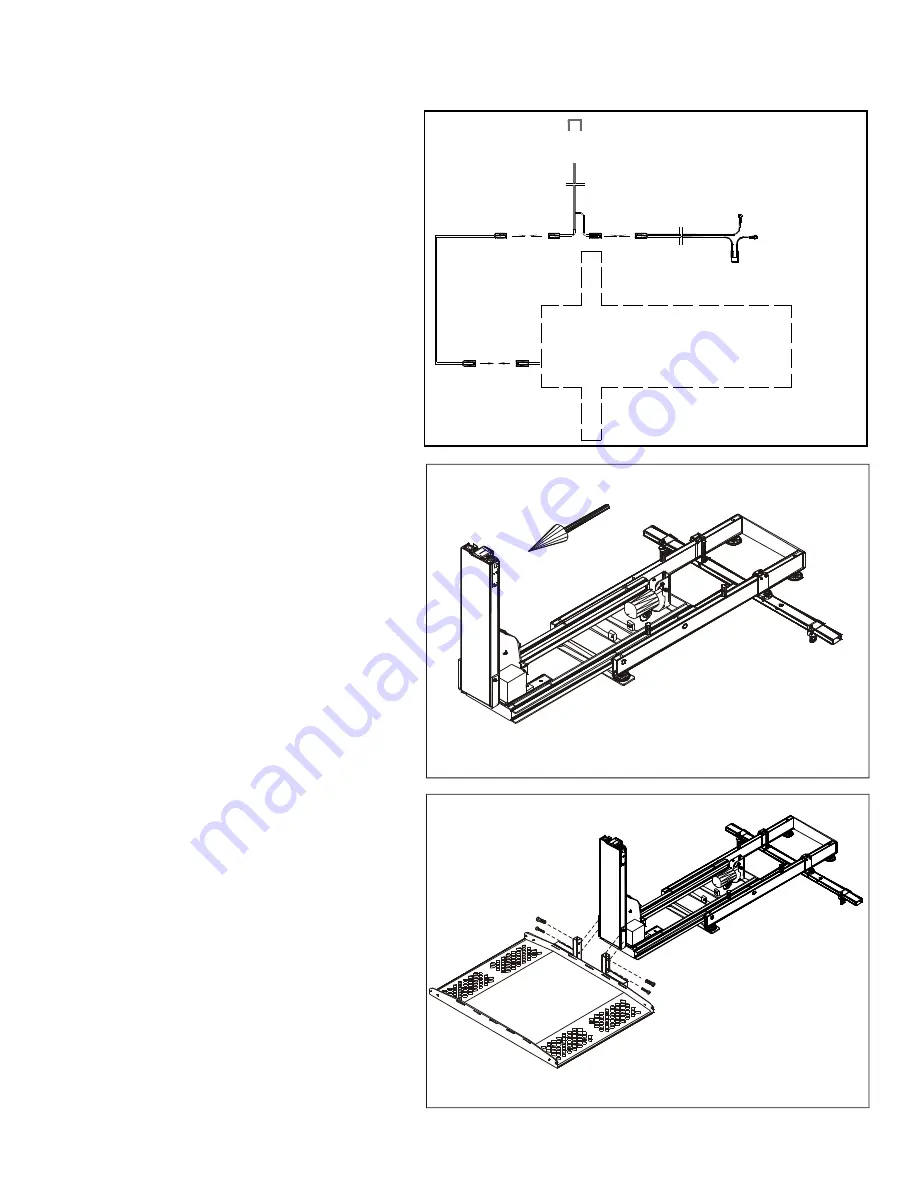
Lift
Hand Control
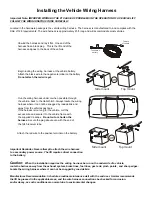
Vehicle Wiring Harness
Connecting the Electrical Components:
Plug the hand control into the vehicle wiring
harness. Then plug the other end into the
electrical harness located on the rear of the
lift.


