


Omneon, Now Part of Harmonic
53
Replacing the Chassis
4. Install the disk drives. Refer to
for
instructions.
5. Install the bezel. Refer to
for instructions.
6. Install the I/O modules. Refer to
for
instructions.
7. Install the processor module. Refer to
for instructions.
8. Install the power supplies. Refer to
for
instructions.
9. Apply power to the Omneon MediaDeck by connecting the AC
power cords to the separate, isolated power sources.
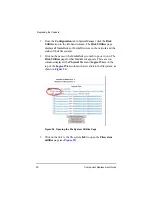
10. Start the file system. To start the file system:
a. From the
Configuration
tab in SystemManager, click the
Disk
Utilities
icon in the left-hand column to display the
Disk
Utilities
page.
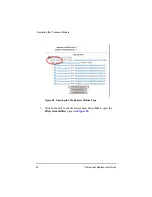
b. Click the icon for the Omneon MediaDeck which contains the
file system you want to start. The
Disk Utilities
page for that
MediaDeck appears.
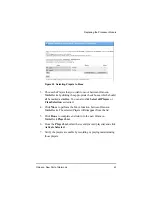
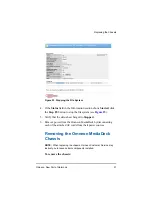
c. Click the
Filesystem
hyperlink to display the
Filesystem
Utilities
page (see
).
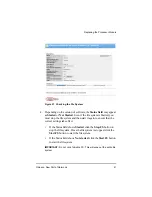
d. At the bottom of the page, click the
Start FS
button.
IMPORTANT:
Do not click ‘Initialize FS’. This will wipe out the entire
file system.
e. When the
Start Filesystem
page appears, make sure that the
first option,
Use NVRAM Journaling for this filesystem
, is
checked, and that all other options are unchecked. Click the
Start
button.
Summary of Contents for Omneon MediaDeck
Page 1: ...Component Replacement Guide Omneon MediaDeck MediaDeck Part Number 28 0136 Revision L...
Page 8: ...Component Replacement Guide...
Page 14: ...4 Component Replacement Guide...
Page 24: ...14 Component Replacement Guide Replacing a Disk Drive...
Page 58: ...48 Component Replacement Guide Replacing the Processor Module...
Page 65: ......
Page 66: ......
Page 67: ......
Page 68: ......


