10
Component Replacement Guide
Replacing a Disk Drive
NOTE:
The drive size (in GB) and form factor must match the other
drives in the enclosure. Replacement drives should have the same or
greater drive capacity as those they are replacing.
2. Remove the bezel. For instructions, refer to
.
3. In SystemManager, from the
Drive Properties
page for the drive,
click
Fail drive
to fail the drive.
View the
Disk Utilities
page for the Omneon MediaDeck to verify
that the drive state is reported as
Dead, Failed
.
4. From the
Disk Utilities
page, find the physical location of the drive
and note the state of the LEDs for this drive as follows:
a. The top Activity LED should be steady green, indicating that
the drive is not being actively used. If it is blinking, this is the
wrong
drive to remove.
b. The bottom Status LED should be off.
5. If you identify the same drive when performing steps 4a and 4b,
proceed to the next step. If not, call Omneon
and
do not
continue with this procedure.
6. Wait 30 seconds before unlatching the drive at the physical location
. Wait an
additional
30 seconds before removing
the drive from the Omneon MediaDeck enclosure. To remove the
disk drive:
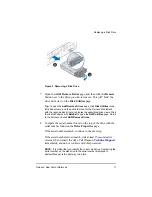
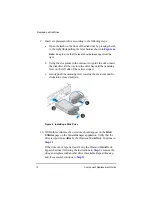
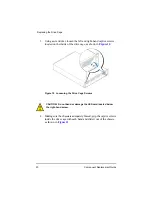
a. Open the latch on the front of the disk drive by pressing the tab
to the right while pulling the lever back as shown in
b. Slide the disk drive out of the drive bay.
Summary of Contents for Omneon MediaDeck
Page 1: ...Component Replacement Guide Omneon MediaDeck MediaDeck Part Number 28 0136 Revision L...
Page 8: ...Component Replacement Guide...
Page 14: ...4 Component Replacement Guide...
Page 24: ...14 Component Replacement Guide Replacing a Disk Drive...
Page 58: ...48 Component Replacement Guide Replacing the Processor Module...
Page 65: ......
Page 66: ......
Page 67: ......
Page 68: ......


