MediaDeck 7000 component replacement
15
MediaDeck Component Replacement Guide
drive and return it promptly for analysis. Contact Technical Support for a Return Authorization Number
(RA) before shipping the drive back to Harmonic.
Drive replacement with Spectrum Management
The MediaDeck contains high-performance SATA disk drives and SSD drives that can be hotswapped
during operation.
About replacement drives
Replacement disk drives must meet certain criteria. In the event of a drive failure, replacement drives are
available from Harmonic.
IMPORTANT:
Use ONLY Harmonic-supplied replacement disk drives. Disk drives from
any other source will be excluded from coverage under the Harmonic product limited
warranty and maintenance services programs. In addition, any errors or damages caused
by the use of disk drives provided from any other source will cause the entire product to
be excluded from coverage under the Harmonic product limited warranty and maintenance
services programs.
NOTE:
Replacement drives should have the same or greater drive capacity as those they
are replacing, and their form factor must match the other drives in the enclosure.
If you wish to install a Harmonic-supplied drive model that is not supported by your current version
of Spectrum firmware, you may need to install a “DDC” configuration file to your video server, which
enables you to install and use the new drive. For details, see “Installing a DDC file” in the
Harmonic
SystemManager User Guide.
Be sure that you have a replacement drive on hand before removing the failed drive. You may wish to
have more than one replacement drive on hand in case the first is not responsive.
Failing a drive
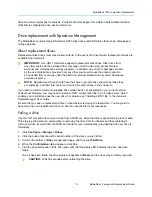
Use the "fail" procedure to remove a drive from a RAID set, when the drive is experiencing a loss of data.
This step is performed as a prerequisite to removing the drive from the chassis and then replacing it
with a new drive, at which time the RAID set rebuild occurs automatically (provided that the new drive is
formatted).
1. Click
Configure
>
Storage
>
Drives
.
2. Click the button that shows the serial number of the drive you wish to fail.
3. Scroll to the bottom of
Drive
configuration page, and then click
Fail Drive
.
4. When the
Confirmation
dialog appears, click
Yes
.
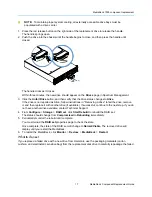
5. Find the physical location of the drive and verify that the status LED indicates the drive has been
failed.
Once it has been failed, the drive status will appears as
Dead
, and the drive may be safely removed.
CAUTION:
Wait 30 seconds before unlatching the drive.


