Introduction
Auto-Lektor is a stand-alone reading device, self-contained in a single unit. It has an
integrated keyboard on the front panel, through which you have access to all the functions.
Auto-Lektor incorporates a scanner, keyboard, hard disk, CD drive and then gives you
access to multiple devices and sources of text: USB, serial and network or the internet. It
can scan large or heavy books; it can save or email the text it has recognised. The
integrated keyboard on the front panel has high-contrast colours, and each button has a
Braille label as well as a text label.
Exploring the external features of your Auto-Lektor
Your Auto-Lektor has features on all four sides and on the top. This tour will help you to
become familiar with these features.
With the Auto-Lektor on the table in front of you, with the front panel towards you, use the
following explanations to identify the features as you explore.
The Front Panel
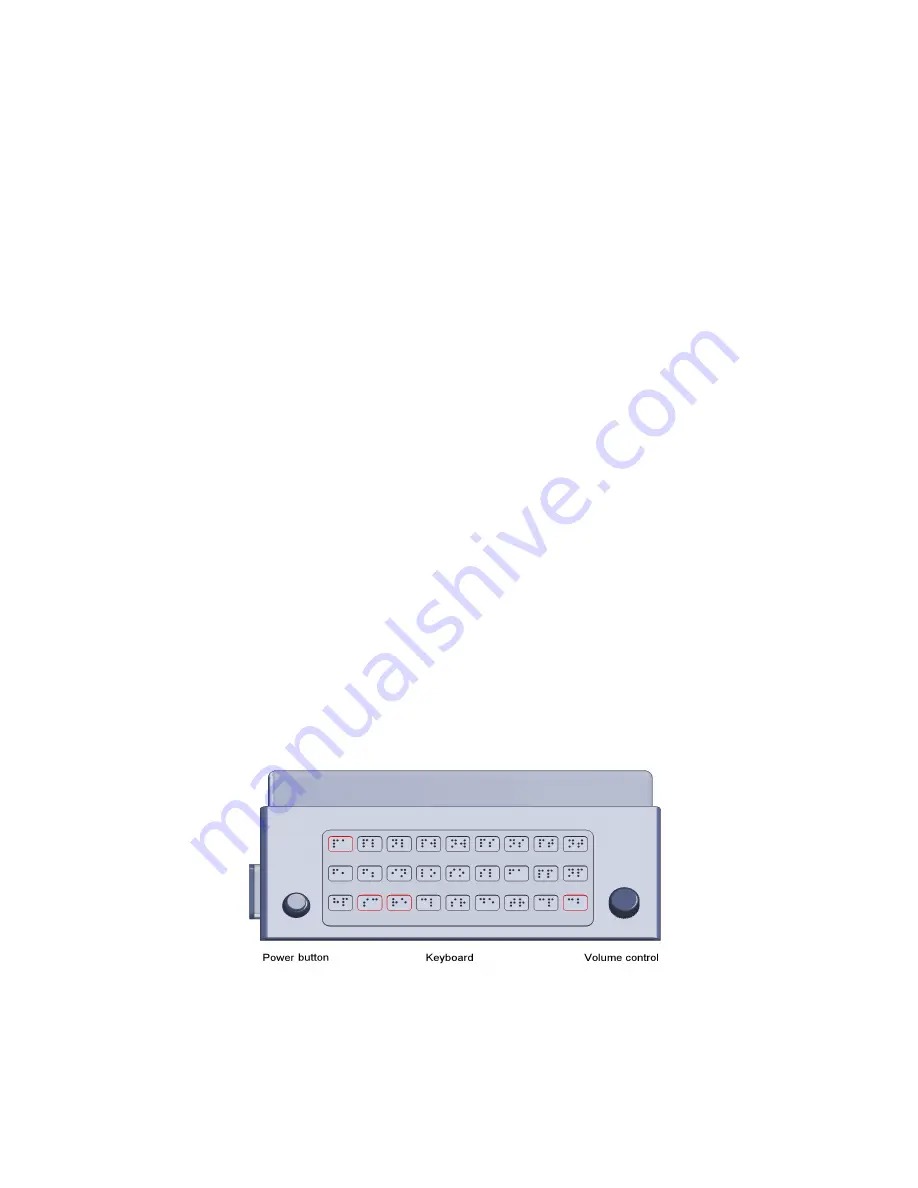
This panel contains the power button, the volume knob and the integrated keyboard.
The power button is located at the bottom left corner of the front face. On the bottom right
corner you will find the volume control. Between them is the keyboard.
The keyboard has three rows of nine keys each. Each key has a two-character Braille
identifier, to help you to find the key you want. There is a full explanation of the keyboard in
the next section.
To get you started, the four keys you need to begin reading are Scan, Read, Pause and
Clear. These keys are labelled SC, RE, PA and CB. You will find them as follows:
Scan, SC, is on the bottom row, second key in from the left.
Read, RE, is next to Scan, on the right.
Pause, PA, is the leftmost key on the top row.
Clear, CB, is the rightmost key on the bottom row.
Next, we go through the features on each side of your Auto-Lektor.
4
Illustration 1: Auto-Lektor front panel. Primary keys are marked in red.


