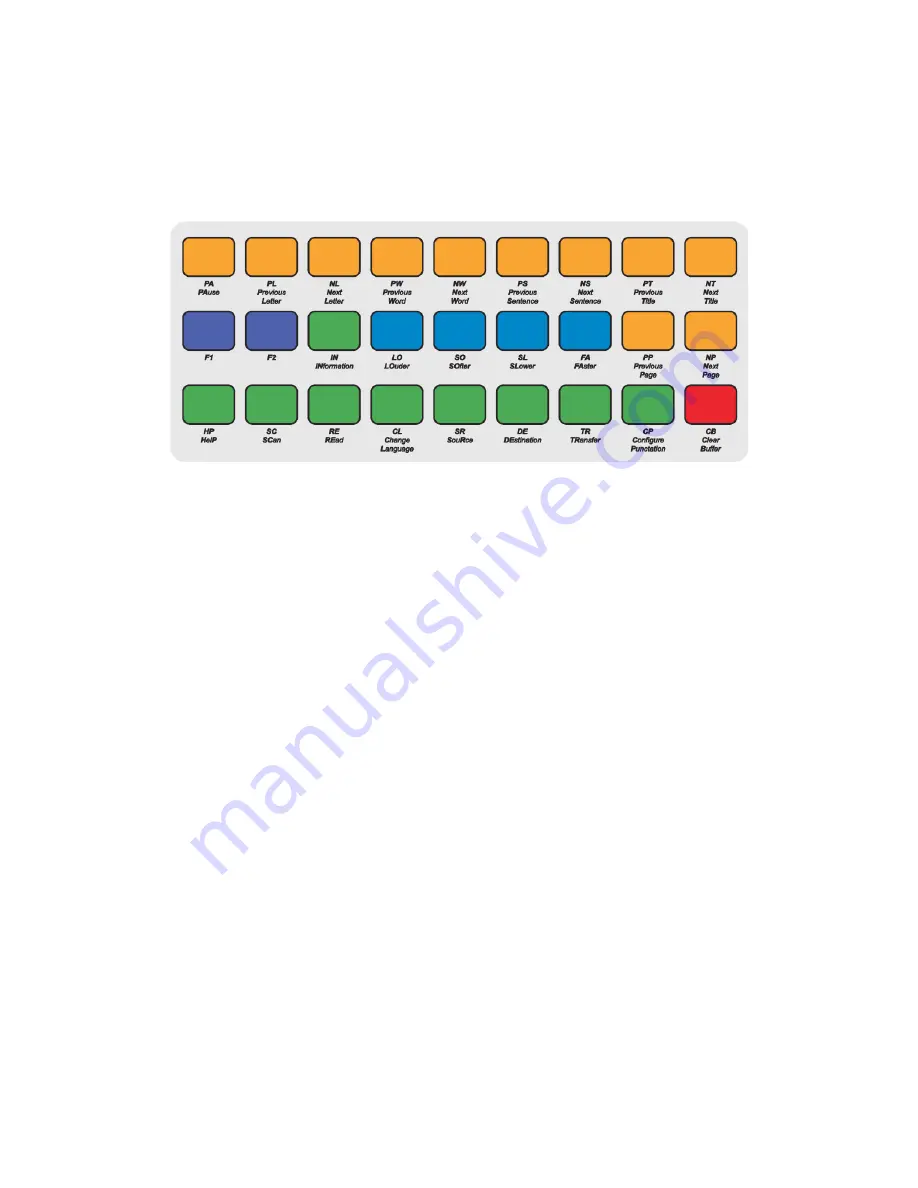
The Auto-Lektor Keyboard
The Auto-Lektor keyboard located on the front panel has three rows of nine buttons. Each
button is labelled with two Braille characters to remind you of what it does. In this Guide,
we will use the two-letter names for the keys throughout, after this explanation of the keys.
All the keys are grouped according to their function, and all the keys in a group have the
same colour.
The groups and their colours and positions are:
Reading, green; these keys are along the bottom row, with one key on the centre row, third
in from the left.
Clear Buffer, red. This group has only one key, which is on the bottom row, far right.
Voice Parameters, blue; these keys are in the middle row, from positions fourth from the
left to second from the right.
Navigation, yellow; these keys take up all of the top row and the two right-most positions of
the middle row.
Function keys, purple; these keys are the two left-most keys on the middle row.
The Reading Group:
Most of the reading group buttons are on the bottom row. The following explanations take
the keys in order from left to right.
Help (HP)
This key puts you in Help mode; once that is on, you can press any other key and Auto-
Lektor will tell you what it does. When you press HP, Auto-Lektor says "Entering context
help mode. Press a key to hear its function." To leave Help Mode, press HP again.
Scan (SC)
Pressing this key starts the scan of the document on the glass, or, if the source text is set
to an external source such as a CD, the hard drive or a USB device, to load the text from
the external source into the Buffer.
If you are reading text from a CD, first you need to choose from the list of the files on the
CD. Choose a title using PT and NT, and then press SC again to load the file. For web
pages and RSS feeds, you work in a similar way. The User Menu section has detailed
information about how each of these text sources works.
7
Illustration 5: Auto-Lektor integrated keyboard showing two-letter key names


