NetWave DirectView Broadcast Console Operations & Technical Manual
Revision A
3 - Operation
Harris Broadcast
3-5
PR&E
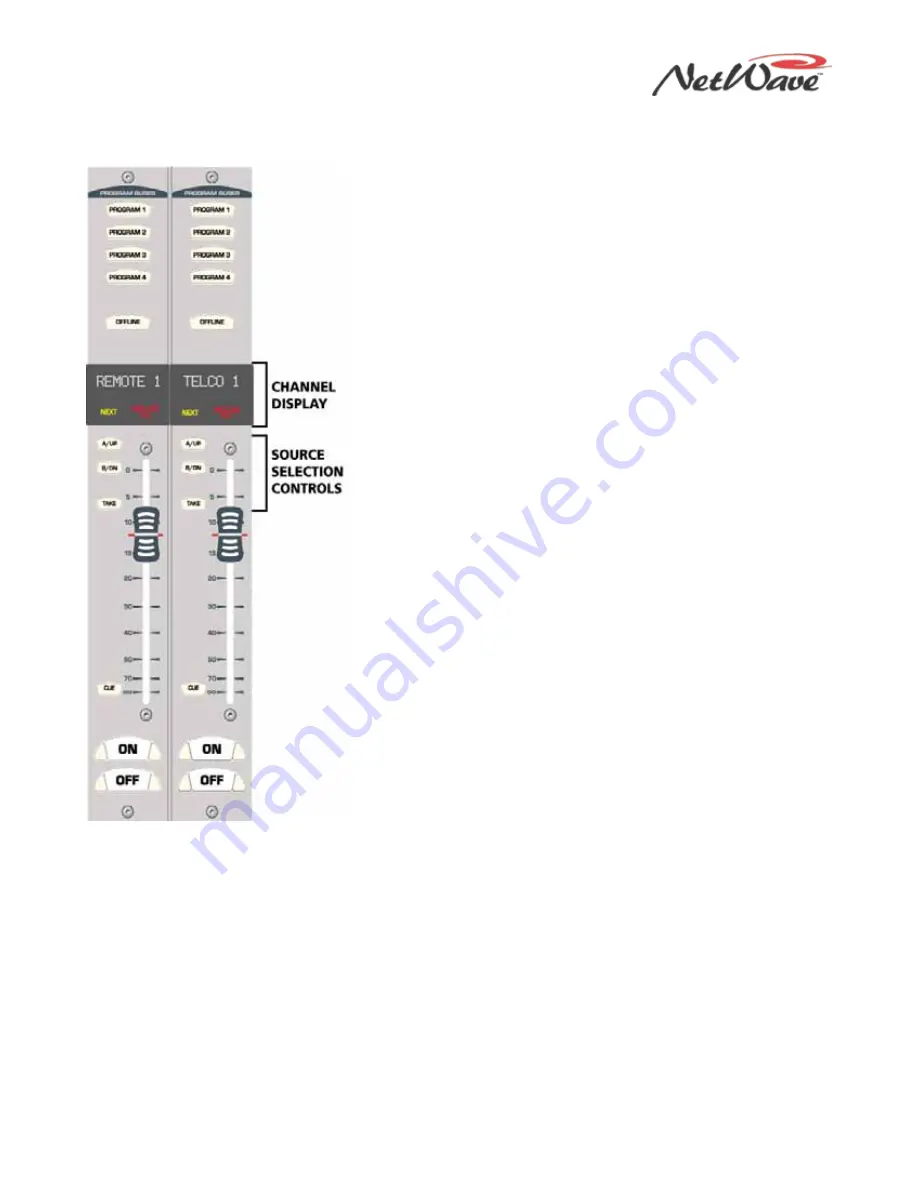
Figure 3-4. Dual Router Panel
Dual Router Panel Quick Guide
When the NetWave console is linked to a VistaMax system, the
VistaMax Enabled and VistaMax Linked labels are lit on the Monitor
Control panel. In this case, one or more Dual Fader panels are
typically upgraded to Dual Router panels (Figure 3-4). Use the
A/UP, B/DN, and Take buttons to select and route a new VistaMax
source for each channel. Dual Router panels are easily recognized by
their channel display:
●
Ten-character Source Name display on each channel strip
●
Two Next and Include All labels instead of A/B name labels
Since most panels are identical to the Dual Fader panel, this
subsection covers only those functions that differ.
Channel Display
Source Name — Each ten-character display can show different
names, depending upon whether Next is lit. When Next is unlit, the
display shows the name of the current network source routed to that
fader channel. Pressing the UP or DN button causes Next to light
and the display switches to show the names of potential new
sources for the channel, in alphanumeric order.
Next — When lit, indicates the source selector buttons (UP and DN)
are actively being used to find a new source for the channel. Next is
turned off when Take is pressed. If Take is not pressed, Next turns
off about three seconds after the last UP or DN button press. In
either case, the Source Name returns to show the current routed
network source name.
Include All — Each fader channel is assigned a list of source names
which can be taken on that fader channel. This list is usually kept
short to make it easy to select a new source. The list can be
expanded to show all the source names available to the console by
pressing and holding the UP and DN buttons together until Include
All lights (about three seconds). While Include All is lit, the list of
new source names is expanded to show all names available to the
console. Press and hold UP and DN together again for three seconds
to turn off Include All and return to the channel-specific include
list.
Source Selection Controls
UP and DN — Pressing either button lights Next, changing the Source Name Display to show the names of
potential next sources while Next is lit. Press the UP button to step through the names in forward
alphanumeric order. Press the DN (down) button to step through the names in reverse order. Press and hold
either button rapidly to step through the list. The Source Name Display returns to show the active source
name about three seconds after the last button press. Press and hold the UP and DN buttons together to
toggle the Include All function on (Include All is lit) or off (Include All is not lit).
Take — When Next is lit, and the channel is off, pressing Take selects the displayed next source as the new
source for the channel. To prevent on-air signal interruptions, the current source cannot be changed while
the channel is On. If you press Take while the channel is on, the ON button blinks rapidly to indicate the
Take command is locked out and the source is “preset.” When you subsequently turn off the channel,
pressing Take instantly takes the preset source.


