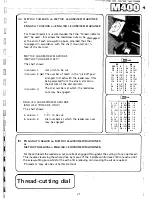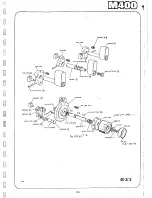
Warner Fail-Safe Spi�dl�. �.rak,�
�-·
. .
�---·
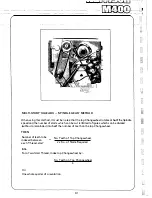
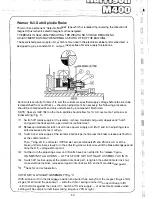
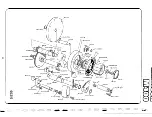
This Unit is a permanent 'Ceramic-Magnet' type which is release·d (by reversing the direction of
magnetic flux) when its electromagnet coil is energised.
THE BRAKE IS SELF-COMPENSATING FOR WEAR AND SHOULD REOUlRE NO
ADJUSTMENT DURING THE NORMAL USE AND LIFE OF THE MACHINE.
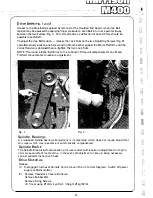
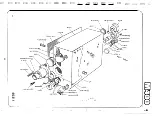
The associated power supply unit, which is mounted in the electrical cabinet and marked 2w1 is
designed to give a constant D .C. output, irrespective of mains supply fluctuations.
Each Unit is carefully 'trimmed' to suit the customers specified supply voltage before the machine
is despatched from our Works - should an adjustment be necessary the following procedure
should be complied with and only undertaken by a competent Electrician.
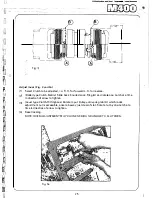
NOTE: Spacers (402.152) on the main spindle should allow for 1mm movement of armature at
initial setting (Fig. 1}._
(1 l Switch off mains supply at th� isolator, remove moulded end guard, depress and 'hold'
end guard interlock switch, op_en electrical cabinet door.
(2} Release potentiometer lock nut on brake power supply unit
(2wl)
and turn adjusting screw
anti-clockwise as far as it will go.
(3) Switch on mains supply at the isolator interlock part and press the brake release push button
at the control station.
Then, using a D. C. voltmeter ( 1 OOV scale) across terminals 25 and 26 (on 2w1) or at the
brake unit terminals, slowly turn the adjusting screw clockwise until the brake disengages and
note the D. C. voltage at this point.
(4) Further tum the adjusting screw until 6 volts have been added to the 'release' figure.
ON NEW INSTALLATIONS - AT THIS POINT SET 'AUTO GAP' ASS EMBLY AS IN Oil
(5) Switch off mains supply at the isolator interlock part, retighten the potentiometer lock nut,
close electrical cabinet, release end guard interlock switch and refit moulded end guard.
(6) Check for correct operation.
!Ill TO SET'AUTOGAP' ASSEMBLY (Fig.1)
With armature (D) in the disengage position and pulled fully away from the magnet (to give 1mm
air gap (E) all round the.periphery) - slide the detent spring retainer (A) on each drive pin (B)
until it bottoms against the carrier {C). Switch off mains supply - or cancel brake release when
setting will be complete (nominal working air gap is .79mm (lzin).
30
L:.;
--L:;•
�
Summary of Contents for M400
Page 1: ...420mm 16 1 2 heavy duty centre lathe Operations Manual info harrisonlathe com 800 575 2843 ...
Page 6: ... t _ ___ 1n_s_t_a_lla_ t_io_n___ J 3 ...
Page 14: ... 2 I _ N I r 1 __ lilt n I I 1 II CJ t k J 29 1 Jit S fi IZ n I 28 i i i Ii ...
Page 19: ...I i f n u 17 Thread cutting ...
Page 25: ...i _1 L l fi l l b f_ _ _1 1 J 0 U C l 23 ____J Maintenance i I i ...
Page 33: ...n td j t L f _J r i J Llf J I 7 r l LJ __ P_a_rt_s_ _s_e_c_ti_o_n __J ...
Page 36: ... _ d i I O i I L l LJ 400 4 79 t M8x30 FV D001H2093 D272H1002 M16x75 FH r l M16 FN 35 V 401 1 ...
Page 46: ...t 1 l 4 79 403 050 403 051 A03 058 SP 996 M12 1 L D4o t 45 SP996M12 j 03 053 403 3 ...
Page 52: ...M8 Fl 1ETRIC J0 4 111 7 16 50 813 30 4 160 304 162 404 5 ...
Page 66: ...M20 FH A 02O WN 411 028 1 411 025 4 11 026 411 14 64 J ...
Page 67: ...r 1 r J M16x60 FJJ 411 013 65 411 012 411 010 411 011 411 16 ...
Page 68: ...__ 411 052 66 411 050 41i Q53 411 31 i I J 1 t 1 I ...
Page 74: ...411 200 411 202 M10 Fll 411 205 0401H0001 72 411 204 M10x35 FY 3 411 67 ...
Page 83: ... LJ l J t f 1 I i 1 i J r s 0 i _____ _II j 1 J J 9 8 9 0 5 i 1 1 l s s I r i ...

