background image

HARRY

9

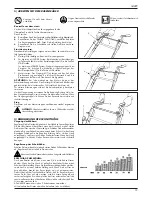
Wear safety glasses to protect

your eyes

Never smoke while filling the gasoline

tank

Keep persons, who do not

know the safety rules away

from the mower.

4) 

OPERATION

Pre-start inspections

before each start-up, check the following and, if necessary, perform the

service specified.

l

CHECK deflector, grasscatcher to make sure they are in proper

position and tightened.

l

CHECK oil level in engine and, if necessary, add oil up to, but not

over, full mark.

l

CHECK cutting heights and adjust (see paragraph "cutting height

adjustment").

Engine startup

Once the machine has been set up properly, start the engine as follows:

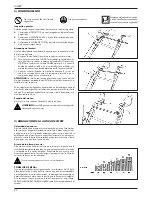
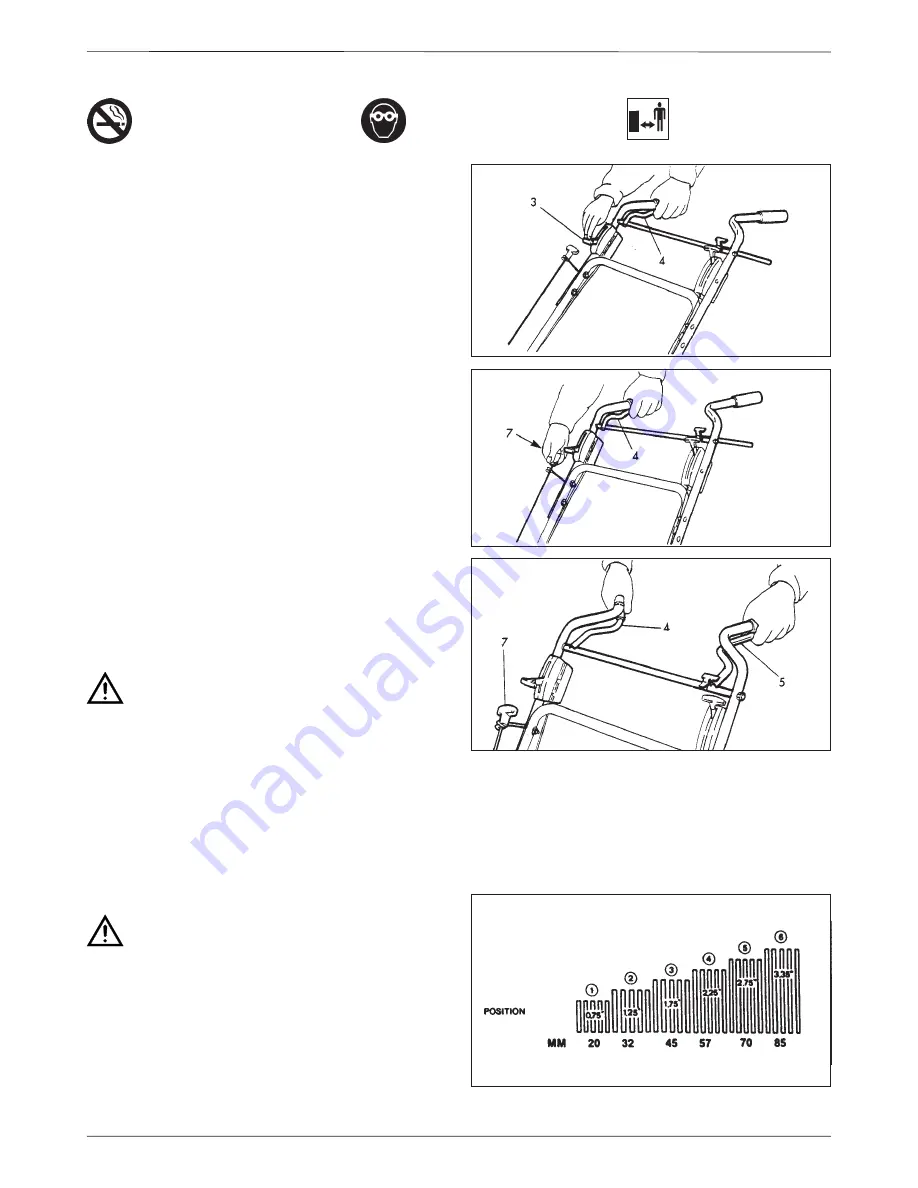
A) Operate the brake handle (4) to enable engine startup.

B) Engine with CHOKE system:

If the model is equipped with an accelerator, when the engine is cold,

position the accelerator lever (3) on START.

Engine with PRIMER system:

Press the fuel-enrichment pump located on carburettor 3 or 4 times.

If the model is equipped with an accelerator position the accelerator

lever (3) on MAX.

C) Start engine:

Grip the starting handle (7) and pull the starter rope gently until you

feel the resistance caused by compression.

Then give the starter rope a sharp tug.

CAUTION: 

The blade starts turning as soon as the engine is started.

Keep the handle (4) pressed during machine operation. When the handle

is released, the engine stops. For further information and explanations,

read carefully the user instruction manual of the engine. Squeeze adjusting

lever towards wheel and move it to the position desired. Assure pin on

adjusting lever engages notch in housing. Refer to figure  for the

approximate cutting height afforded by each of the different positions

Engine stop:

The engine and the blade stop when the handle is released.

CAUTION! 

The blade will continue turning for max. 3 more

seconds after the engine has been stopped.

5) MOWING PROCEDURE

Cutting height adjustment:

Always stop the engine and wait until the mower blade goes to a comple-

te halt. Squeeze adjusting lever towards wheel and move it to the position

desired. Assure pin on adjusting lever engages notch in housing. Refer to

figure for the approximate cutting height afforded by each of the different

positions.

Mowing procedure:

Vary speed to suit grass conditions. Set the engine speed to the maximum

for tall and thick grass or lower for short and thin grass. On self propelled

models squeeze control bar towards handle to engage the transmission;

to stop forward motion release the control bar. The mower can be hand

pushed with the control released.

Never use the lawn mower without either grasscatcher or deflector.

Mowing tips:

Best results are achieved when no more than 1/3 of the height of the

grass is cut off. The cutting deck should be level under all conditions; if

long grass must be cut, use highest cutting height for first mowing. If you

want the grass shorter, then recut to the lower height. If cut too short, the

grass will expend more energy for development of new leaves and less

for root strengthening and will be more subjected to burning. On the

other hand, if allowed to grow too long, the lower part will be shaded

and will discolor. Dispersed clippings mat to form thatch which prevents

proper growth; to prevent grass disease from thatch, bagging is always

recommended. All HARRY mowers are designed to allow immediate

change of function: cutting and bagging at the same time or cutting only

(this is recommended only when grass is high).

Summary of Contents for 721

Page 1: ...sped Gazonmaaier HARRY Manuale di istruzioni per l uso e la manutenzione Safety and operation instruction Manuel d instructions et de mise en route Bedienungsanleitung Manual de instrucci nes y de man...

Page 2: ...Provvede te alla riparazione prima dell uso p Non permettete l uso del vostro rasaerba ad alcuna persona se pri ma non gli avete fornito delle precise istruzioni e non gli avete fatto leggere questo m...

Page 3: ...atura al l esterno della stoffa L impugnatura e la maniglia del cestello in tela devono essere entrambe nella parte alta del cestello Il foglio di plastica sar in basso 2 Fissate i 4 lati del sacco in...

Page 4: ...e indietro quando la trazione non inserita Arresto del motore Il motore e la lama si arrestano rilasciando la maniglia freno ATTENZIONE La lama girer ancora per max 3 secondi 5 REGOLAZIONE DELL ALTEZZ...

Page 5: ...LAZIONI ATTENZIONE Per ogni intervento di manutenzione ricordatevi di spegnere il motore e di staccare il connettore della candela di accensione Controllo Smontaggio e affilatura della lama Fermate il...

Page 6: ...lasciandolo per asciugare Immagazzinate il rasaerba in un luo go asciutto e protetto dalle intemperie Cavo comando semovenza La nuova trasmissione NHARRY che equipaggia tutti i rasaerba semoventi gra...

Page 7: ...clothing long pants boots or heavy shoes that will grip even in wet weather and gloves like golfers for a sure grip Also don t wear anything that s so loose that it might get caught on something f Che...

Page 8: ...side of the catcher The plastic sheet will be on the bottom 2 Secure the 4 sides of fabric bag to rectangular frame opening by slipping plastic ends of bag over the metal frame Leave top left and righ...

Page 9: ...forded by each of the different positions Engine stop The engine and the blade stop when the handle is released CAUTION The blade will continue turning for max 3 more seconds after the engine has been...

Page 10: ...Stop engine CAUTION before checking or doing any work on the blade disconnect the spark plug wire and secure it away from the plug to prevent unintentional starting Tip mower on its left side or oppo...

Page 11: ...awn mower handle To check and correct if necessary the tension on the spring A the following sequence should be followed 1 Check the length L0 of the spring A when the engagement handle is in dis enga...

Page 12: ...isez attentivement les conseils de s cutit conformes aux normes Europ enes avant d utiliser la tondeuse Les symbols mention s dans ce manuel indiquent un particulier danger et vous aident de pr venir...

Page 13: ...et gauches 3 Fixer la grille sur le 2 crochets du sac V rifier que la grille soit bien en face de la tondeuse Le c t tondeuse et le c t bac sont indiqu s sur la grille 4 Placer les petites plaques m...

Page 14: ...rr t du moteur Le moteur et la lame s arr t nt d s que la poign e est relach e ATTENTION La lame continuera tourner pendant max 3 secondes apr s I arr t du moteur 5 R GLAGE DU COUPE La tonte Ajustez l...

Page 15: ...der au nettoyage CONTROLE DEMONTAGE ET AFFUTAGE DE LA LAME Stoppez le moteur D tachez le c ble de la bougie Penchez la tondeuse du c t oppos la bougie pour viter un engorgement qui pourrait emp cher...

Page 16: ...roit sec et abrit 9 GARANTIE HARRY gr ce son r seau de Station Service offre ses Clients l assistance technique aux tondeuses de sa production HARRY garantit l utilisateur le remplacement gratuit ou l...

Page 17: ...durch bevor Sie den Rasenm her in Betrieb nehmen Lesen Sie sich diese Bedienungsanleitung der Europ ischen Sicherheitsvorschiften sorgf ltig durch Achten Sie auf die Symbole in dieser Anleitung Die S...

Page 18: ...er Griff mu sich au erhalb des Sackes befinden Die Plastikfl che mu nach unten montiert werden 2 Befestigen Sie die 4 Seiten des Sackes am Gestelle Ziehen Sie die Plastikh lle ber die St be des Gestel...

Page 19: ...tor und das Messer stoppen nachdem den Hendel losgelassen w rde ACTUNG Das Messer dreht noch max 3 Sekunden nach der Ausschaltung des Motors 5 REGULIERUNG DER SCHNITTH HE Vorgang des M hers Regulieren...

Page 20: ...chen kontrollieren Sie da bei der Reparatur Original HARRY Ersatzteile verwendet werden Denn nur so kann die gleiche Qualit t gew hrleistet werden die Sie vorher gekauft haben 7 ARBEITEN MIT DEM RASEN...

Page 21: ...nen Kontrollieren Sie den Fangsack ob sich in diesem noch Gras befindet Waschen Sie den Sack aus und lassen Sie ihn trocknen Lagern Sie den Rasenm her in einem trocknen Ort 9 GARANTIESCHEIN Der Herste...

Page 22: ...de descarga ni haga ning n ajuste Aseg rese de que la tracci n no est funcionando al arrancar m Trabaje s lo de dia o con una buena luz artificial n NO CORRA con el cortac sped No trabaje ni con pris...

Page 23: ...anteniendo fuera el manillar Este conjunto se colocar en la parte de atr s del manillar poniendo la red en la parte superior del recogedor La zona de pl stico sin agujeros sera la parte de abajo 2 Ase...

Page 24: ...la barra Parada del motor El motor y la hoia se paran librando la manija de freno ATENCION La cuchilla gira como m ximo durante 3 segundos despues de parar el motor 5 REGULACION DE LA ALTURA DE CORTE...

Page 25: ...d 8 Para asegurarse que no haya da os en el aparato deben utilizarse los repuestos recomendados por el fabricante 7 INSPECCION Y MANTENIMINETO ATENCION Pare el motor y desconecte la bujia antes de rep...

Page 26: ...un lugar seco y aislado del fr o excesivo 9 GARANTIA HARRY a trav s de su red de distribuidores dar a todos sus clientes un servicio eficiente a sus cortac spedes HARRY reparara sin cargo al primer c...

Page 27: ...lleen maar bij daglicht of goed kunstlicht maaien n Nooit rennen maar voetstaps lopen Niet angstig zijn tijdens het werken en de machine onder controle houden o De maaier enkel gebruiken als deze in g...

Page 28: ...blokkeren Montage van de grasvangzak De deflector aan het onderste gedeelte van de opening van het vangzakframe vastmaken met behulp van de vier schroeven borgringen en moeren vervolgens de twee meta...

Page 29: ...s hoog en dik is of op een minimum als het kort is Duw de grasmaaier vooruit met de juiste snelheid om het gras perfect geknipt te houden Op de gemotoriseerde modellen om de motorkracht over te brenge...

Page 30: ...ET OP Denk eraan de grasmaaier uit te schakelen en de kabel van de bougie te verwijderen voor u met het onderhoud begint DE CONTROLE EN HET SLIJPEN VAN DE MESSEN De motor stopzetten en de kabel van de...

Page 31: ...aier in een droge en beschermde hoek zetten 9 GARANTIECONDITIES De HARRY gazonmaaiers hebben 12 maand garantie De garantie wordt niet erkent indien de gebreken voortkomen uit normale slijtage ongevall...

Page 32: ...Produced in Italy by HARRY S p A Via Leonardo da Vinci 81 85 CASSANO D ADDA MI Italy Tel 0363 64888 Fax 0363 65510...

Reviews: