background image

7 – English

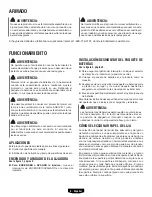
OPERATION

MAINTENANCE

WARNING:

To ensure proper brake operation after extended use, 
periodically check its operation by removing the sanding 
disc, running your sander without load (off the workpiece) 
and then turning the sander off. The backing pad should 
not take longer than 6 seconds to stop.  If it takes longer 
than 6 seconds to stop, return the sander to your nearest 
Authorized Service Center for repair. Failure to do so may 

result in minor injury.

NOTICE:

To  avoid  damaging  the  motor  from  overheating,  be 
careful not to let your hand cover the air vents.

  Turn on the sander and move it slowly over the workpiece.


NOTE:

 The speed of orbit observed during use is de

-

signed to give optimum results, and is not an indicator 
of the tool’s actual sanding performance.

  Make  successive  passes  in  parallel  lines,  circles,  or 

crosswise movements.

  Turn the sander off and wait until it comes to a complete 

stop before removing it from the workpiece.

Do not force.

  The  weight  of  the  unit  supplies  adequate 

pressure, so let the sanding disc and sander do the work. 
Applying additional pressure slows the motor, rapidly wears 
the sanding disc, and greatly reduces sander speed. Exces

-

sive  pressure  will  overload  the  motor,  causing  possible 
damage from motor overheating, and can result in inferior 
work. Any finish or resin on wood may soften from the fric

-

tional heat. Do not allow sanding on one spot too long, as 
the sander’s rapid action may remove too much material, 
making the surface uneven. 
Extended  periods  of  sanding  may  tend  to  overheat  the 

motor. If this occurs, turn sander off and wait until sanding 

disc comes to a complete stop, then remove it from work

-

piece. Remove the hand from vent area, remove sanding 
disc, then with the hand removed from vent area, turn sander 

on and run it free without a load to cool the motor.

 WARNING:

When  servicing,  use  only  identical  replacement  parts. 

Use of any other part could create a hazard or cause 

product damage.

GENERAL MAINTENANCE

Avoid  using  solvents  when  cleaning  plastic  parts.  Most 
plastics are susceptible to damage from various types of 
commercial solvents and can be damaged by their use. Use 
clean cloths to remove dirt, dust, oil, grease, etc.

NOTE: ILLUSTRATIONS START ON PAGE 9 

AFTER FRENCH AND SPANISH LANGUAGE SECTIONS.

Summary of Contents for HPSD01

Page 1: ...Funcionamiento 6 8 Mantenimiento 8 Illustraciones 9 Pedidos de piezas y servicio Pág posterior THIS INSTRUCTION BOOKLET CONTAINS IMPORTANT SAFETY INFORMATION PLEASE READ AND KEEP FOR FUTURE REFERENCE WARNING To reduce the risk of injury the user must read and understand the operator s manual before using this product CE LIVRET D INSTRUCTIONS CONTIENT DES CONSIGNES DE SÉCURITÉ IMPORTANTES VEUILLEZ ...

Page 2: ... mask non skid safety shoes hard hat or hearing protection used for appropriate conditions will reduce personal injuries Prevent unintentional starting Ensure the switch is in theoff positionbeforeconnectingtopowersourceand or battery pack picking up or carrying the tool Carrying power tools with your finger on the switch or energizing power tools that have the switch on invites accidents Remove a...

Page 3: ...s Keep cutting tools sharp and clean Properly maintained cutting tools with sharp cutting edges are less likely to bind and are easier to control Use the power tool accessories and tool bits etc in accordance with these instructions taking into account the working conditions and the work to be performed Use of the power tool for operations different from those intended could result in a hazardous ...

Page 4: ... eye protection with side shields marked to comply with ANSI Z87 1 Wet Conditions Alert Do not expose to rain or use in damp locations Recycle Symbol This product uses lithium ion Li ion batteries Local state or federal laws may prohibit disposal of batteries in ordinary trash Consult your local waste authority for information regarding available recycling and or disposal options V Volts Voltage m...

Page 5: ...ding steel surfaces TURNING THE SANDER ON OFF See Figure 1 page 9 To turn the sander ON or OFF push the ON OFF switch in the direction shown INSTALLING REMOVING BATTERY PACK See Figure 2 page 9 Make sure the switch is in the OFF position Insert the battery pack into the battery port as shown Make sure the latch on the battery pack snaps into place and the battery pack is secured in the product bef...

Page 6: ...is no more than half full This will permit the air to flow through the bag better Always empty and clean the dust bag thor oughly upon completion of a sanding operation and before placing the sander in storage OPERATION WARNING Collected sanding dust from sanding surface coatings such as polyurethanes linseed oil etc can self ignite in the sander dust bag or elsewhere and cause fire To reduce the ...

Page 7: ...isc and sander do the work Applying additional pressure slows the motor rapidly wears the sanding disc and greatly reduces sander speed Exces sive pressure will overload the motor causing possible damage from motor overheating and can result in inferior work Any finish or resin on wood may soften from the fric tional heat Do not allow sanding on one spot too long as the sander s rapid action may r...

Page 8: ...chargeur outils piles appareil n 995000850 SÉCURITÉ PERSONNELLE Rester attentif prêter attention au travail et faire preuve de bon sens lors de l utilisation de tout outil électrique Ne pas utiliser cet outil en état de fatigue ou sous l influence de l alcool de drogues ou de médicaments Un moment d inattention pendant l utilisation d un outil électrique peut entraîner des blessures graves Utilise...

Page 9: ... causer des irritations ou des brûlures Ne pas utiliser un bloc piles ou un outil endommagé ou modifié Les piles endommagées ou modifiées peuvent produire un comportement imprévisible pouvant provoquer un incendie une explosion ou des blessures Ne pas exposer le bloc piles ou l outil près d un incendie ou à une température extrême L exposition à un incendie ou à une température supérieure à 130 C ...

Page 10: ...GER Indique une situation dangereuse qui si elle n est pas évitée aura pour conséquences des blessures graves ou mortelles AVERTISSEMENT Indique une situation dangereuse qui si elle n est pas évitée pourrait entraîner des blessures graves ou mortelles ATTENTION Indique une situation dangereuse qui si elle n est pas évitée pourraît entraîner des blessures légères ou de gravité modérée AVIS Sans sym...

Page 11: ... du bois Élimination de la rouille et ponçage de l acier MISE EN MARCHE ARRÊT DE LA PONCEUSE Voir la figure 1 page 9 n Pour allumer ou éteindre la ponceuse Pousser l interrupteur de marche arrêt dans la direction illustrée INSTALLATION RETRAIT DU BLOC PILES Voir le figure 2 page 9 Verrouiller la gâchette en mettant le sélecteur de sens de rotation en position centrale Insérer la pile dans l outil ...

Page 12: ... poussière avant qu il soit à moitié plein Ceci permettra à l air de mieux passer au travers du sac Toujours vider et nettoyer soigneusement le sac après avoir terminé un travail de ponçage et avant de remiser la ponceuse AVERTISSEMENT La poussière produite lors du ponçage de revêtements de surface tels que le polyuréthane l huile de lin etc peut s enflammer spontanément à l intérieur ou à l extér...

Page 13: ...brasive et l outil effectuer le travail Une pression supplémentaire ne fait que ralentir le moteur user rapidement la feuille abrasive et réduire considérablement la vitesse du ponçage Une pression excessive surcharge le moteur qui risque d être endommagé par une surchauffe et nuit à la qualité des résultats Tout revêtement ou toute résine se trouvant sur le bois peut fondre sous la chaleur créée ...

Page 14: ...nicamente con la baterías y el cargadors indicados en el folleto de la herramienta aparato paquete de baterías cargador complementario 995000850 SEGURIDAD PERSONAL Permanezca alerta preste atención a lo que esté haciendo y aplique el sentido común al utilizar herramientas eléctricas No utilice la herramienta eléctrica si está cansado o se encuentra bajo los efectos de alguna droga alcohol o medica...

Page 15: ...gnificar un riesgo de incendio si se emplea con un paquete de baterías diferente Utilice las herramientas eléctricas sólo con los paquetes de baterías específicamente indicados El empleo de paquetes de baterías diferentes puede presentar un riesgo de incendio Cuando no esté utilizándose el paquete de baterías manténgalo lejos de otros objetos metálicos como clips monedas llaves clavos tornillos o ...

Page 16: ...lor De esta manera se reduce el riesgo de explosiones y de lesiones ADVERTENCIAS DE SEGURIDAD PARA LIJADORA No aplaste deje caer o dañe de baterías Nunca utilice una batería o cargador que se ha caído aplastado recibido un golpe contundente o ha sido dañado a de alguna manera Las baterías dañadas pueden sufrir explosiones Deseche de inmediato toda batería que haya sufrido una caída o cualquier dañ...

Page 17: ... mejor y de manera más segura el producto SÍMBOLO NOMBRE DENOMINACIÓN EXPLICACIÓN Alerta de seguridad Indica un peligro posible de lesiones personales Lea el manual del operador Para reducir el riesgo de lesiones el usuario debe leer y comprender el manual del operador antes de usar este producto Protección ocular Siempre póngase protección ocular con protección lateral con la marca de cumplimient...

Page 18: ... el manual del operador que se incluye con el cargador y la batería ADVERTENCIA Las herramientas de baterías siempre están en condiciones de funcionamiento Por lo tanto siempre debe estar en la posición de apagado el interruptor cuando no esté usándose la unidad o el operador la lleve por un lado CÓMO SELECCIONAR PAPEL DE LIJA La selección del papel de lija del tipo adecuado y del grano de tamaño ...

Page 19: ...ienta y lesiones corporales serias PARA INSTALAR EL CONJUNTO DEL SACO CAPTAPOLVO Vea la figura 4 página 9 Retire el paquete de baterías Con un movimiento de deslizamiento y un giro leve monte el conjunto del saco captapolvo en el escape de polva de la lijadora PARA VACIAR EL CONJUNTO DEL SACO CAPTAPOLVO Vea la figura 5 página 9 Para lograr un desempeño más eficiente de la unidad vacíe el saco capt...

Page 20: ...esiones menores AVISO Para evitar dañar el motor por recalentamiento tenga cuidado de no cubrir con la mano las aberturas de ventilación Encienda la lijadora y muévala lentamente por la pieza de trabajo NOTA La velocidad de órbita que observa durante el uso está diseñada para brindar resultados óptimos y no es un indicador del rendimiento real de lijado de la herramienta Realice pasadas sucesivas ...

Page 21: ...A To turn off pour arrêter para apagar la unidad B To turn on pour mettre en marche para encender la unidad A A A B B C A A Hook and loop sanding disc disque abrasif à boucles et crochets disco de lija de gancho y lazada B Backing pad coussinet almohadilla de respaldo B C B A A A Dust exhaust sortie de poussière escape de polvo B Dust bag assembly ensemble de sac à poussière conjunto del saco capt...

Page 22: ...NOTES NOTAS ...

Page 23: ...NOTES NOTAS ...

Page 24: ...el de service veuiller transmettre le numéro de modèle et de série situés sur la plaquette de données du produit Enregistrer le produit https HARTtools com register Les détails de la garantie sont disponibles sur www HARTtools com Une preuve d achat est requise pour valider la garantie limitée de 3 ans HART le logo HART et le logo H sont des marques de Techtronic Cordless GP www HARTtools com 1 80...

Reviews: