Instructions for use
Installation
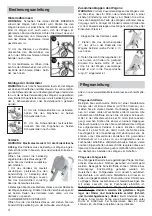
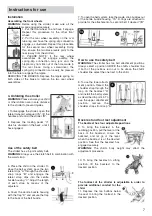
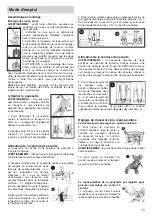
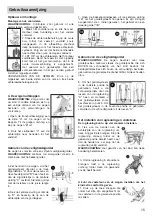
Assembling the front wheels
WARNING:
Before using the stroller, make sure all the
wheel systems are engaged securely.
1. Put the front wheel on and have it engage.
Repeat this procedure for the other front
wheel.
2. Put the rear wheel assembly on the oval
tube leg and have the spring-clip connection
engage, as illustrated. Repeat this procedure
for the second rear wheel assembly. Doing
this, ensure the two brake levers point to the
rear (away from the stroller).
3. PLEASE
NOTE: If
the
rear
wheel
assemblies do not engage audibly, the
spring-clip connection may jam and the
nipple may not stick out of the hole made in
the oval brace. Using a screwdriver, the
spring-clip connection can easily be pressed
into the hole to engage the nipple.
REMOVING THE BRAKES: Depress the nipple spring on
both sides of the brake to remove the two rear wheel
assemblies.
4. Unfolding the stroller
WARNING:
Please ensure your child
or other children are in safe distance
to the stroller to prevent injuries.
I. To disengage the stroller, open the
lateral transport safeguard "A", lift the
handles and unfold the stroller "B".
II. Depress the locking pedal "C",
which is situated on the back, until it
has engaged.
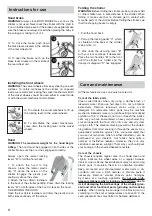
Use of the safety belt
The stroller has a 5-point safety belt.
WARNING:
Always use the crotch belt in combination with
the waist strap.
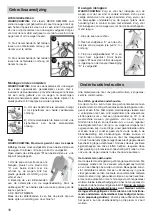
5. Place the child in the stroller. To
close the belt system, pass the two
lateral clips "A” through the shoulder
strap loops "B” and engage the
lateral strap clips into the centre
buckle housing "C". Adjust the length
of each strap by means of the
adjusters.
6. Cover the centre buckle housing
with the flap "D” and secure the flap
to the back of the belt buckle.
How to use the safety belt
WARNING:
The stroller has two belt attachment positions.
Always select a position ABOVE the child's shoulder line.
If both of the positions turn out to be above the child's
shoulder line select the one next to the child.
8. To use the lower attach-
ment position, thread the
shoulder strap through the
loop on the backrest "A”
and install the belt system
as described in point 5. To
use the upper attachment
position,
remove
the
shoulder straps from loop "A".
Back rest and foot rest adjustment
The backrest has four adjustable positions
9. To bring the backrest in the
reclining position, pull the lever at the
back of the backrest. Lower the
backrest, and let go of the lever
when the backrest is at the desired
position. See that the backrest has
engaged securely.
WARNING:
The child's body weight may affect the
adjustment procedure.
10. To bring the backrest in sitting
position, lift the backrest to the
desired position.
The footrest of the stroller is adjustable in order to
provide additional comfort for the
child.
11. Depress the two buttons below
the seat to bring the footrest in the
desired position.
7. To open the belt system, take the waste strap buckles out
of the centre buckle housing "7A”. D-rings are attached to
provide for the attachment of a second belt, if desired "7B".
A A
A
C
A
B
D
7


