①
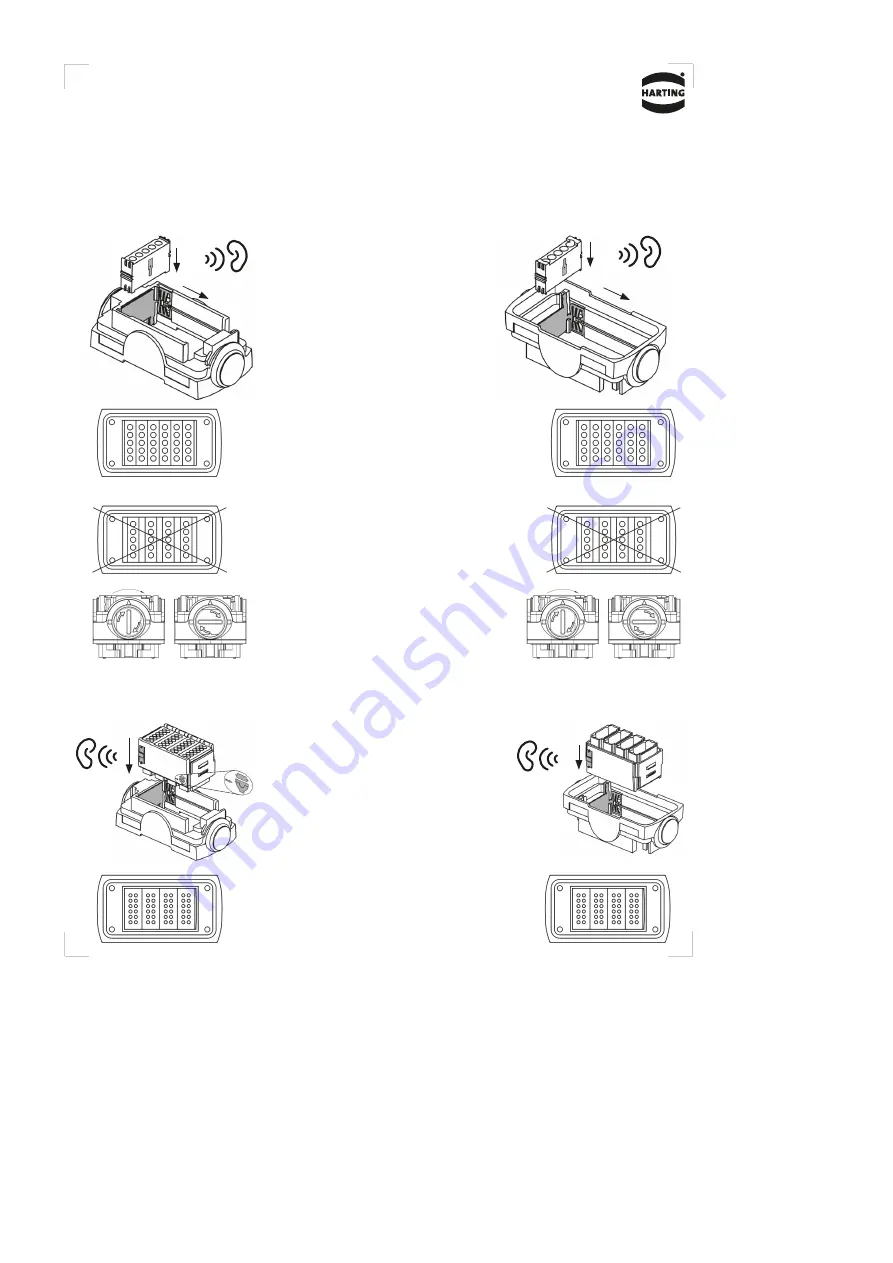
Setzen Sie das Modul in Position
„A“ ein.
▸
Das Modul rastet mit hörbarem
Klicken ein.
/
Insert the module into the „A“
position.
▸
The module snaps into position
with an audible click.
②
Modul an Endposition schieben.
Push the module into its final
position.
①
Beachten Sie die Ausrichtung der
seitlichen Kunststoffnasen!
Diese Kunststoffnasen werden in
die Metallklammer des Gehäuses
gedrückt.
▸
Der Adapterrahmen rastet mit
hörbarem Klicken ein.
/
Note the orientation of the lateral
plastic tabs!
These plastic tabs are pressed
into the metal clamp of the hood/
housin
g.
▸
The Adapter frame snaps into
position with an audible click.
Hinweis:
Die Steckplätze müssen immer
komplett bestückt werden! /
Notice:
The slots must be filled
completely!
Montageanleitung /
Assembly instructions
Han-
Yellock
®
6
0 Trägergehäuse /
Carrier hood
Montage /
Assembly
anschlussseitig /
termination side
Module /
Modules
Adapterrahmen /
Adapter frames
Module /
Modules
Adapterrahmen /
Adapter frames
steckseitig /
mating side
①
②
①
②
①
Blockierfunktion (nur
11 12 600 0110
)
Schlitz senkrecht:
offen
Schlitz waagerecht: verriegelt /
Locking function
(
11 12 600 0110
only
)
slot vertical:
open
slot horizontal:
locked
Bestell-Nummer 11 12 600 0110/9901
Stand: Oktober 2021
MA_Han-Yellock_60_Traegergehaeuse_11_12_600_0110 _9901.indd
11 12 600 01
10/9901
C l
i c
k !
C l i
c k
!
C l i
c k
!
①
C l
i c
k !


