13
6 MC_Rack
In MC_Rack (the rack you use to record and analyze data online and offline) the data files are independent
from each other. You can save and reuse a rack for several experiments and generate separate data files.
You can then load the generated data file with another rack for further offline analysis later.
The main power of MC_Rack is its great flexibility. You can combine various virtual instruments according
to your experimental setup. You can decide about the fate of each single data stream separately. It is up
to you, which data streams are displayed on the screen, which are saved, which are analyzed, and so on.
This concept saves disk space and computer performance and makes handling of up to 256 channels with
up to 50 kHz sampling rate easy. A status bar informs you of the actual performance of your computer
when you record or replay data.
Please note that the high flexibility of MC_Rack can make a complex configuration of the software
necessary please do not be concerned by this. It is easy when you know how.
It is very important to note, that all virtual instruments in your rack work independently from each other.
As a consequence, they have to be configured separately. For example, you have to select the input
streams for each instrument separately.
Generally, you will arrange the virtual instruments in your rack in a hierarchical order. The selected data
streams flow from your MC_Card or from the Replayer (recorded data) into the virtual instrument highest
in the hierarchy. Similar to a production line in a plant, this instrument picks up only those channels from
the data streams that you have assigned to it. It processes this data and produces an output stream that is
lead to the virtual instrument next in the hierarchy, and so on. When you build a rack, make yourself clear,
which data streams flow to which instrument and what output you should expect. If you change the
selection of channels for a virtual instrument, you may have to adjust the selection for instruments that
depend on its output as well. If you have not specified an input for a tool, an error message will inform
you.
6.1 Getting Started
Here you will find a short description of basic tasks and tools that are needed. Go through this chapter
before you start building a rack.
Starting MC_Rack
Double-click the "MC_Rack" icon or select MC_Rack from the "Start" menu.
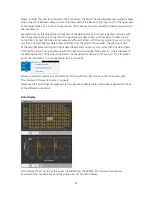
The program starts. One dialog box opens automatically. This is your rack. You will now configure your
rack and implement the features you need to accomplish the task. Your rack is almost empty, it holds only
a "Recorder". In the "Recorder" dialog box, you define the path and the file in which the acquired data
is going to be saved.


